On This Page
Overview
Code Searcher allows you to search for products, diagnoses, and procedures to include in your query or template. Code Searcher is used across all the Compass Products - the following are available for each one:
| Compass Product | Code Types | Search Types |
|---|---|---|
| Patient | Products, Diagnoses, Procedures | Keyword, Exact Match |
| Prescriber | Products | Keyword |
| National | Products | Keyword |
Code Searcher can be accessed in several ways, depending on the Compass Product. For Patient and Prescriber, you can navigate to the Code Searcher by clicking on the Search icon in a criteria box. For Zip, Code Searcher is accessed by clicking on the “Add Products” button within the Products pane. For National, you can search for products directly within the Products view.
Compass Patient Code Searcher supports two search types: Keyword and Exact Match. Keyword search is selected by default and returns results matching any supported field across your search terms. Exact Match allows you to define specific criteria to narrow results to exact attributes. Each Code Searcher - Product, Diagnosis, and Procedure - includes category-specific Exact Match criteria, detailed in their respective sections below. Prescriber, National, and Zip, only support keyword searches.
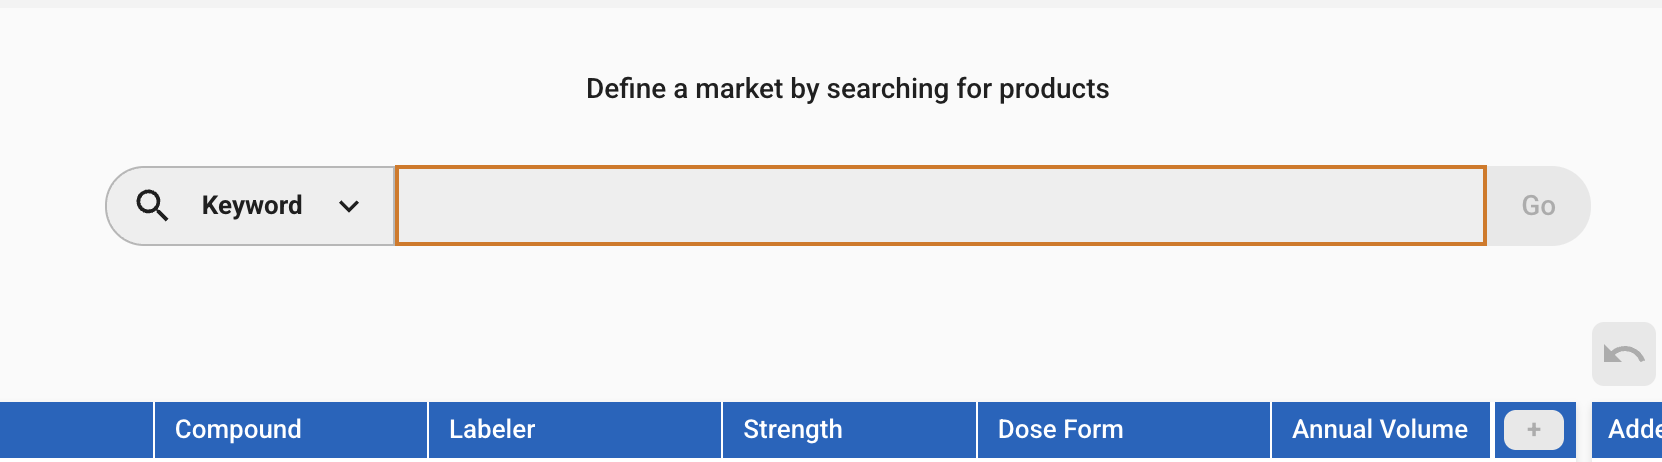
Upon navigating to Code Searcher, click into the search bar to begin a new search. If you have any recent searches, they will appear listed in a dropdown. You may select one of these terms to add it to your current search or type a new term. Note that recent searches are specific to each application and search type. (E.g., a term entered in a Patient product search will only appear as a recent search term in another Patient product search.)
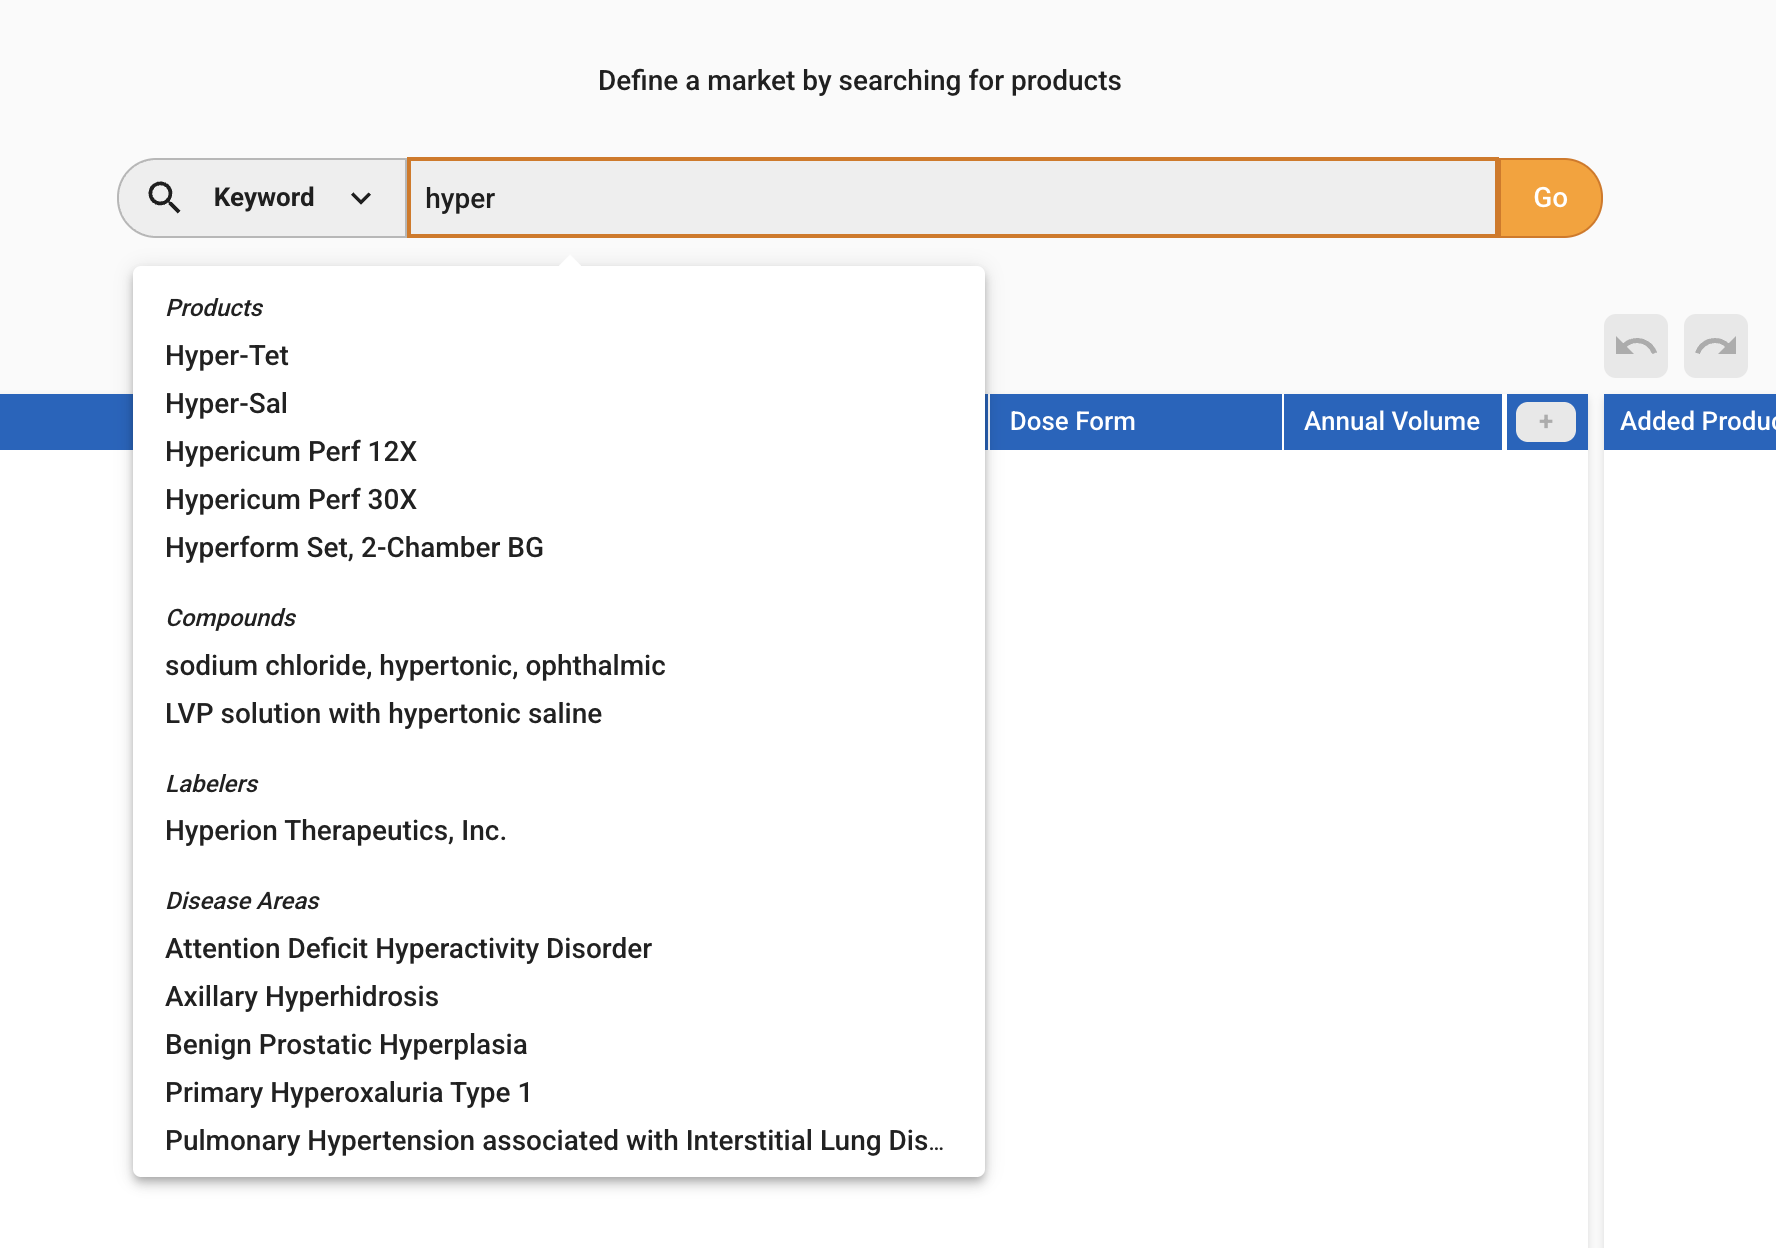
Once you enter at least three characters, the dropdown will refresh to show you related suggestions, organized by category. These suggestions will update automatically as you continue typing. Use your mouse or the arrow keys on your keyboard to select a term to add to your search.
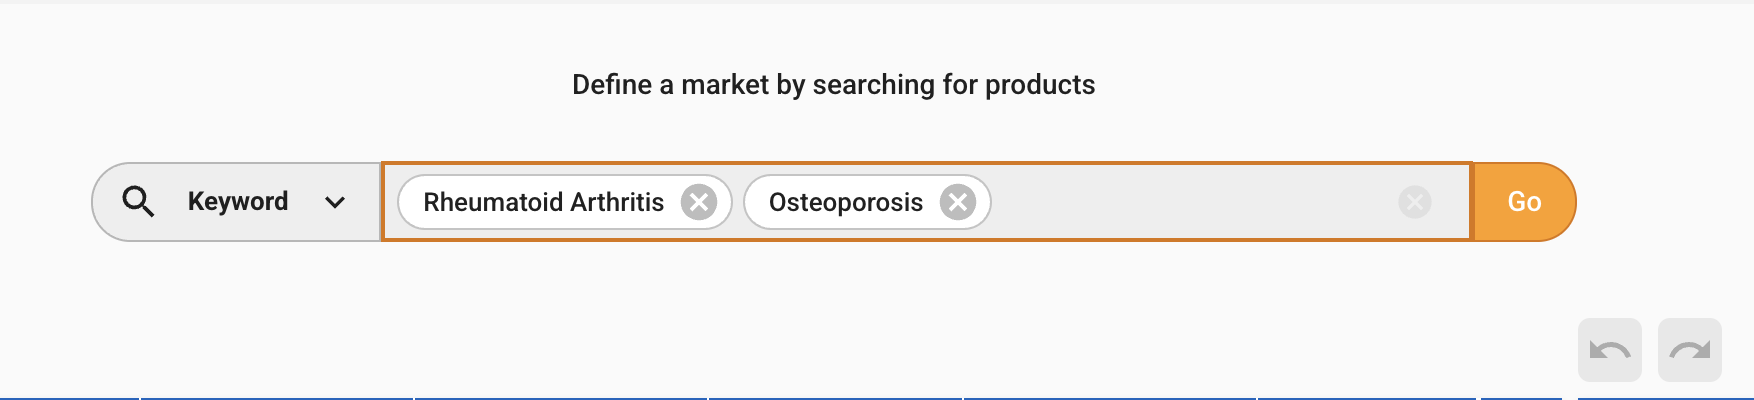
To search for multiple terms, enter your first term and press “tab” or “enter” on your keyboard to encapsulate it. Then, repeat this process for all desired terms. Alternatively, you can copy and paste a list of terms from a spreadsheet or text document. Terms on separate lines will automatically be separated as individual search terms upon pasting.
When you are finished adding terms, click “Go” or hit Enter on your keyboard again to run a search. Note that product search terms must be at least three characters and diagnosis search terms must be at least two characters.
After running a search, any search terms failing to produce results are encapsulated in a red border and are automatically shifted to the front of the search bar.
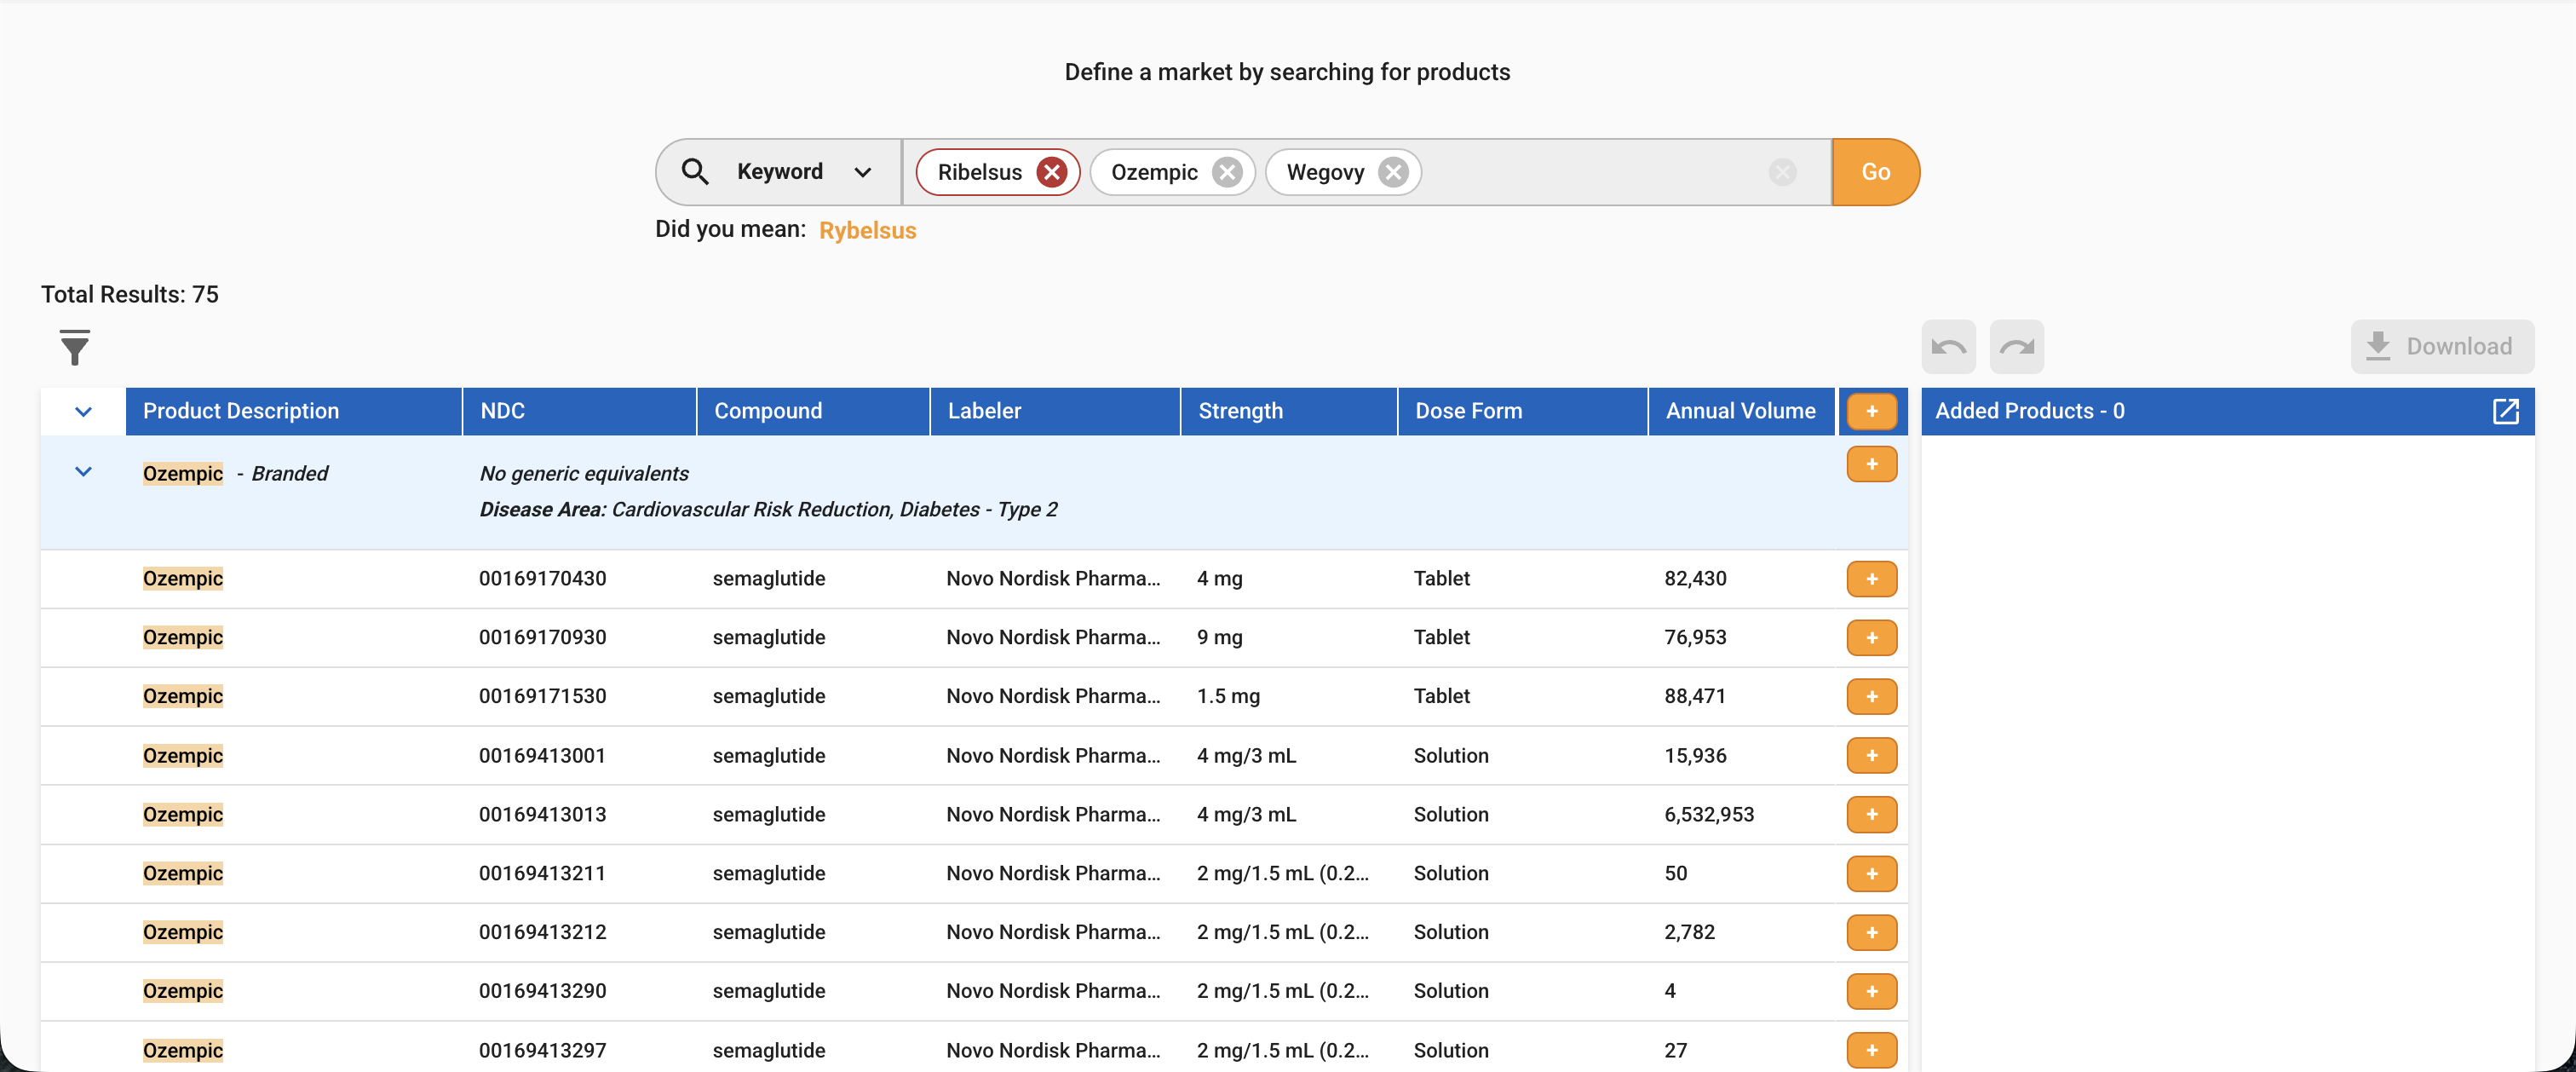
To navigate through search results, use the right scroll bar. Code Searcher results are displayed with infinite scroll, and you will see a loading indicator throughout scrolling while additional results are loaded. To navigate back to the top of search results, click on the “Back to Top” link at the bottom of the Code Searcher.

When performing Keyword searches, you can also collapse/expand product and diagnosis hierarchies within Code Searcher, which allows for faster navigation through product brands and diagnosis hierarchies in the search results. To collapse a single brand or diagnosis hierarchy, click on the arrow icon next to the brand name or top-level diagnosis code.

Click on the arrow again to expand the hierarchy.

To collapse all hierarchies, click on the arrow icon in the upper-left corner of the table header. This will collapse all available brands/diagnoses in the search results; note that there may be a slight delay as more hierarchies are loaded in.
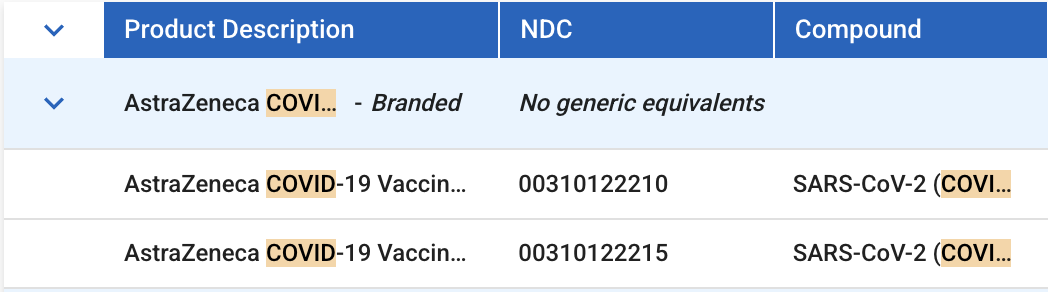
Click on the arrow again to collapse all hierarchies.
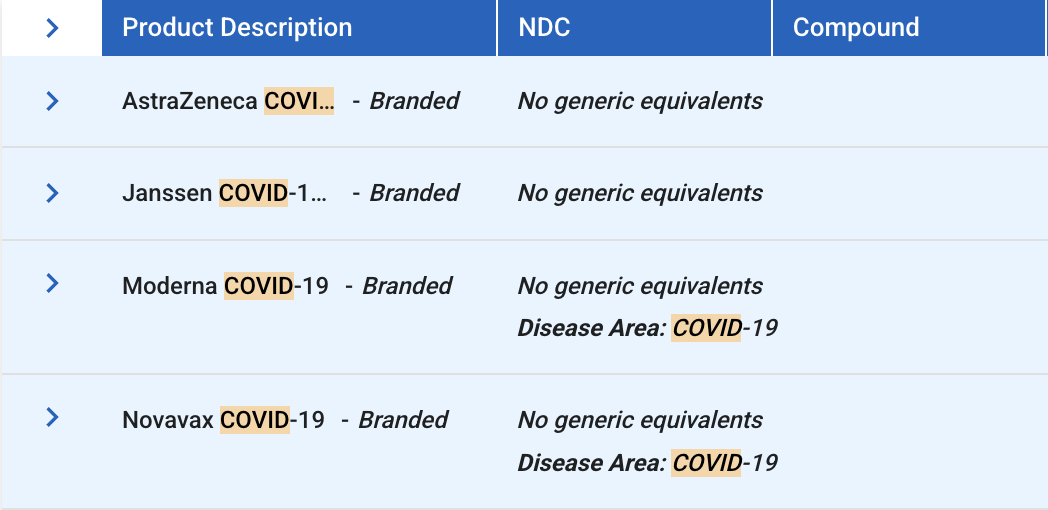
To undo and/or redo actions that you have taken, use the undo and redo buttons at the upper-right of the Code Searcher.

To download a list of added codes in Excel format, click on the Download button above the Added Codes. The file will contain the code type being added.

Products
Product Keyword Searching
When searching for products, the search will locate products that match your search term for the following fields: Product Description, NDC, Product Compound, Company Name, Branded/Generic Equivalents, and Disease Area. You can view Veeva’s Disease Area definitions in the Market Library, as well as in our Data Dictionary.
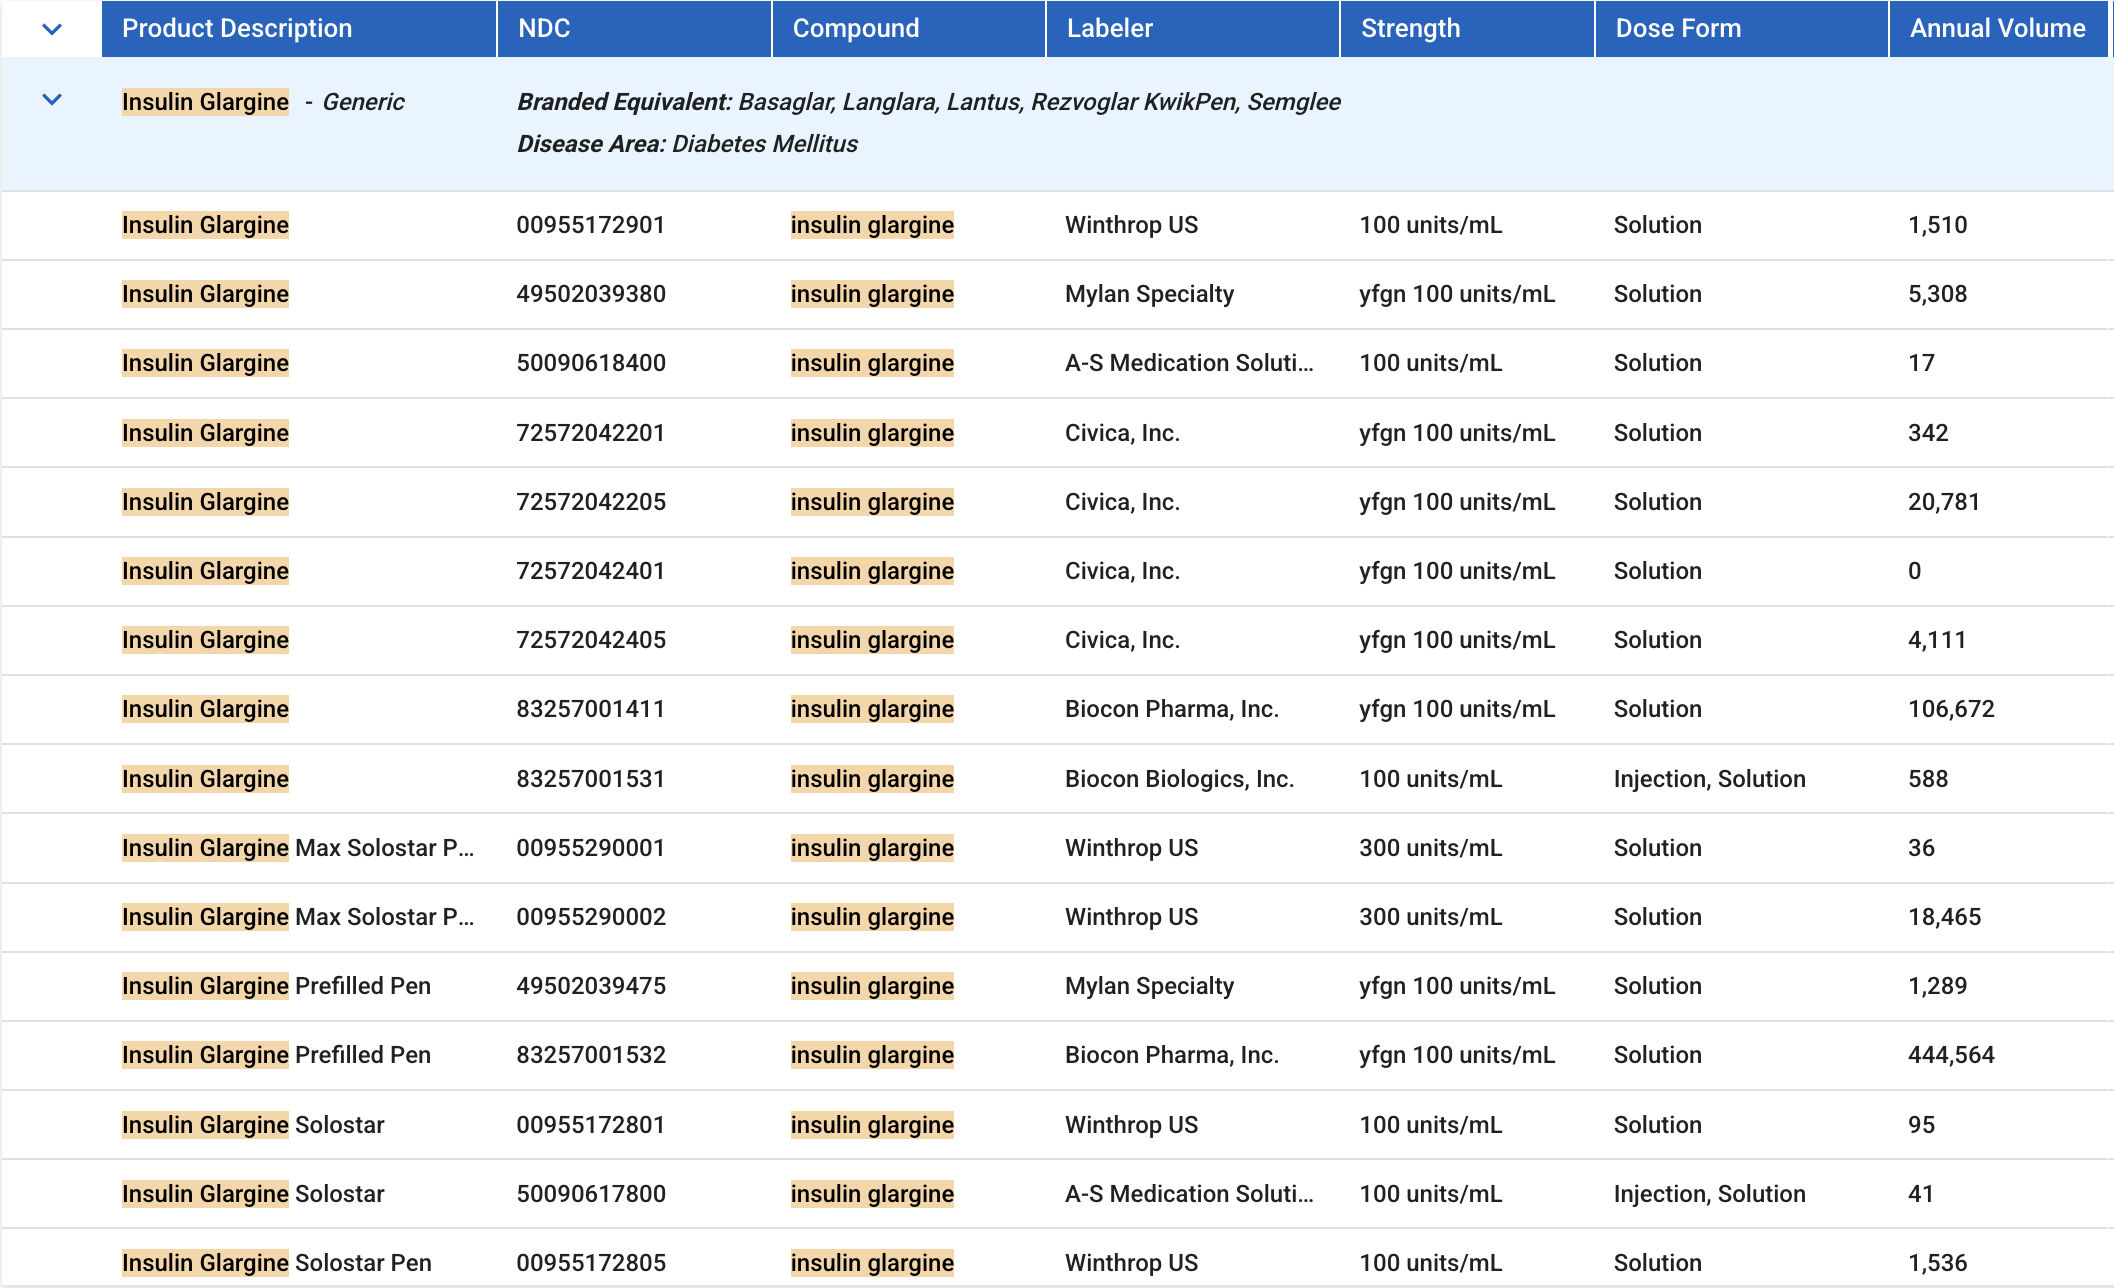
Products are grouped by their brand name (indicated by a shaded header row). In the brand row, you will see whether the products are branded or generic, their corresponding branded and generic equivalents (if applicable), and their associated Disease Areas (if applicable). All products within each brand will be returned upon searching; the most relevant products will be grouped at the top.
The details of each product (Product Description, NDC, Product Compound, Labeler, Strength, Dose Form, Annual Volume) will also be displayed in the Code Searcher. Note that certain types of products will only contain Product Description and NDC. Use the bottom scroll bar to view additional columns.
The filter button allows you to further filter your products by Disease Area, dose form, or product type. The Disease Area filter category will be disabled if none of the returned products have associated Disease Areas. By default, no filters are applied to product searches.

Clicking on a filter category will display a list of available filters, alphabetically sorted A-Z, based on the returned products. Clicking on the checkbox next to the filter will apply that filter to the returned products; the total results count and results table will update in real-time to reflect applied filters.
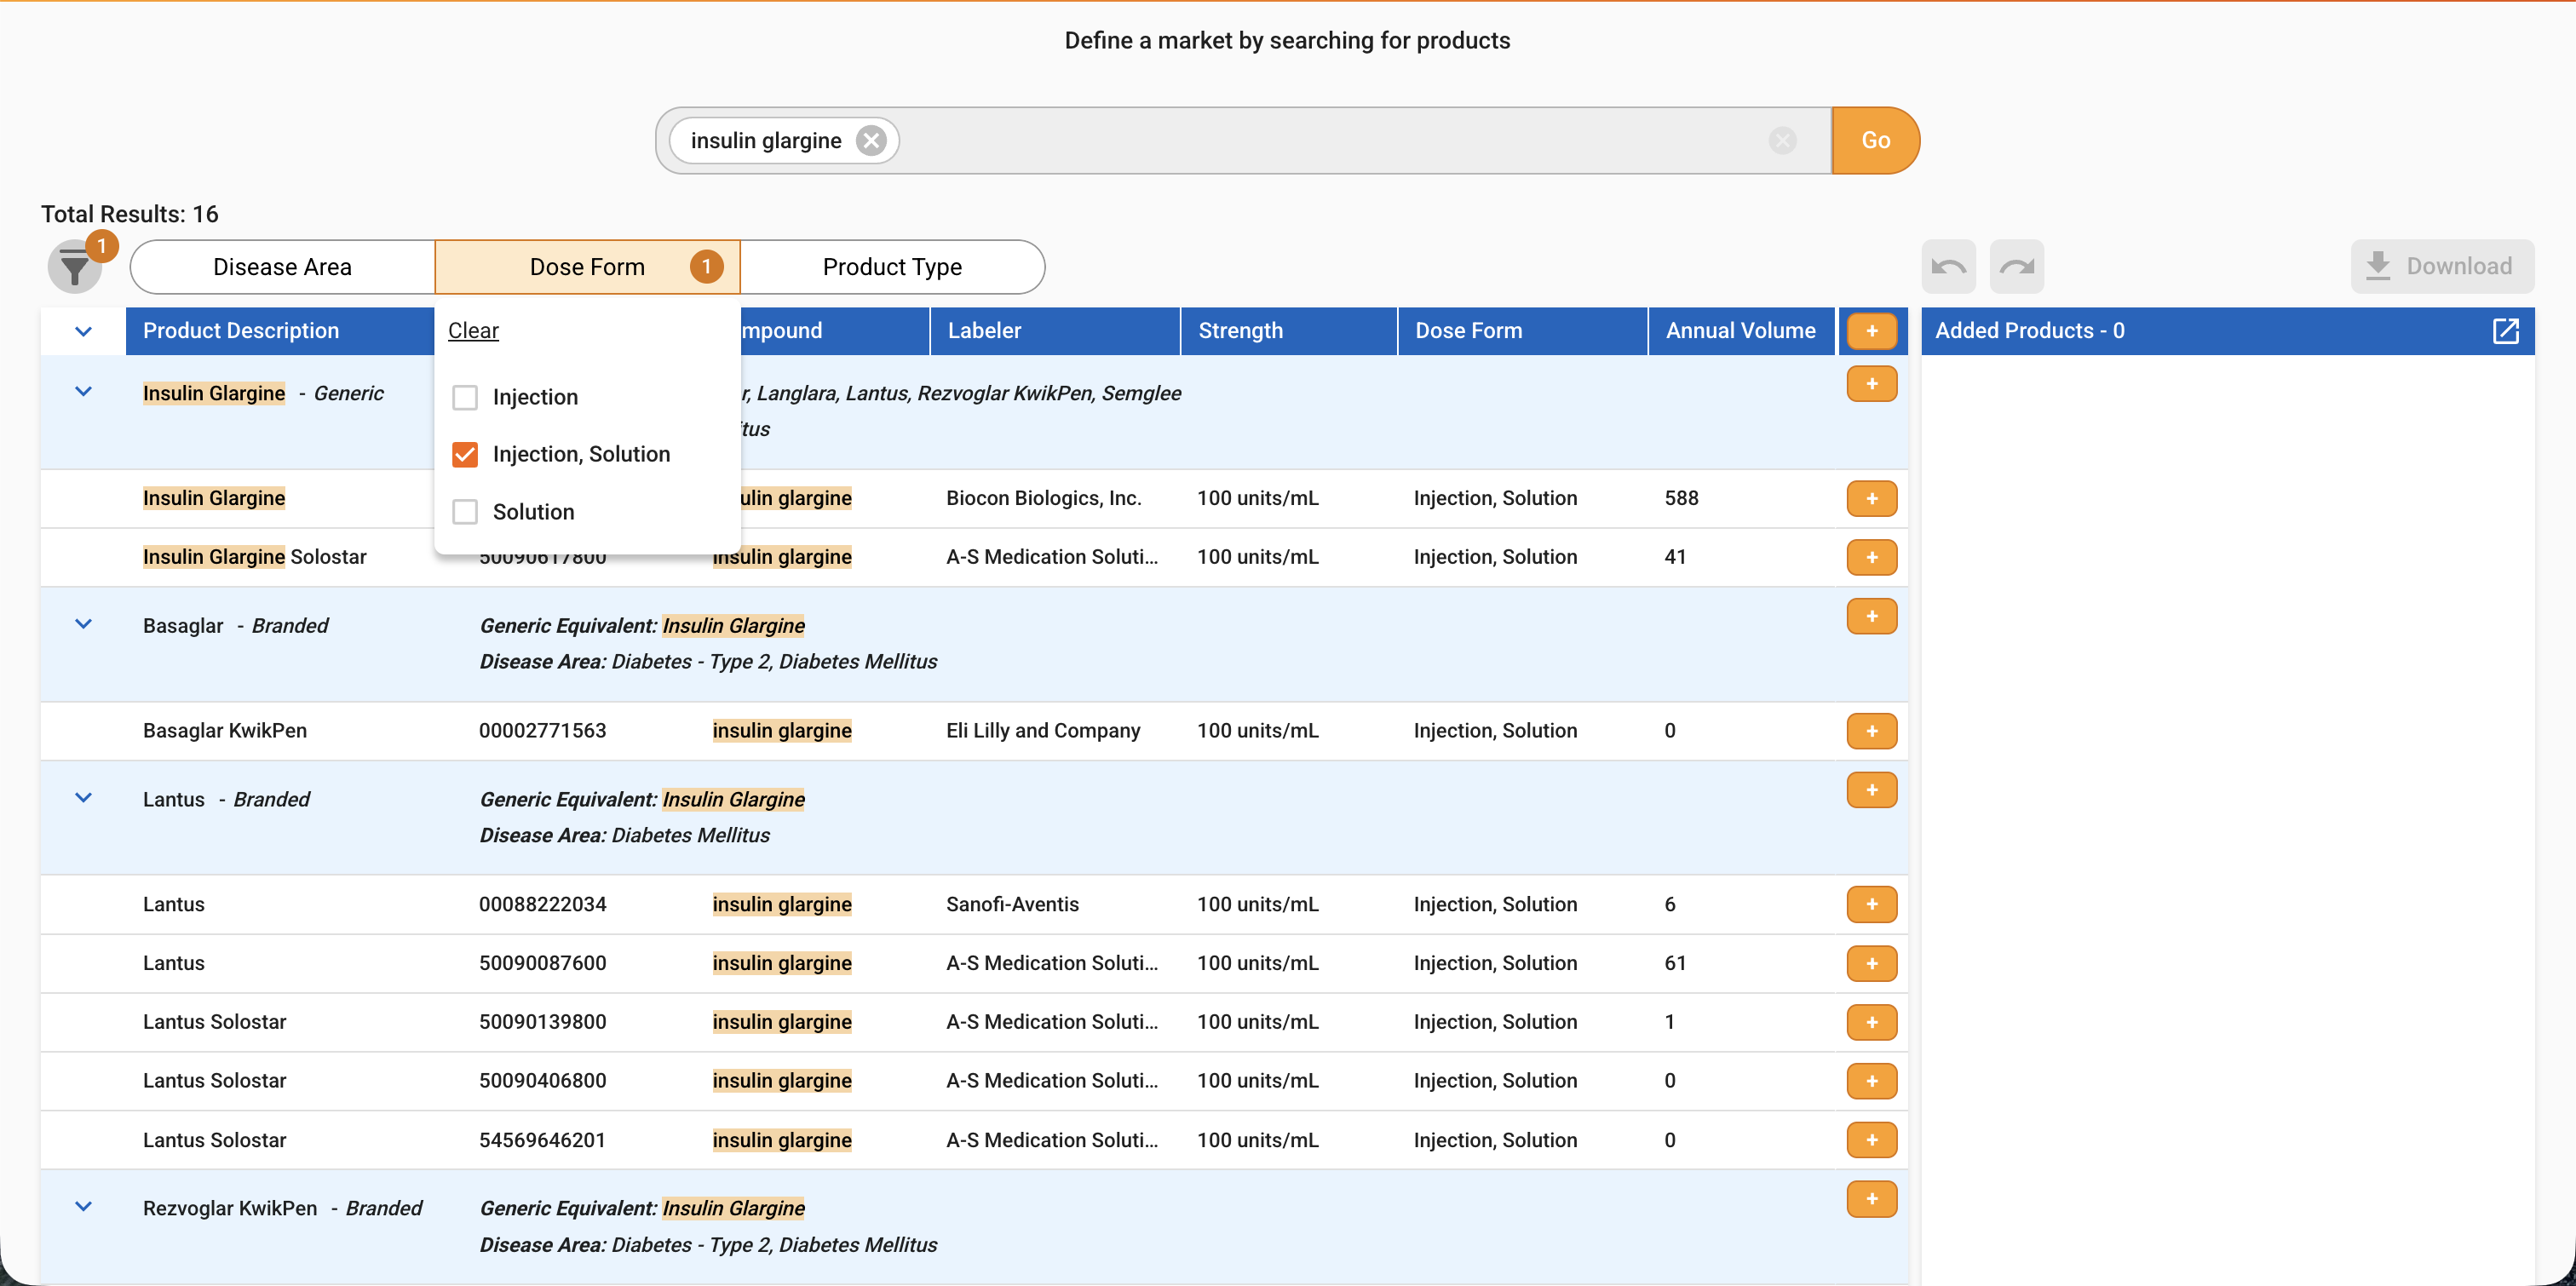
You can apply as many filters as you would like to the returned products. Counts will display in the filter categories, as well as the filter button, so that you can keep track of how many filters have been applied. Counts will continue to display if you choose to collapse the filter categories.
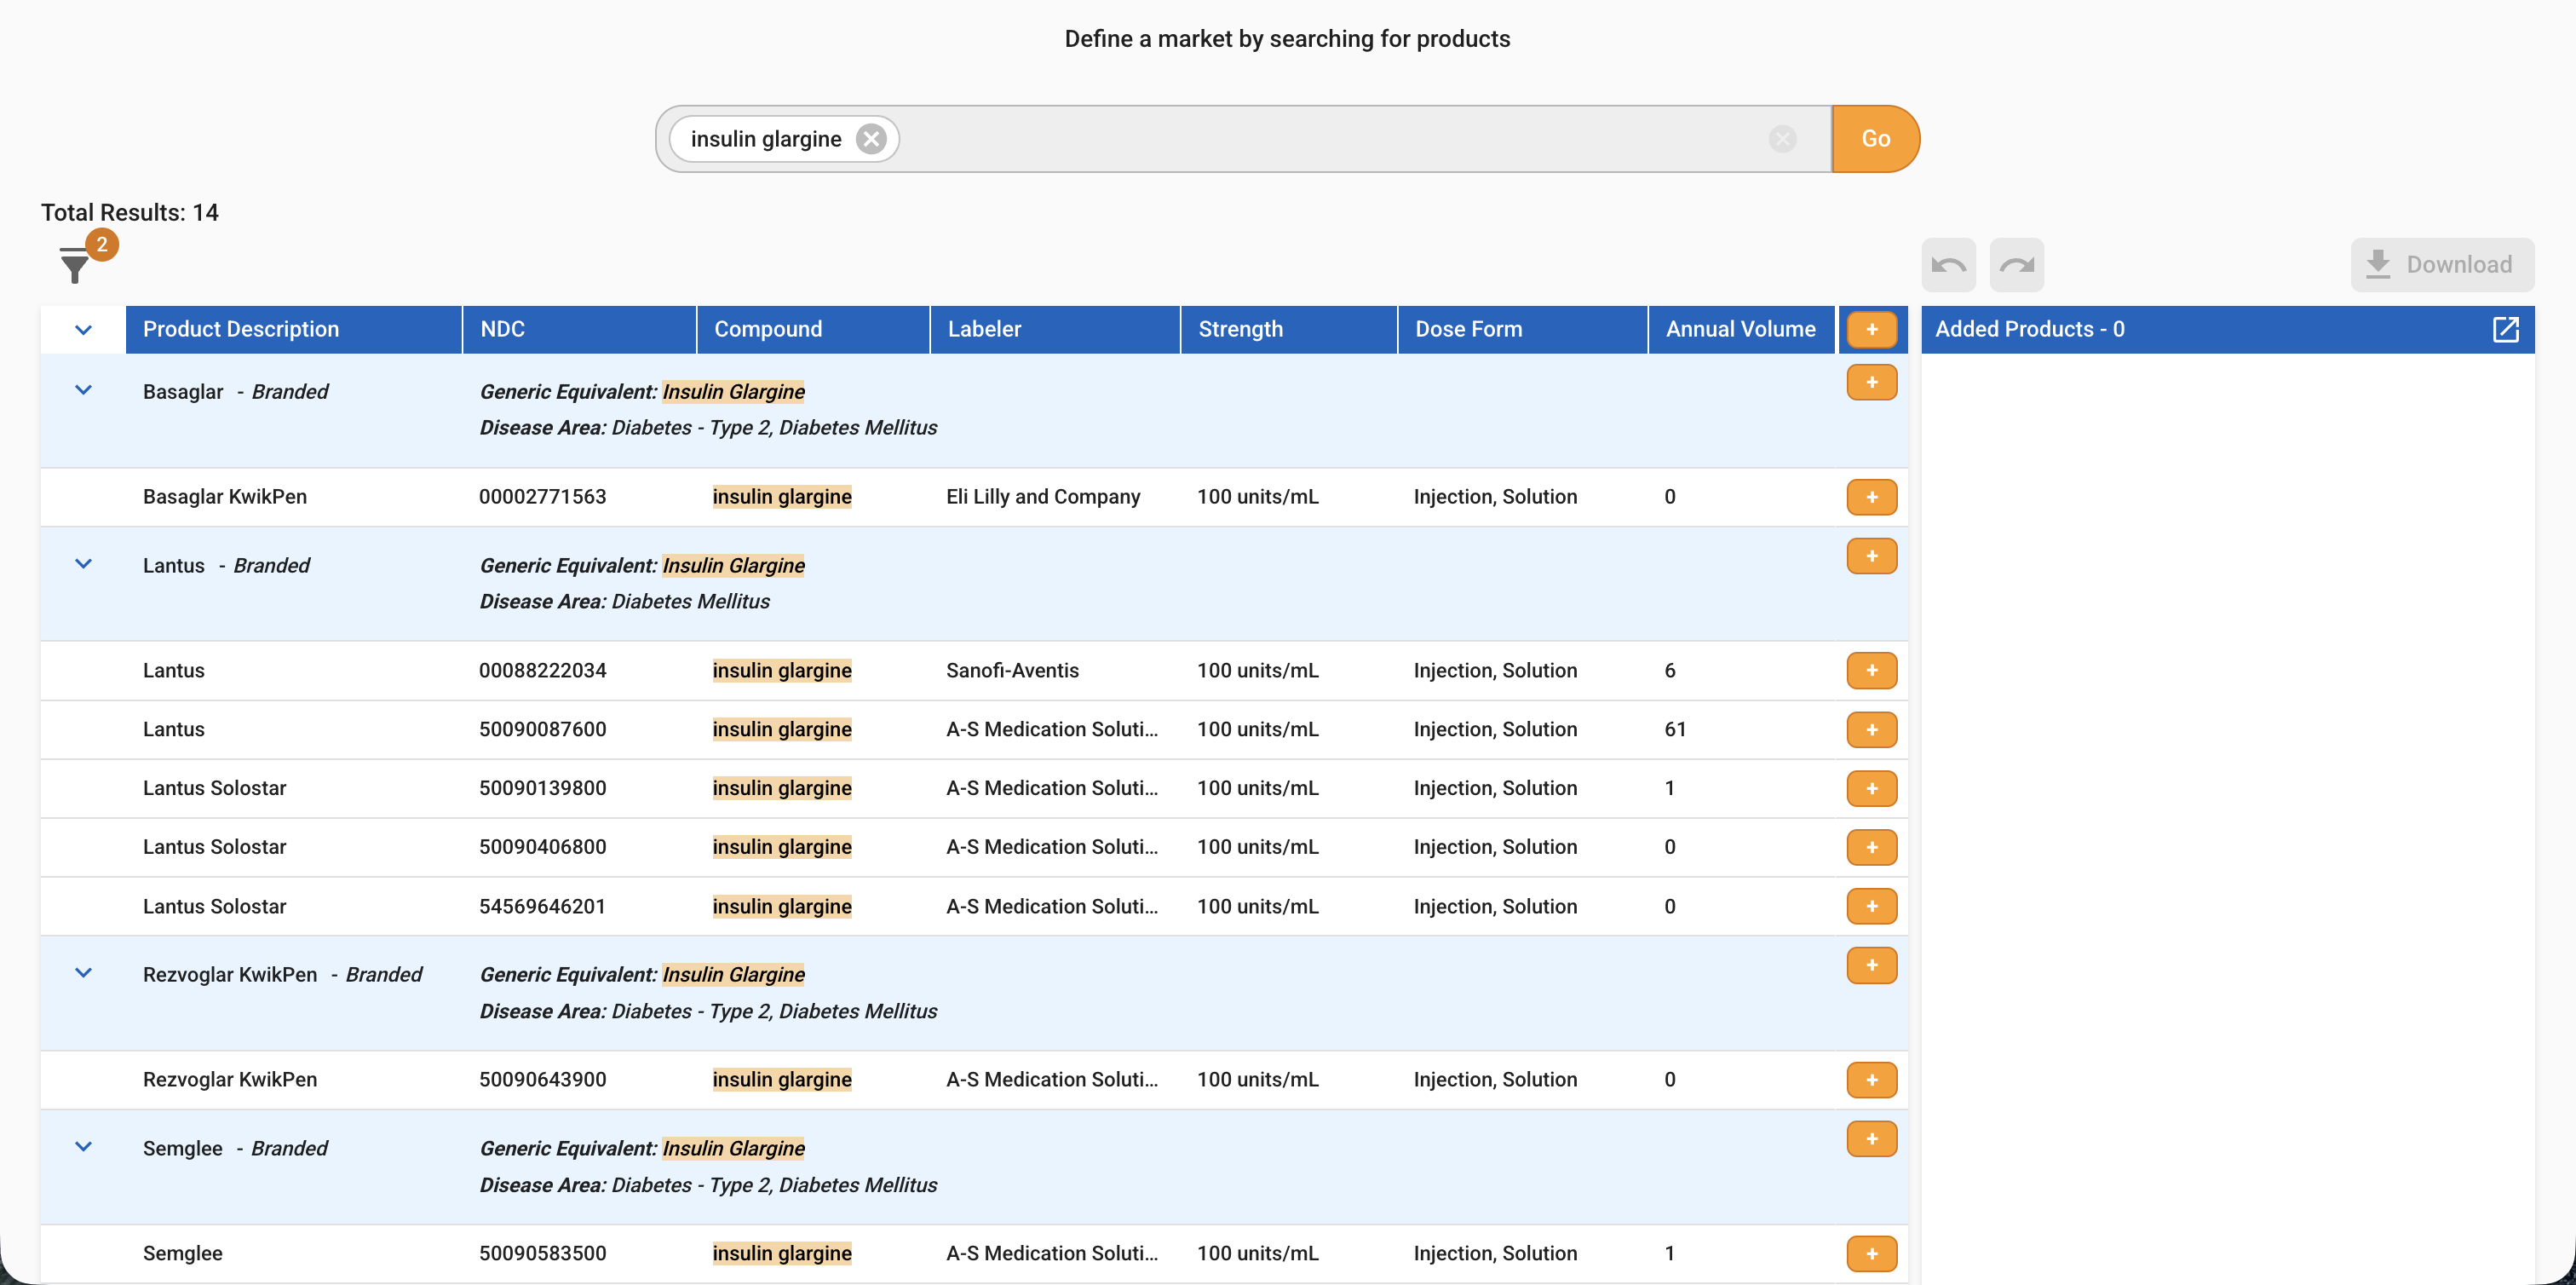
To add a product at a brand-level, click the “+” button on the brand row. This will add all the codes within the brand to the “Added Products” pane on the right. If you have applied filters to the results, clicking the “+” button on the brand row will only add codes that match the applied filters to the “Added Products” pane on the right.
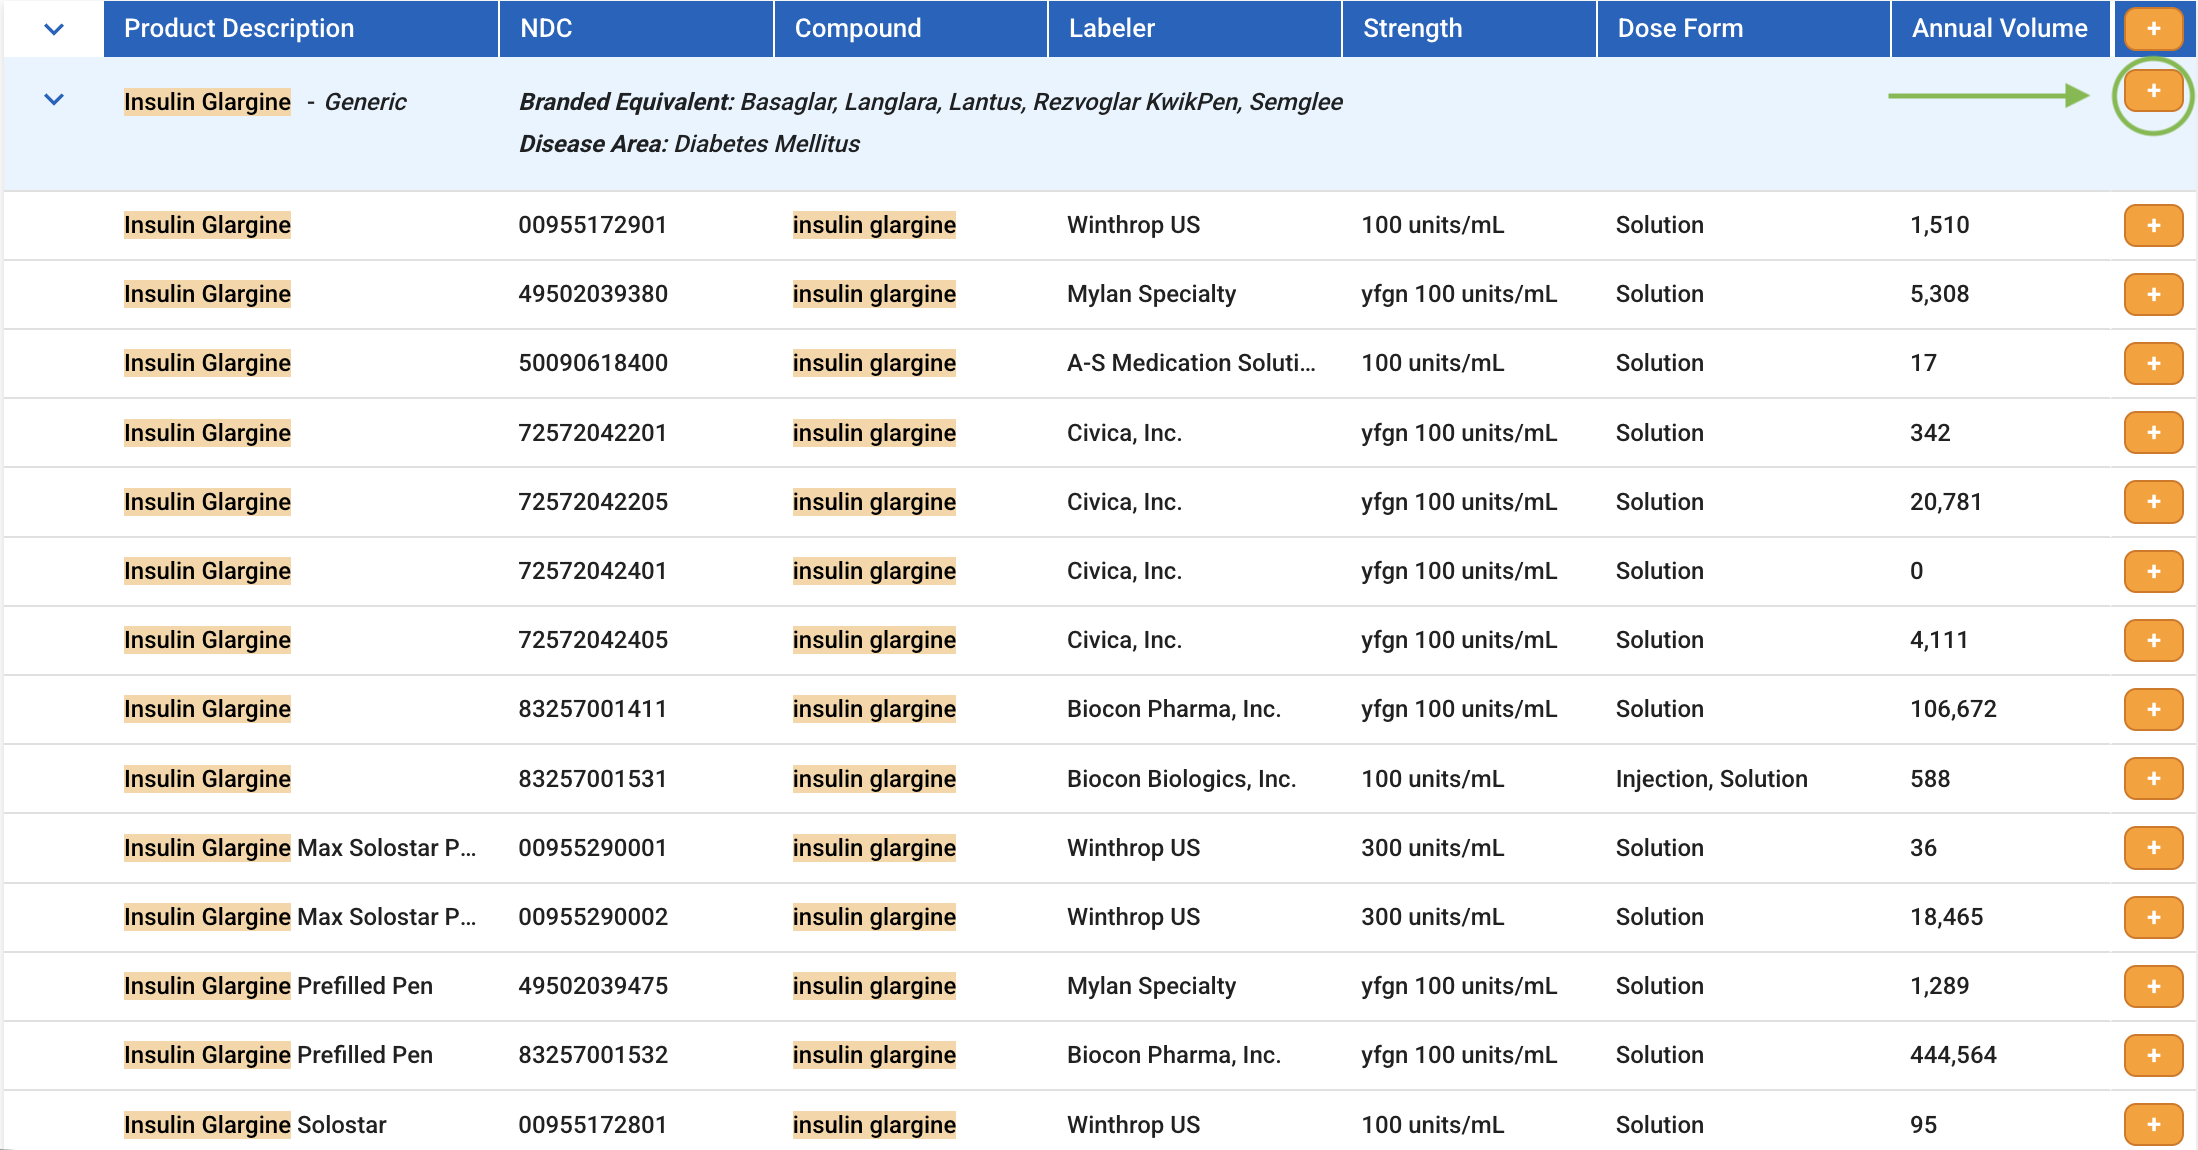
To add a product at an NDC-level, click the “+” button on an individual NDC row. This will add that NDC to the “Added Products” pane on the right. Note that adding products at the NDC-level is only available for Patient. Products are added at the brand-level for Prescriber and National.
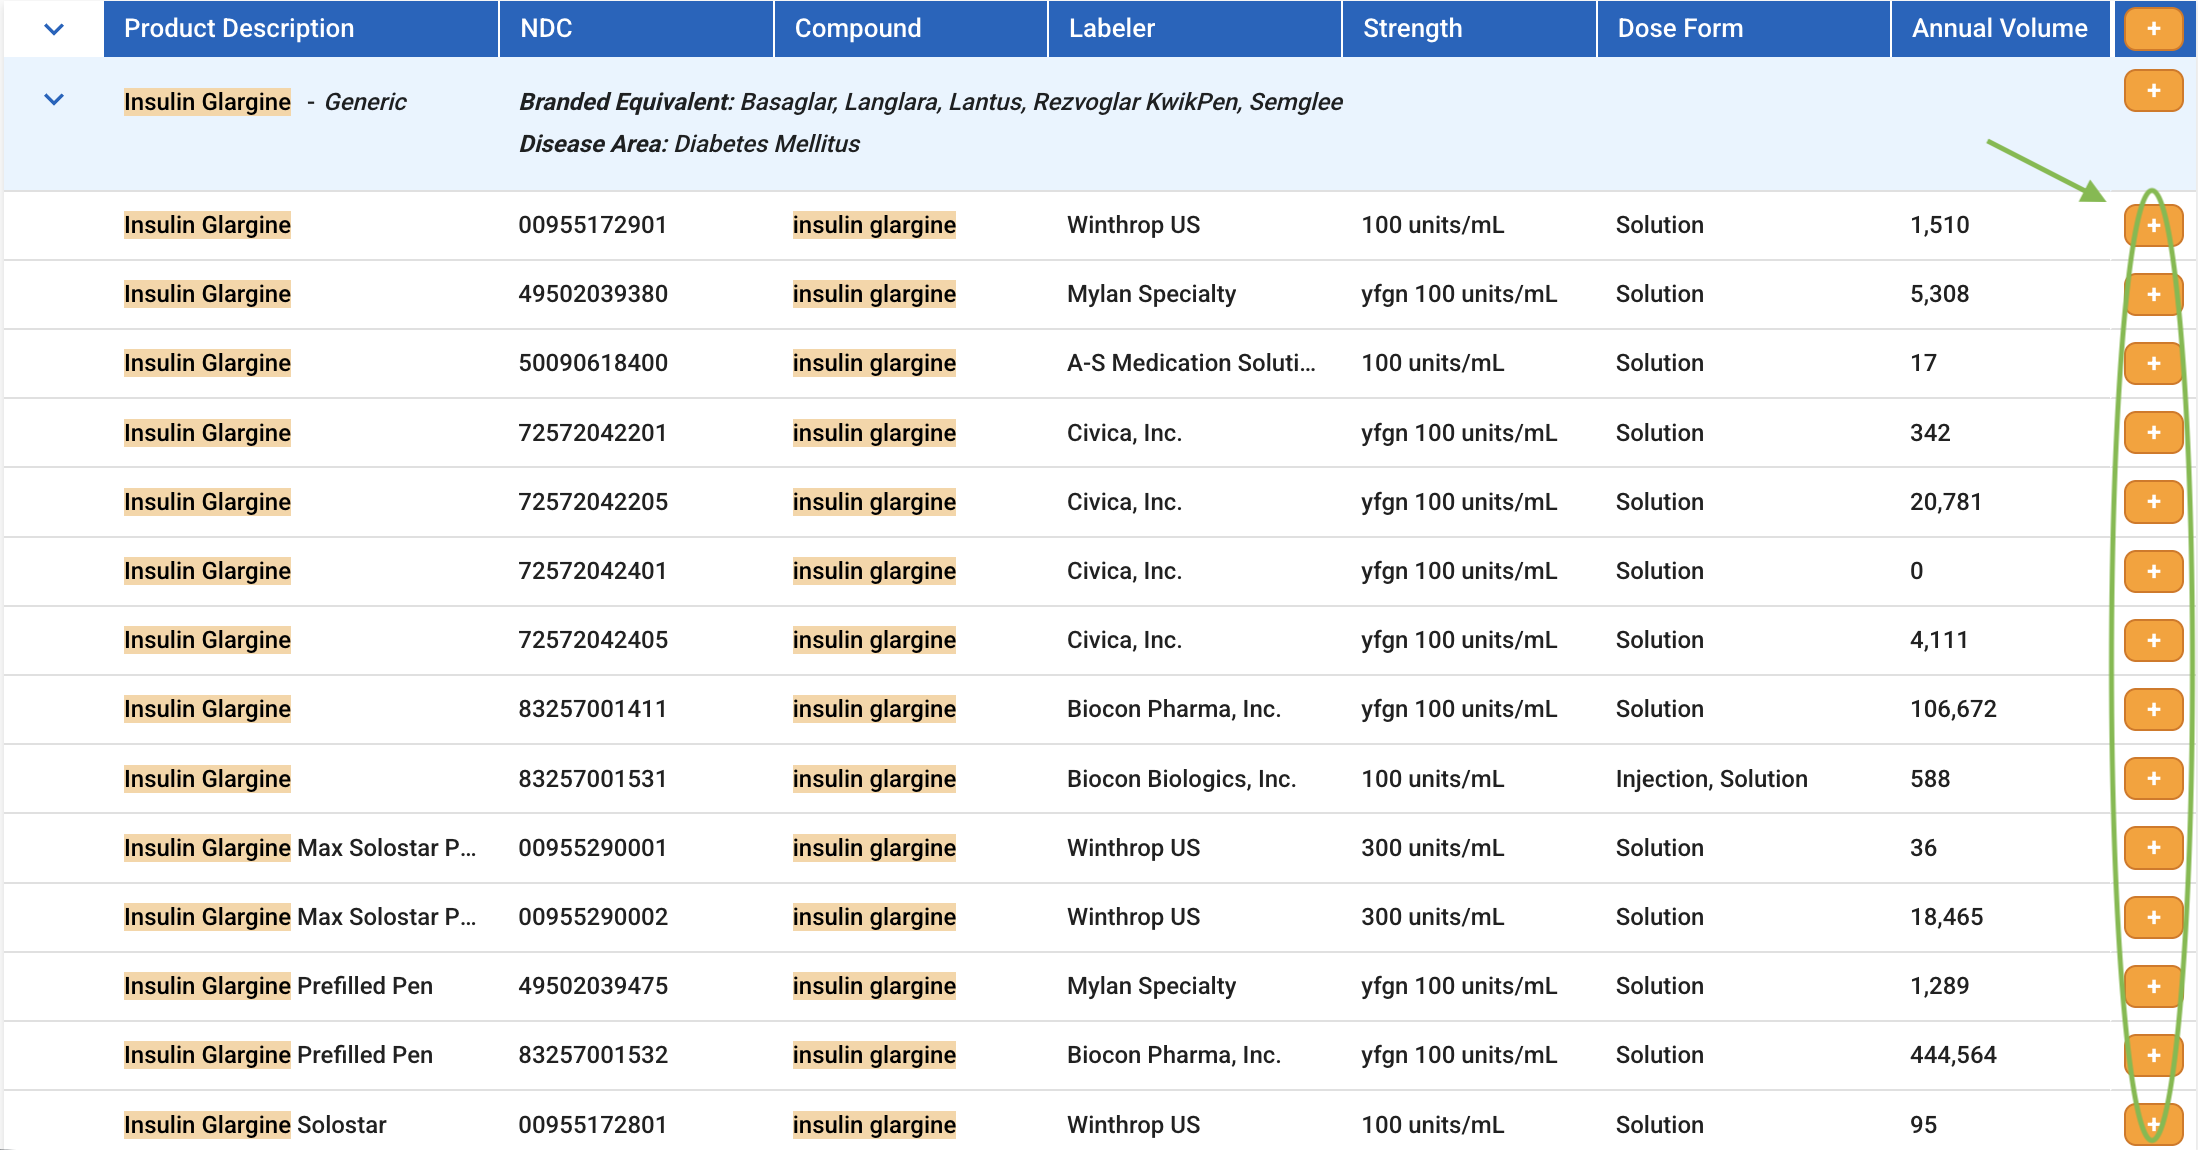
To add all products from your search results, click the add all button “+” at the top of the results list. This will add all Products (Prescriber) or NDCs (Patient) to the “Added Products pane”.
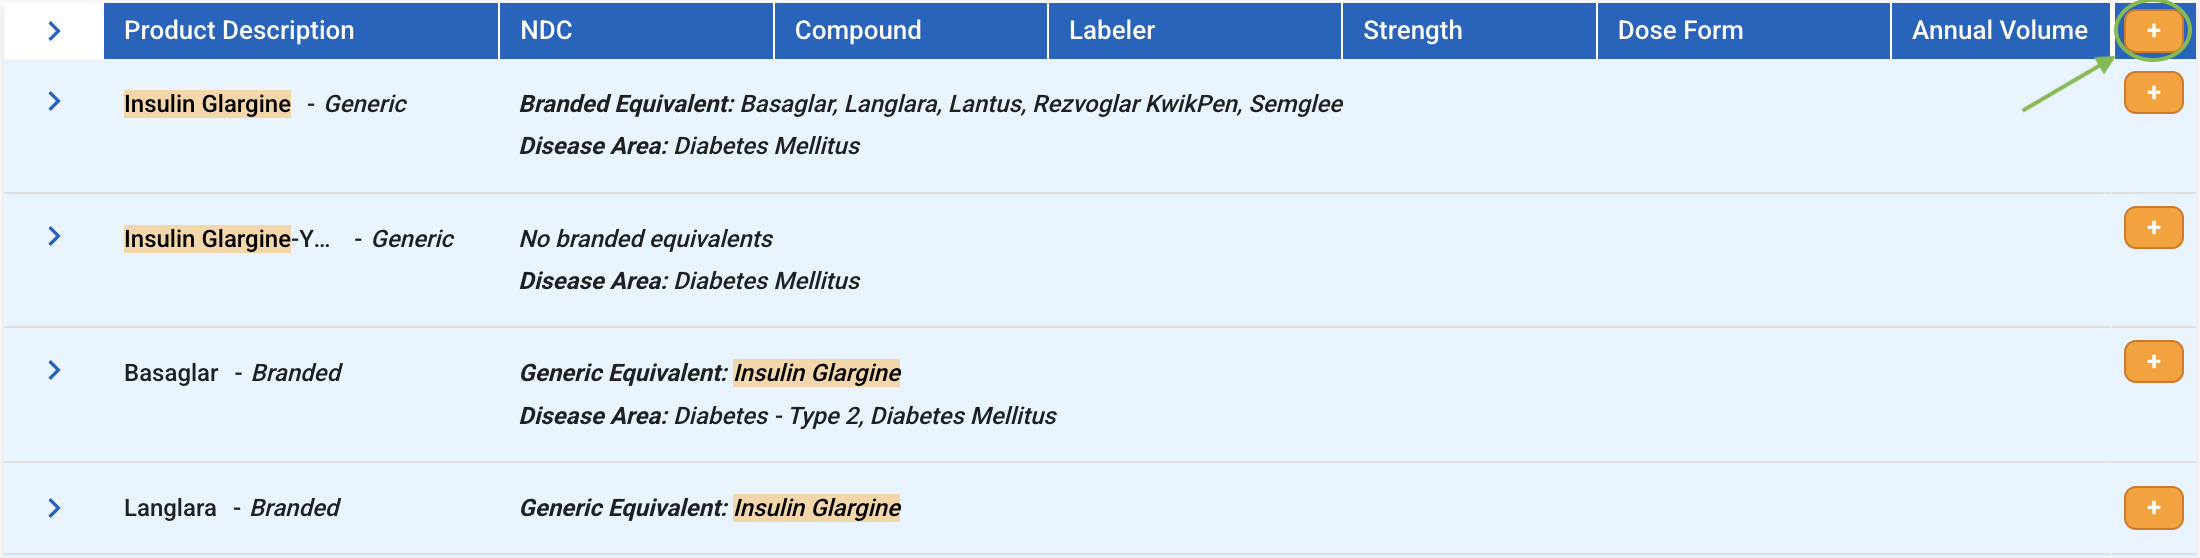
The Added Products pane will display all the products/NDCs that you have added to your qualification criteria. To view the details of your added products (brand name, product compound, labeler, etc.), click on the Expand button in the upper-right corner. From the expanded Added Products pane, you can scroll to view all added products. Click on the Collapse button to close.

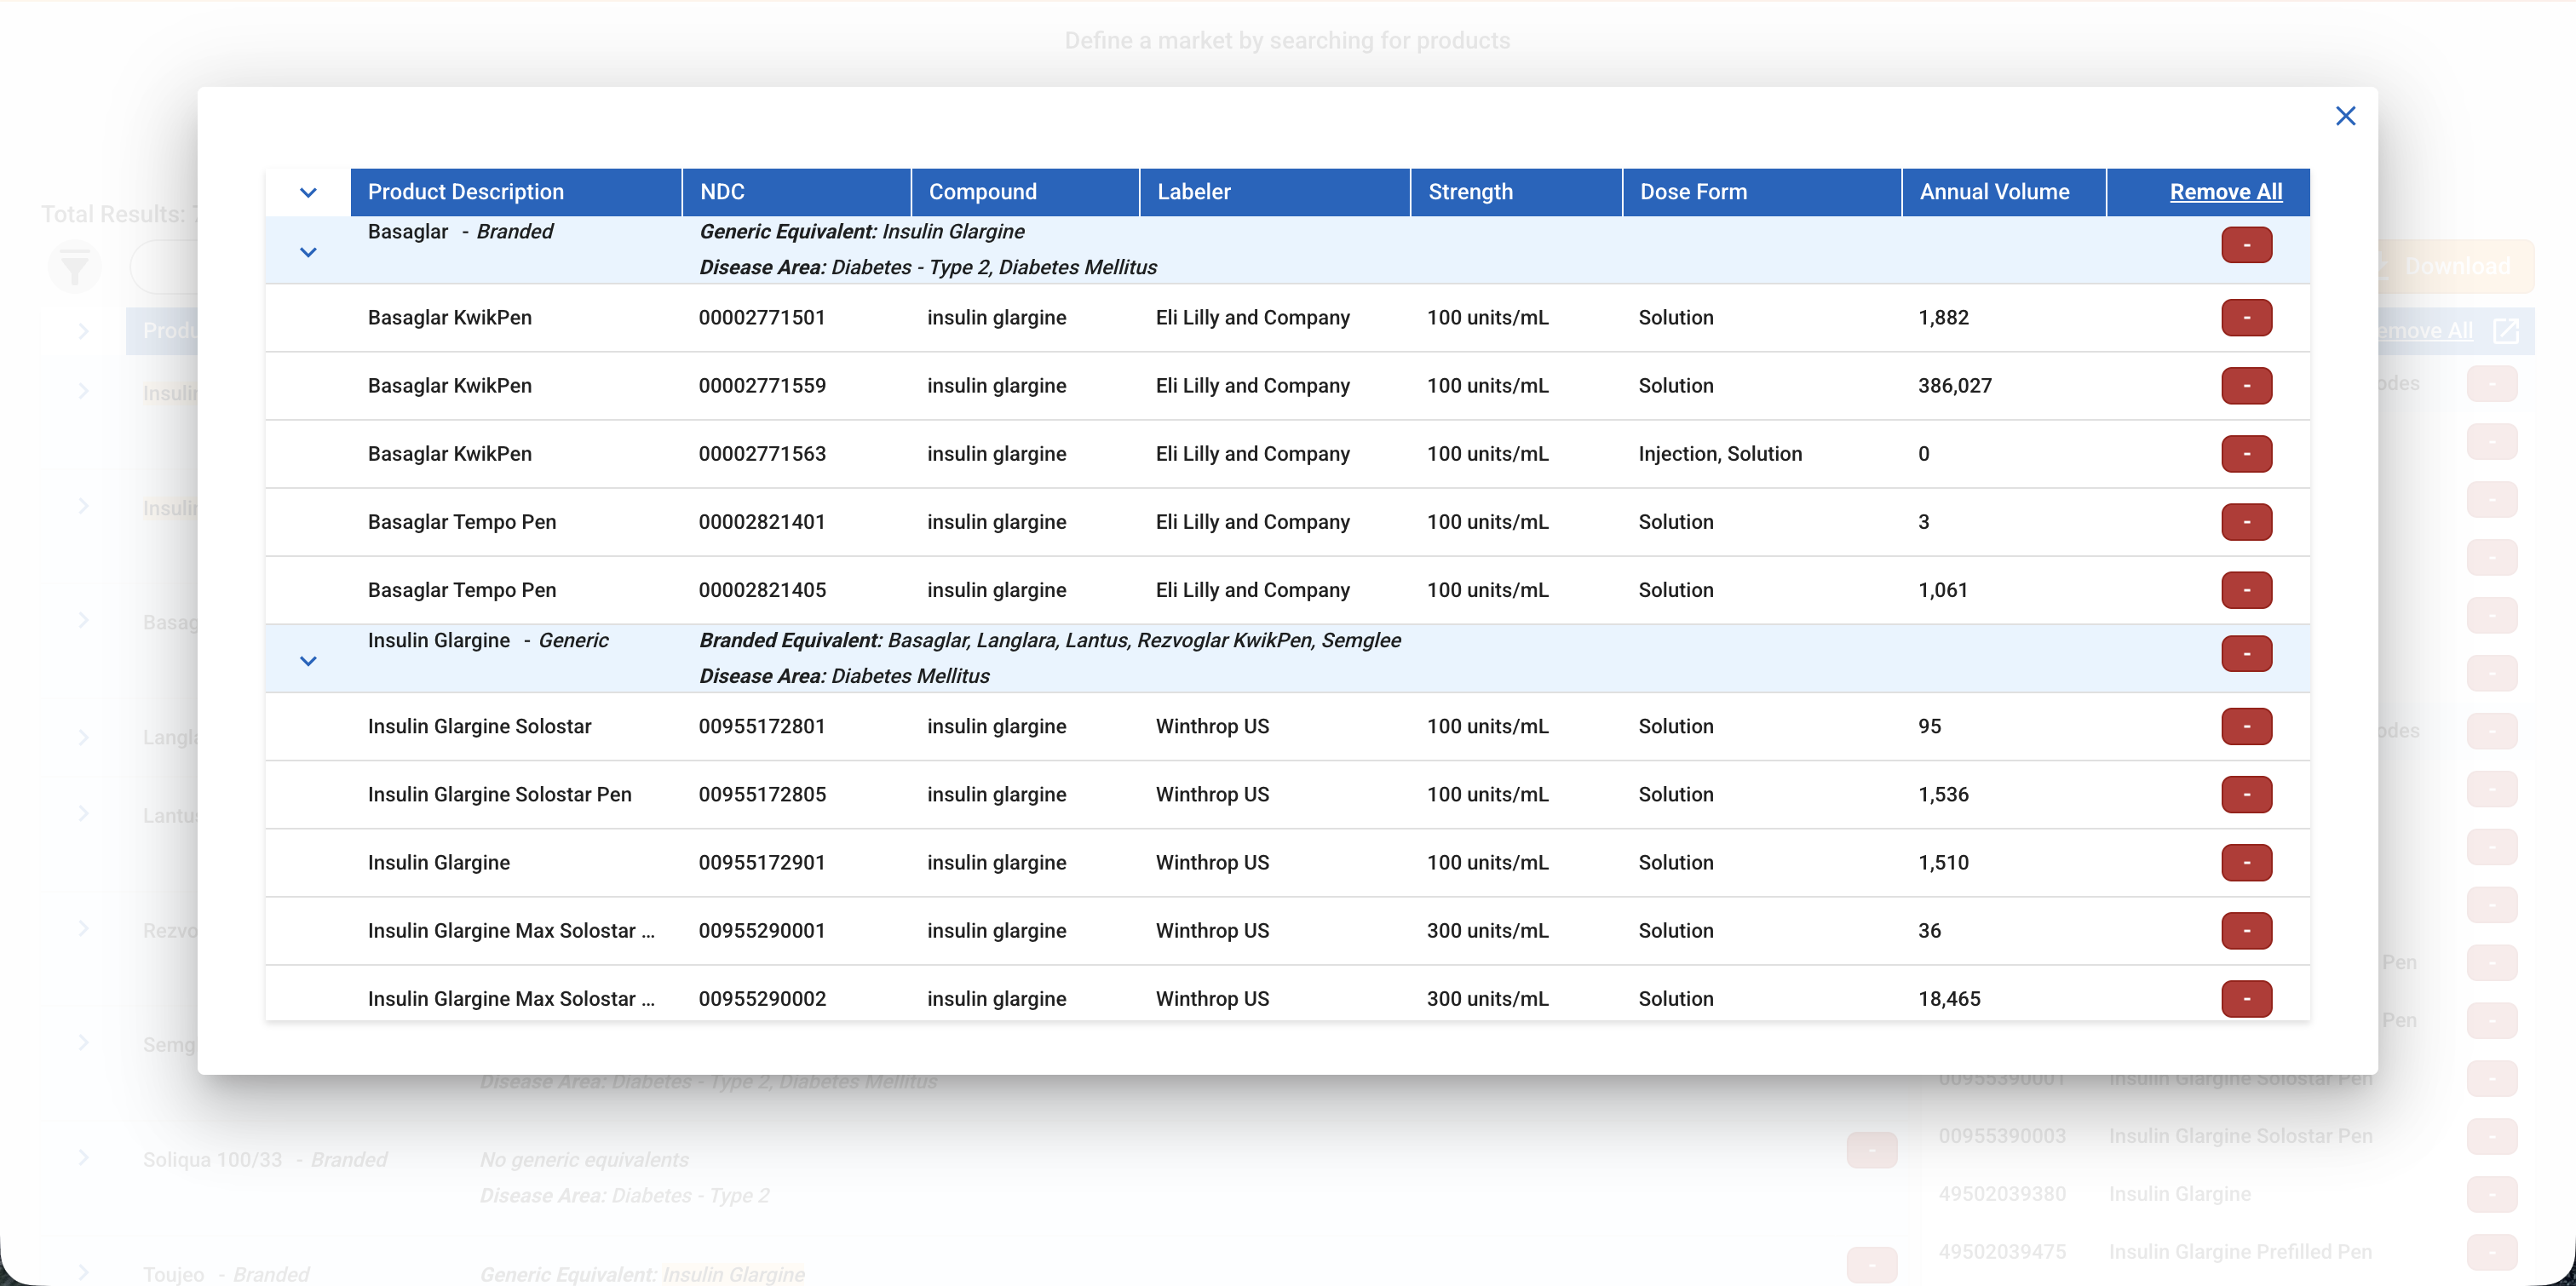
You can remove individual NDCs from your qualification criteria by clicking the “-“ button next to an NDC from the Added Products pane or within the Code Searcher. To remove an entire brand, click the “-“ button on the brand row in Code Searcher or the expanded Added Products pane. You may also remove all products by clicking the “Remove All” link in the Added Products pane or the “-“ button at the top of the results list in Code Searcher.
Product Exact Match Searching
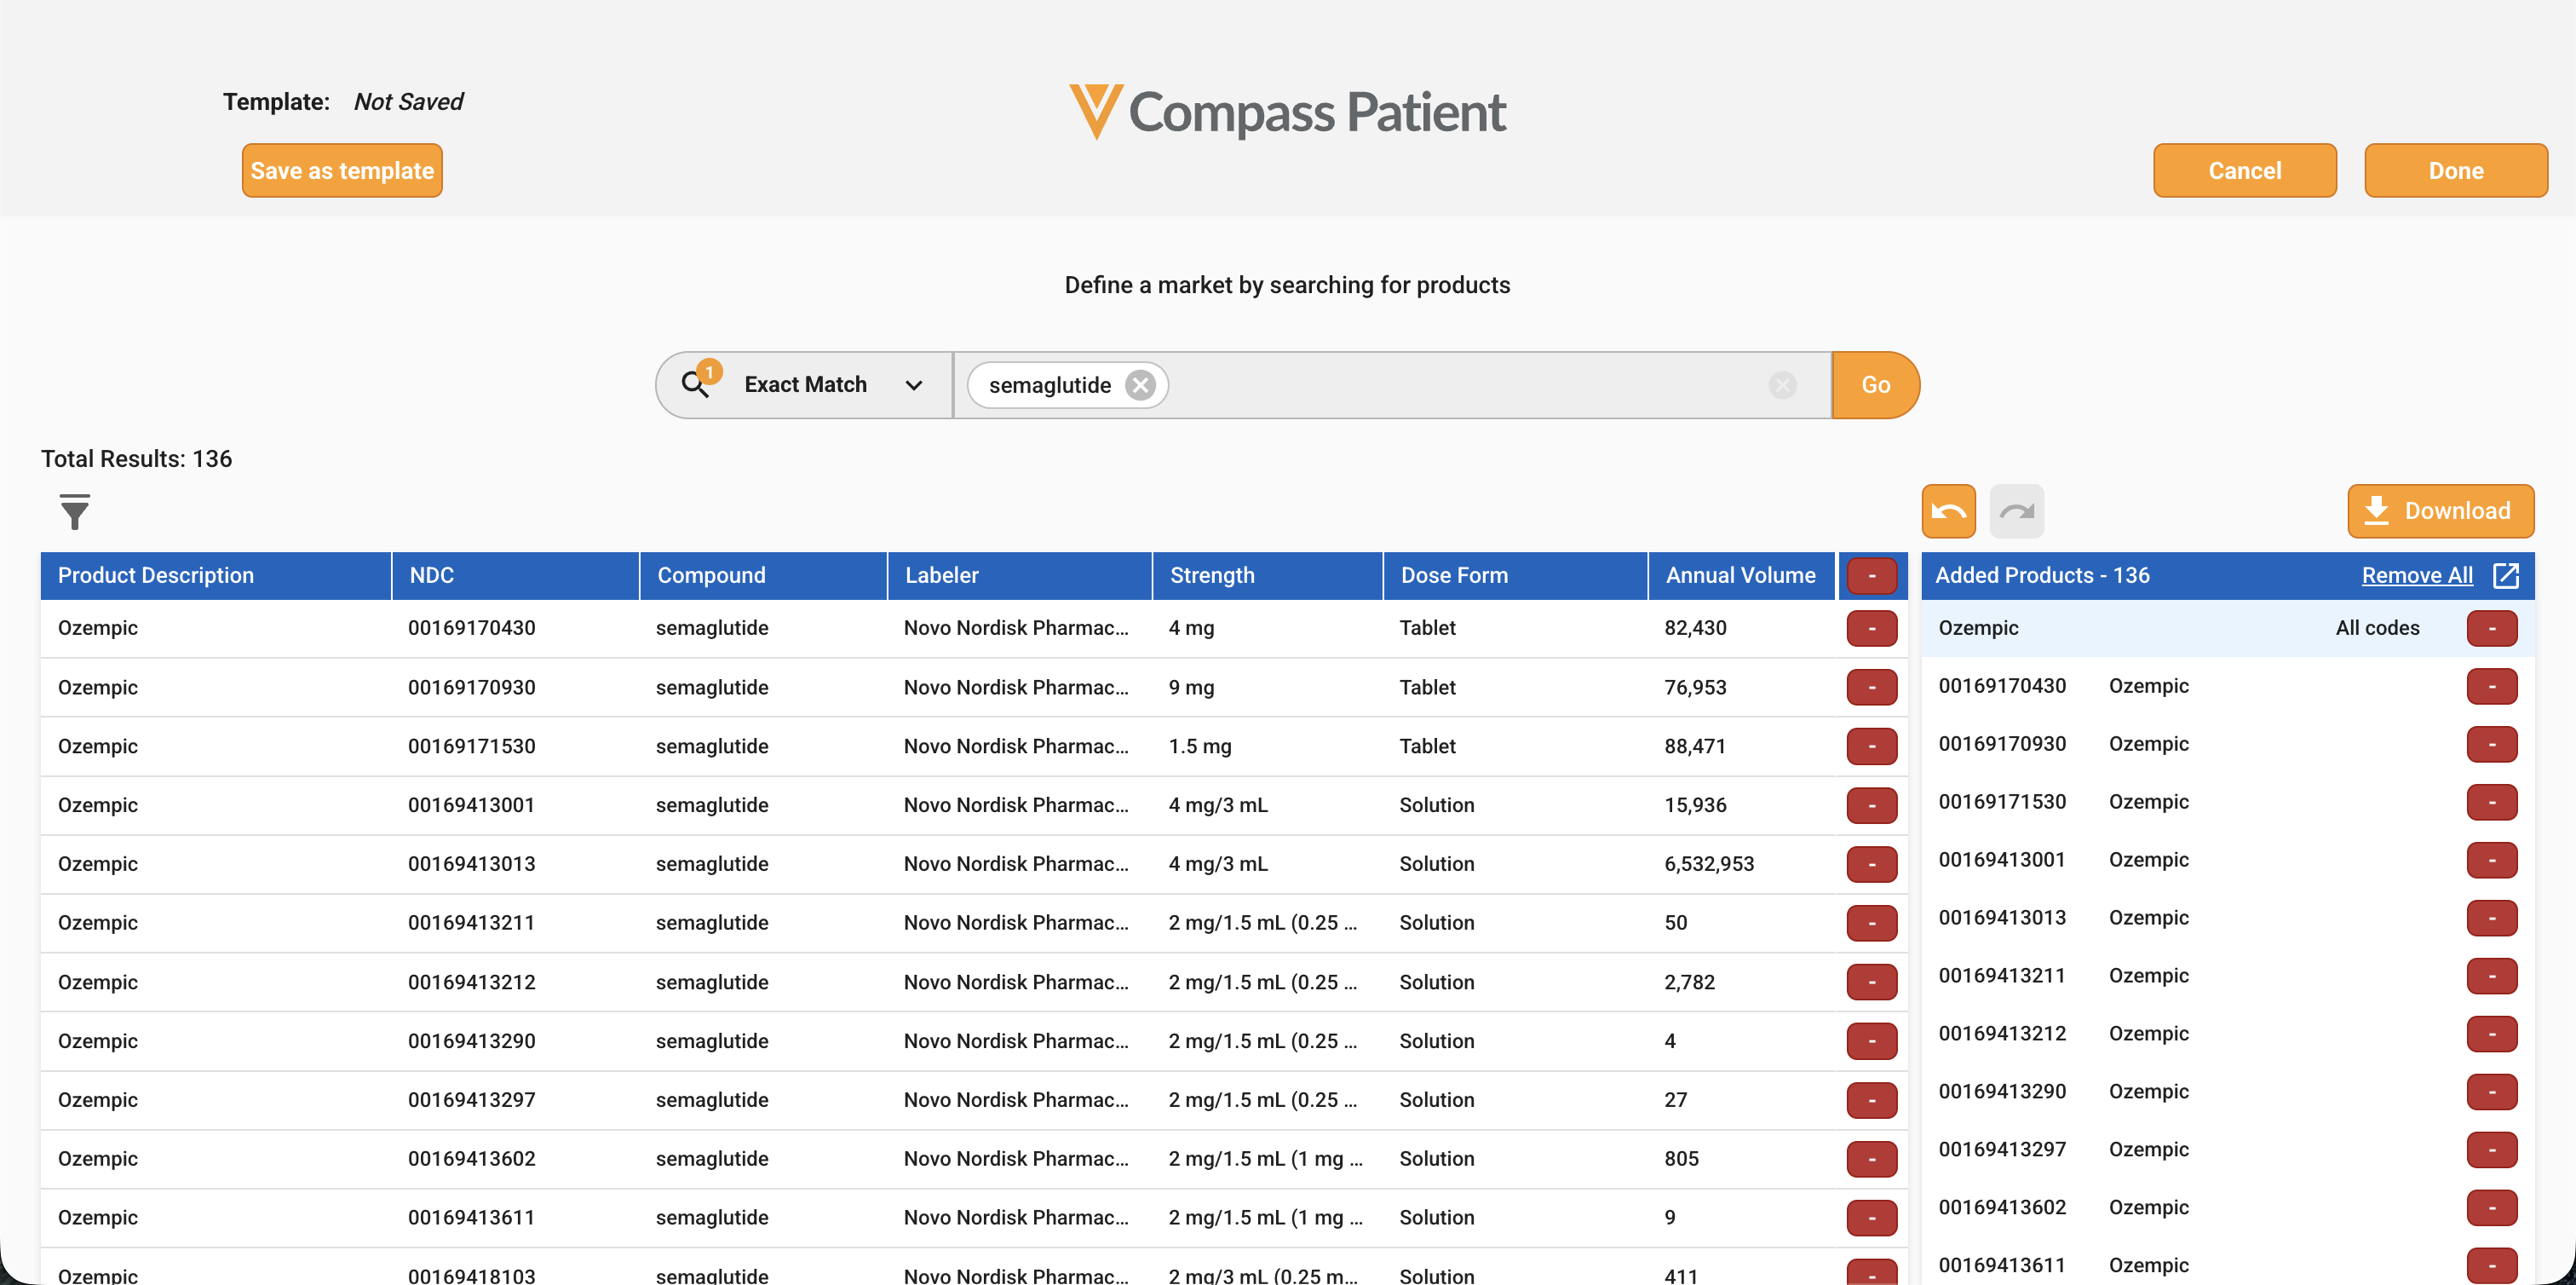
To perform an exact match search in the Product Code Searcher, click the Search Type dropdown on the left side of the search bar and select Exact Match.
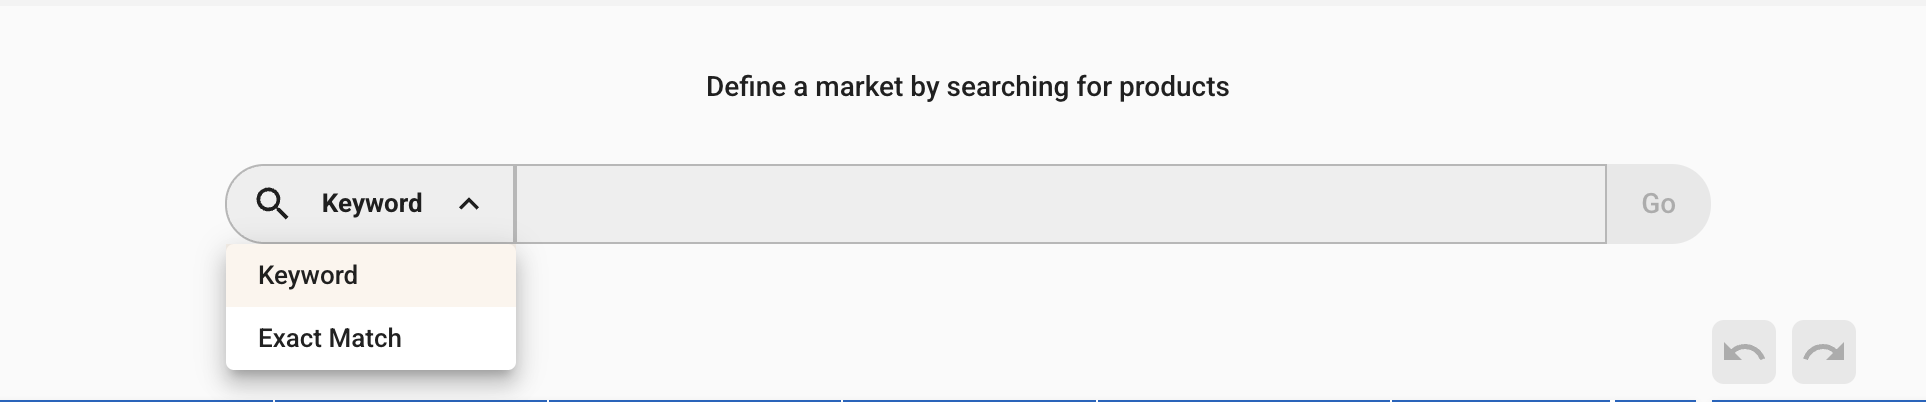
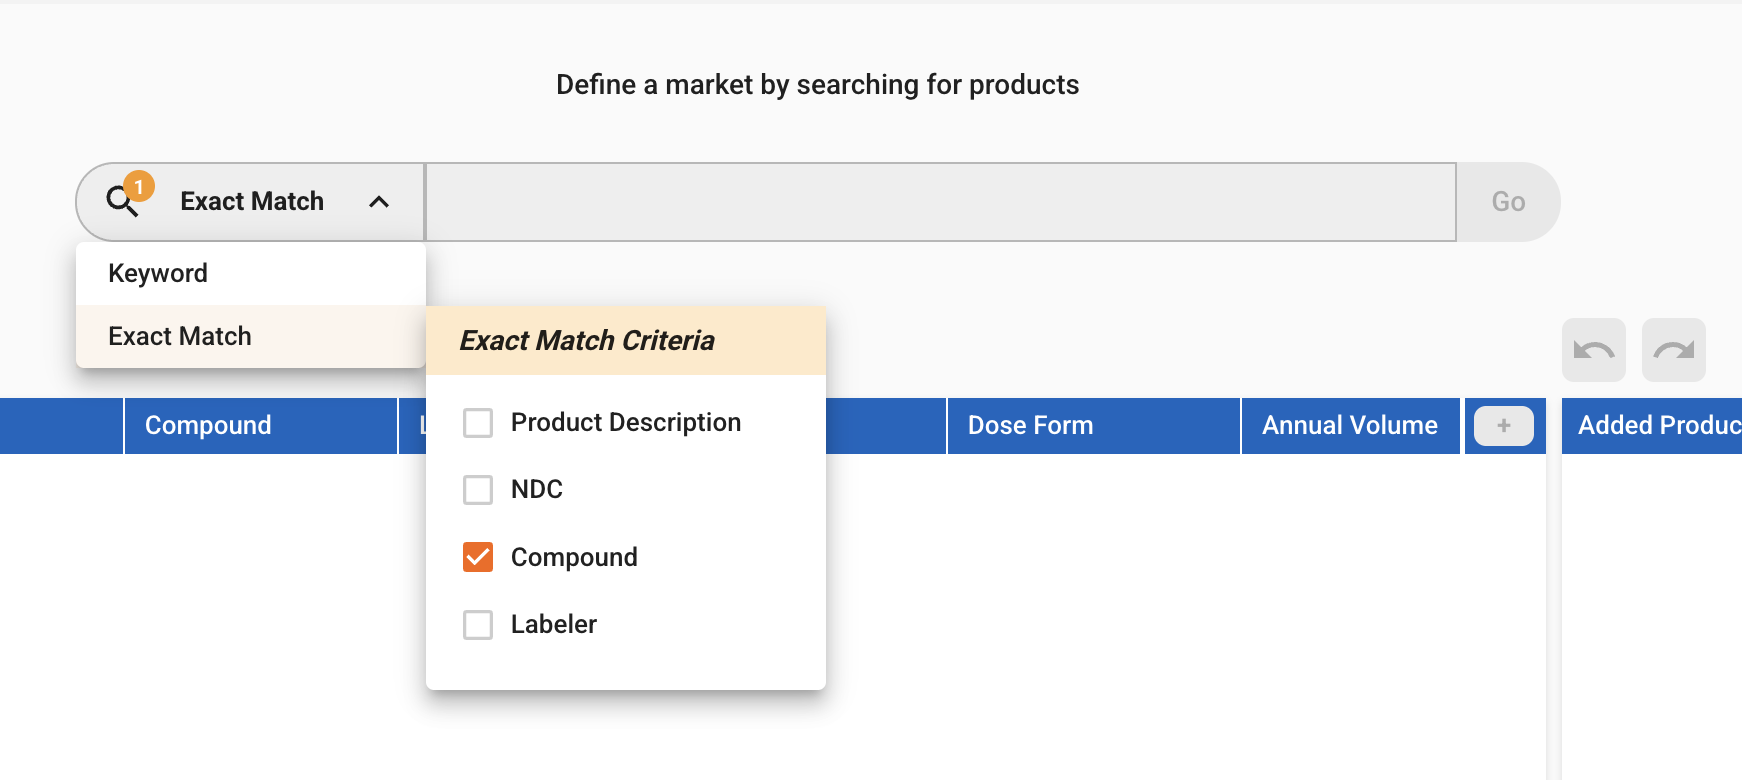
In the Exact Match popover, select the checkbox(es) for the specific attribute(s) you want to match against. In the Product Code Searcher, you can match against:
- Product Description
- NDC
- Compound
- Labeler
After selecting the criteria you want to match against, enter your search terms and click Go (or press Enter). The search evaluates all selected criteria and returns results matching at least one of them.
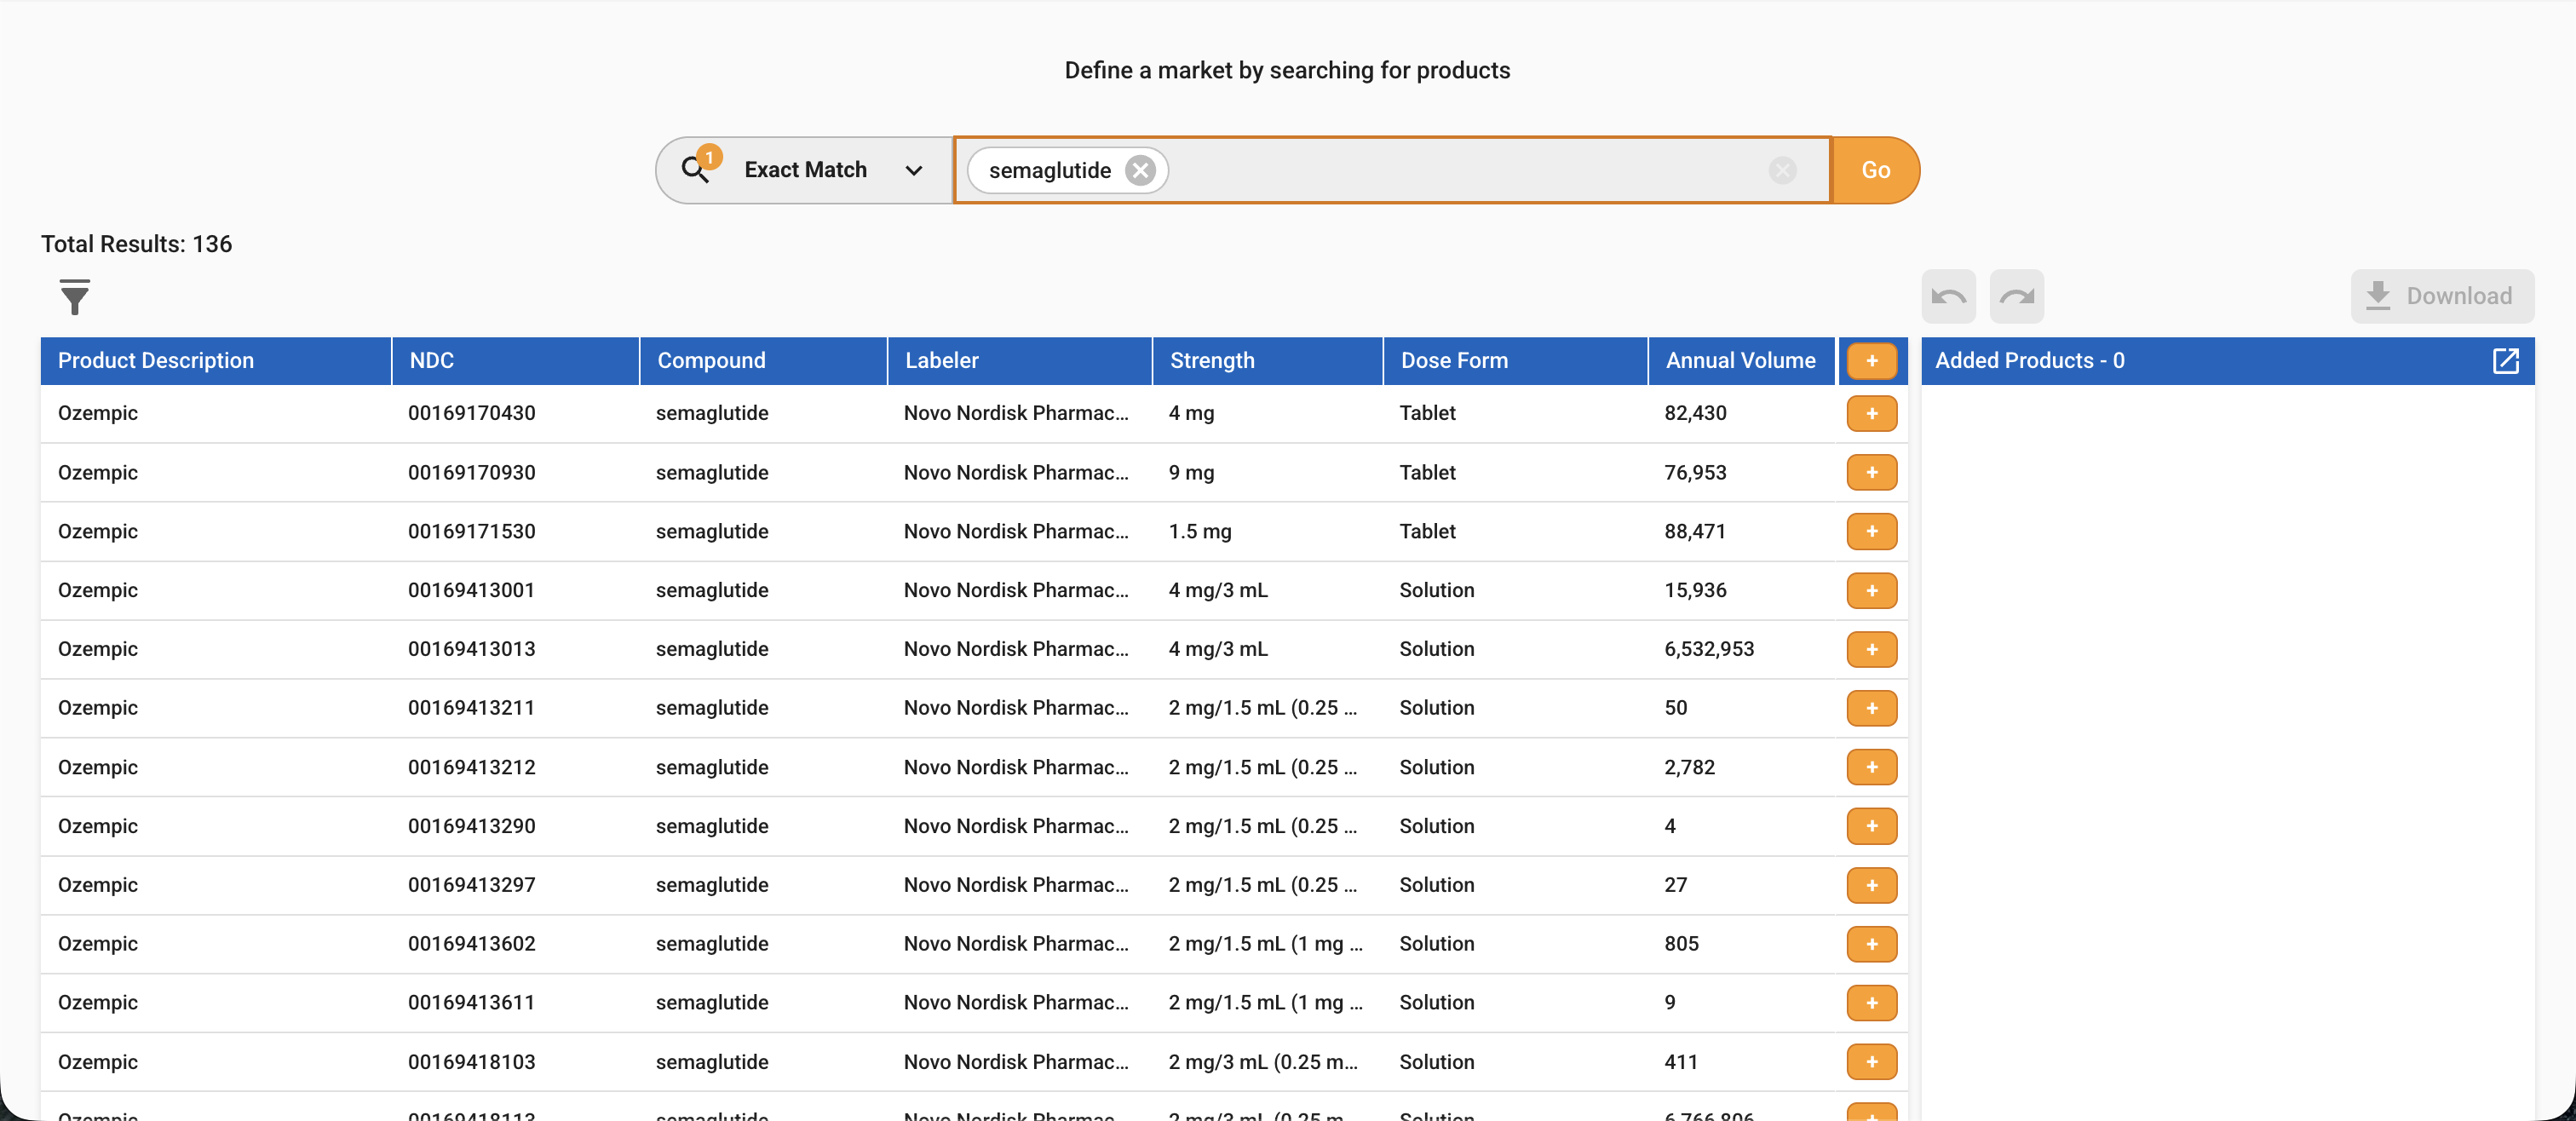
Search results are displayed in alphabetical order, A-Z, by Product Description. Multiple results with the same product description are then sorted by NDC code. Unlike Keyword searches, exact match searches do not group results by associated brand in the results table.
You can add items to the Added Products pane by clicking the “+” button on an individual NDC row, or by clicking the “Add All” button in the top-right corner of the results table. In the Added Products pane, items are automatically grouped at the brand level for ease of organization.
Diagnoses
Diagnosis Keyword Searching
When searching for diagnoses, the search will locate diagnoses that match your search term for the following fields: Diagnosis Code, Description, and Disease Area. You can view Veeva’s Disease Area definitions in the Market Library, as well as in our Data Dictionary.
Diagnosis codes are grouped by their hierarchy (Level 1 of each hierarchy is indicated by a shaded header row). When searching for diagnosis codes, only the codes matching your search term will be returned along with their Level 1 parent, so that you can easily locate what you are searching for.
The details of each diagnosis code (Diagnosis Code, Description, ICD Code Type, Disease Area, and Annual Volume) will be displayed in the Code Searcher. Use the bottom scroll bar to view additional columns.
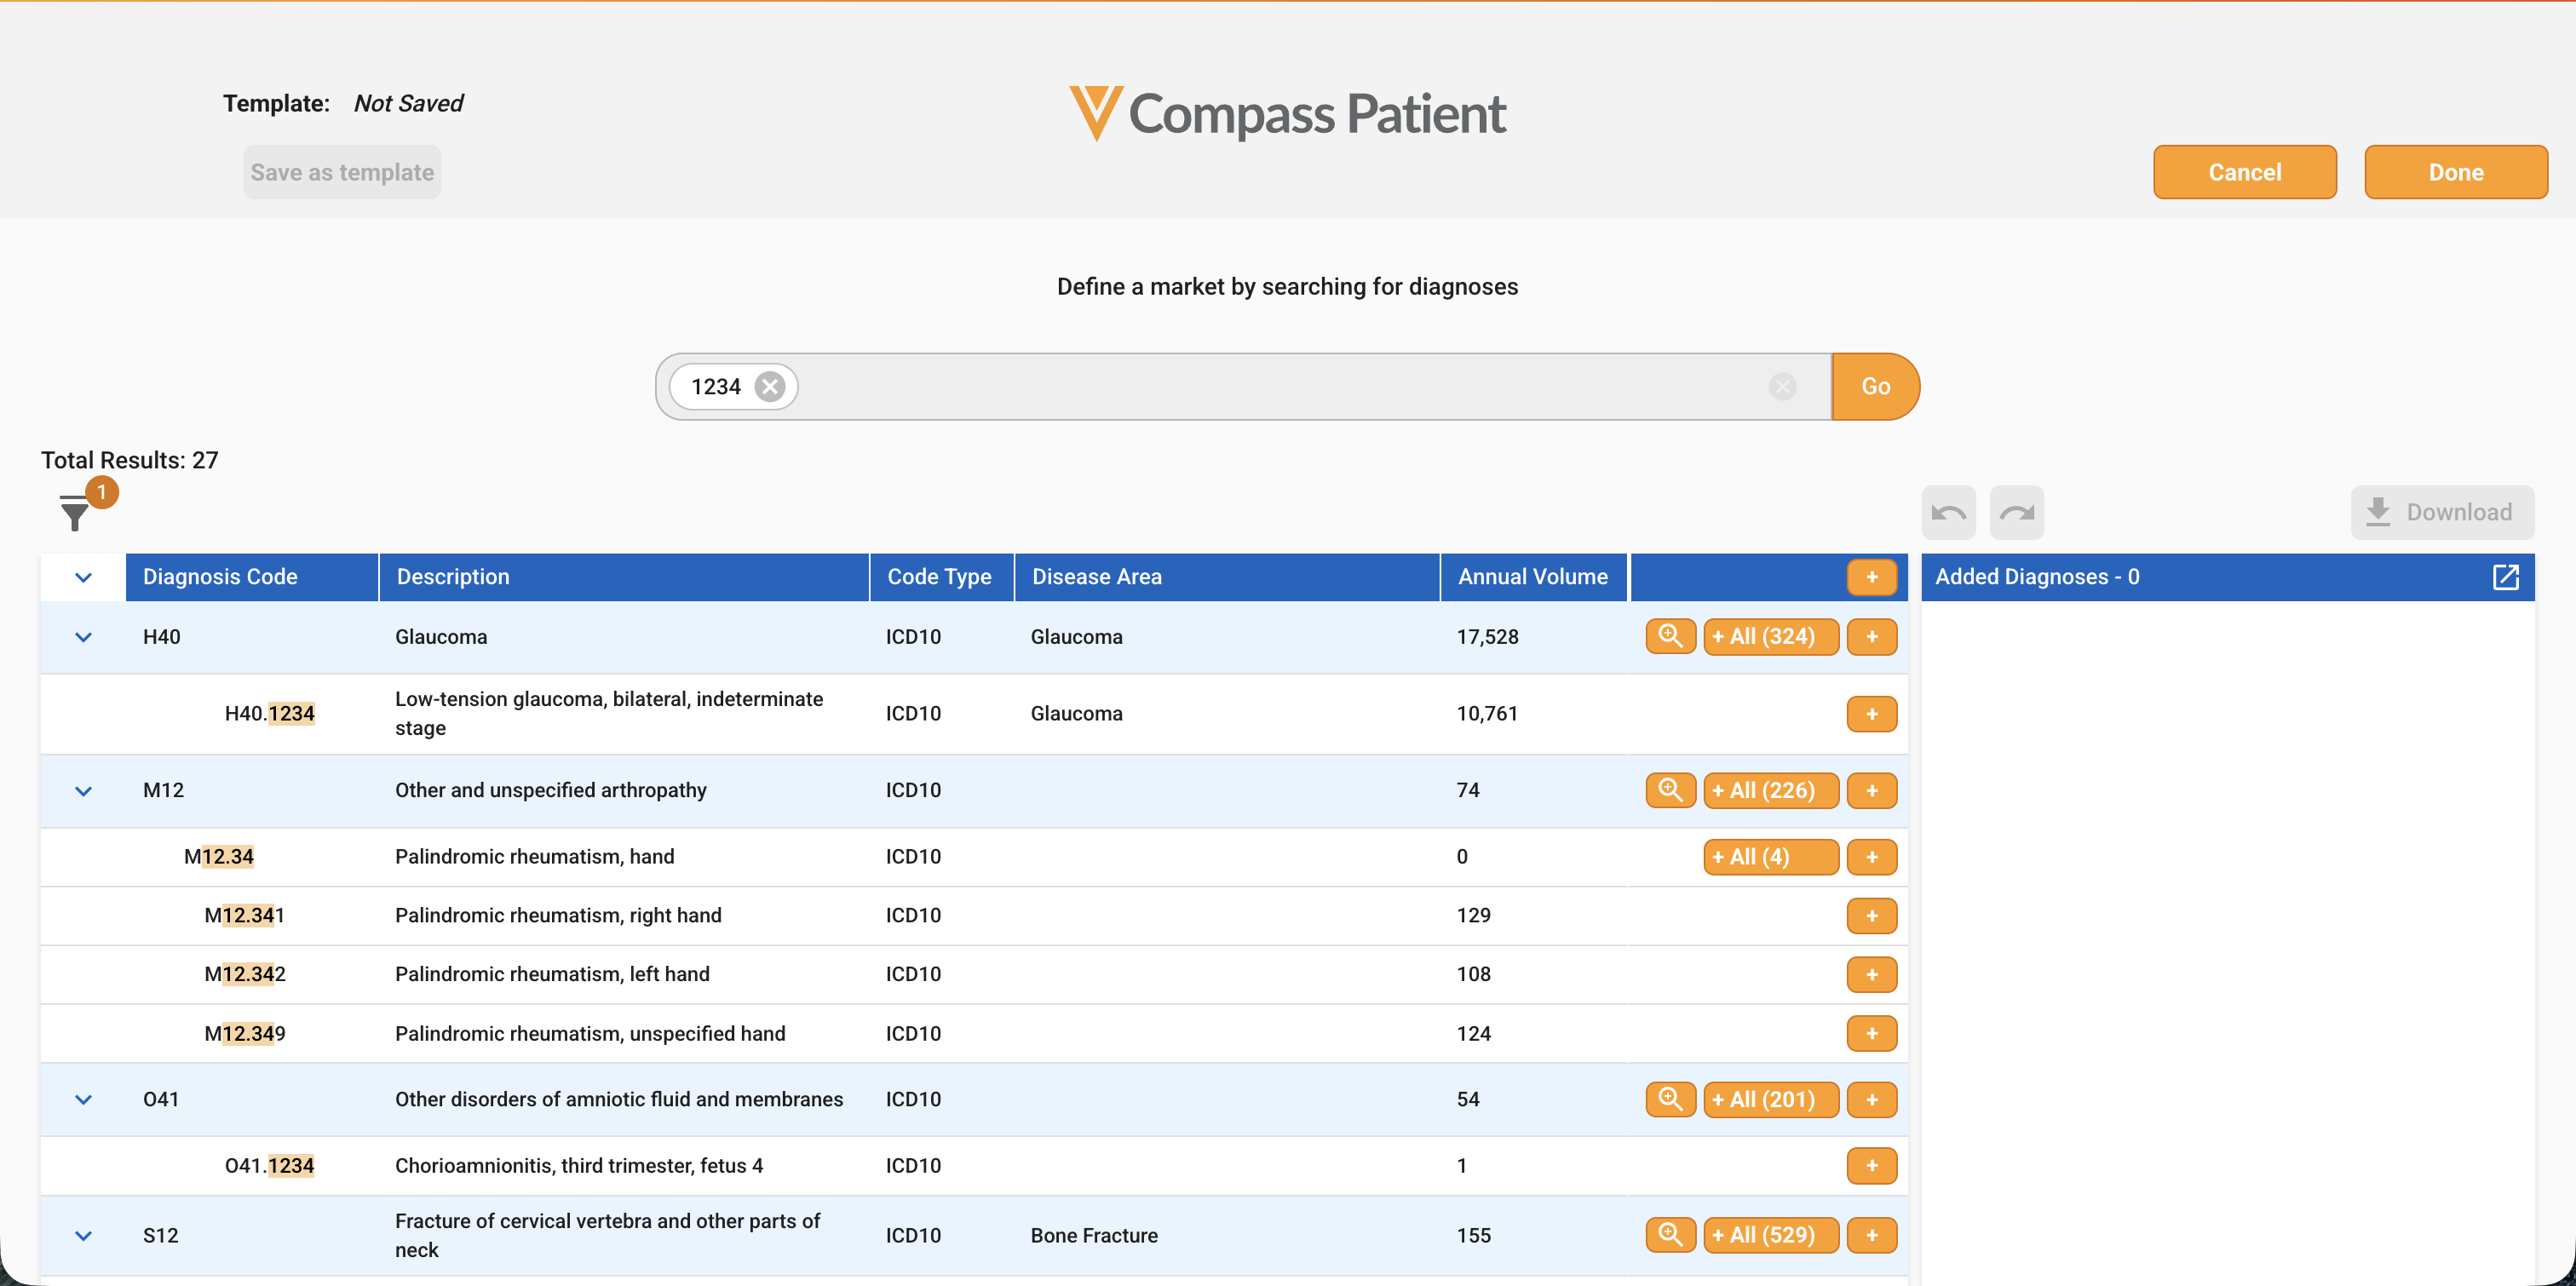
The filter button allows you to further filter your diagnosis codes by ICD Code Type and Disease Area. The Disease Area filter category will be disabled if none of the returned diagnosis codes have associated Disease Areas. By default, diagnosis codes are filtered to ICD10 only. If you select an IC9 value from the typeahead search suggestions, the ICD9 filter will be automatically applied upon searching.

Clicking on a filter category will display a list of available filters, alphabetically sorted A-Z, based on the returned diagnosis codes. Clicking on the checkbox next to the filter will apply that filter to the returned diagnosis codes; the total results count and results table will update in real-time to reflect applied filters.
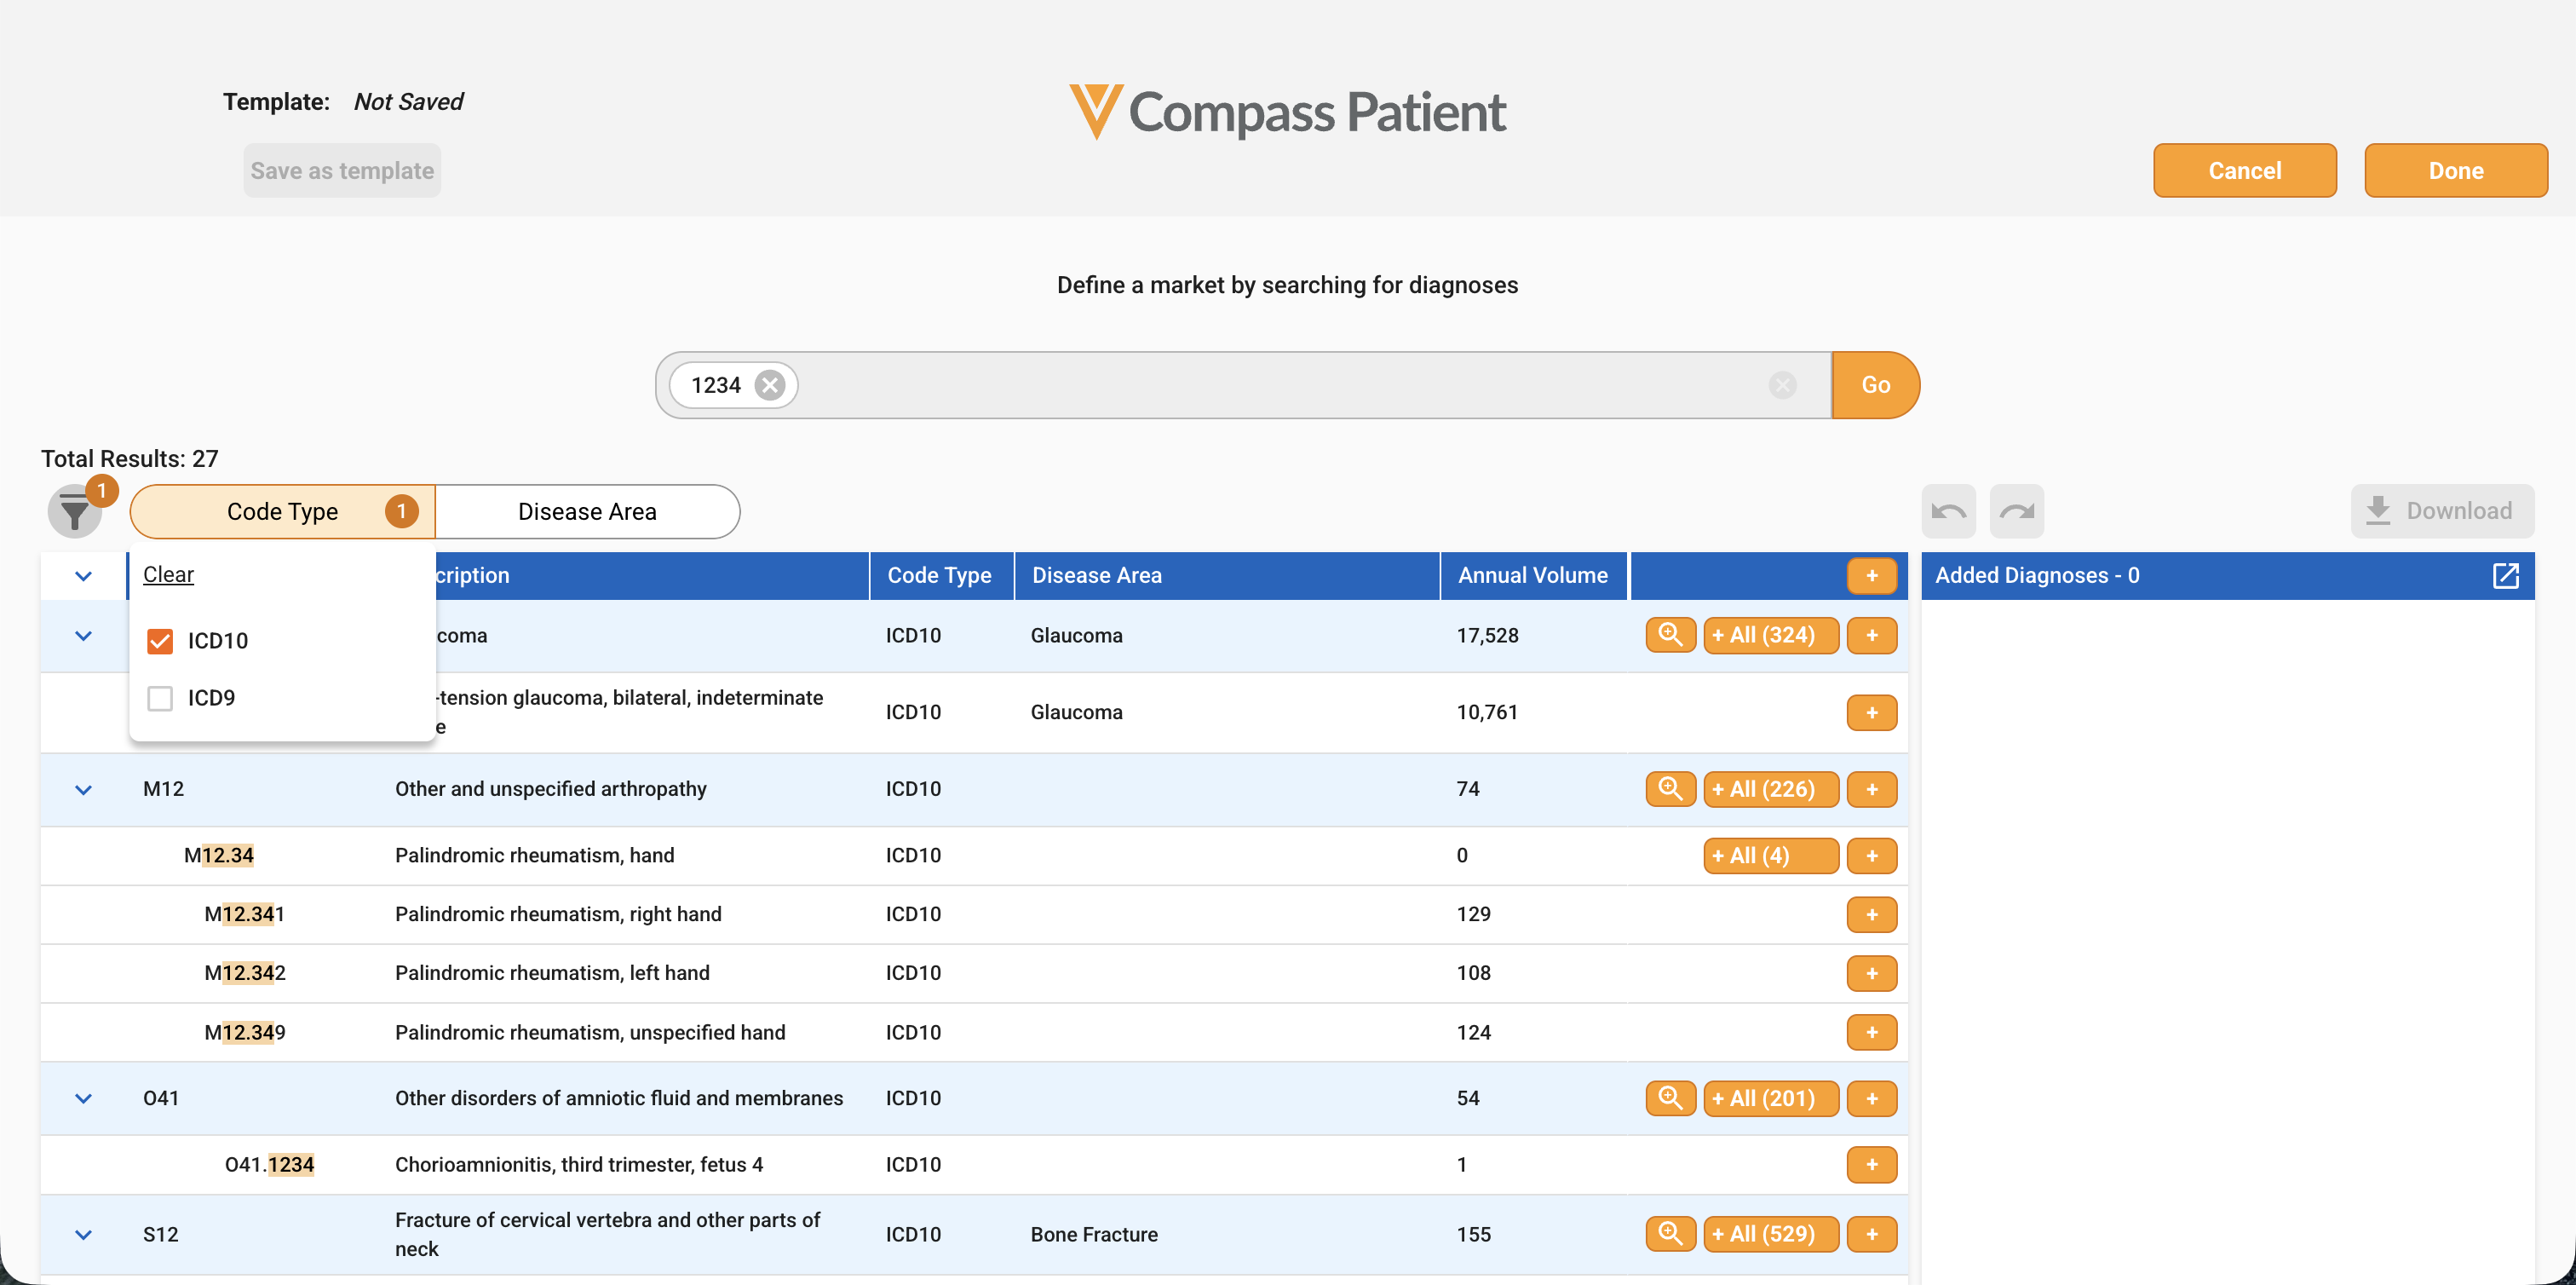
You can apply as many filters as you would like to the returned diagnosis codes. Counts will display in the filter categories, as well as the filter button, so that you can keep track of how many filters have been applied. Counts will continue to display if you choose to collapse the filter categories.
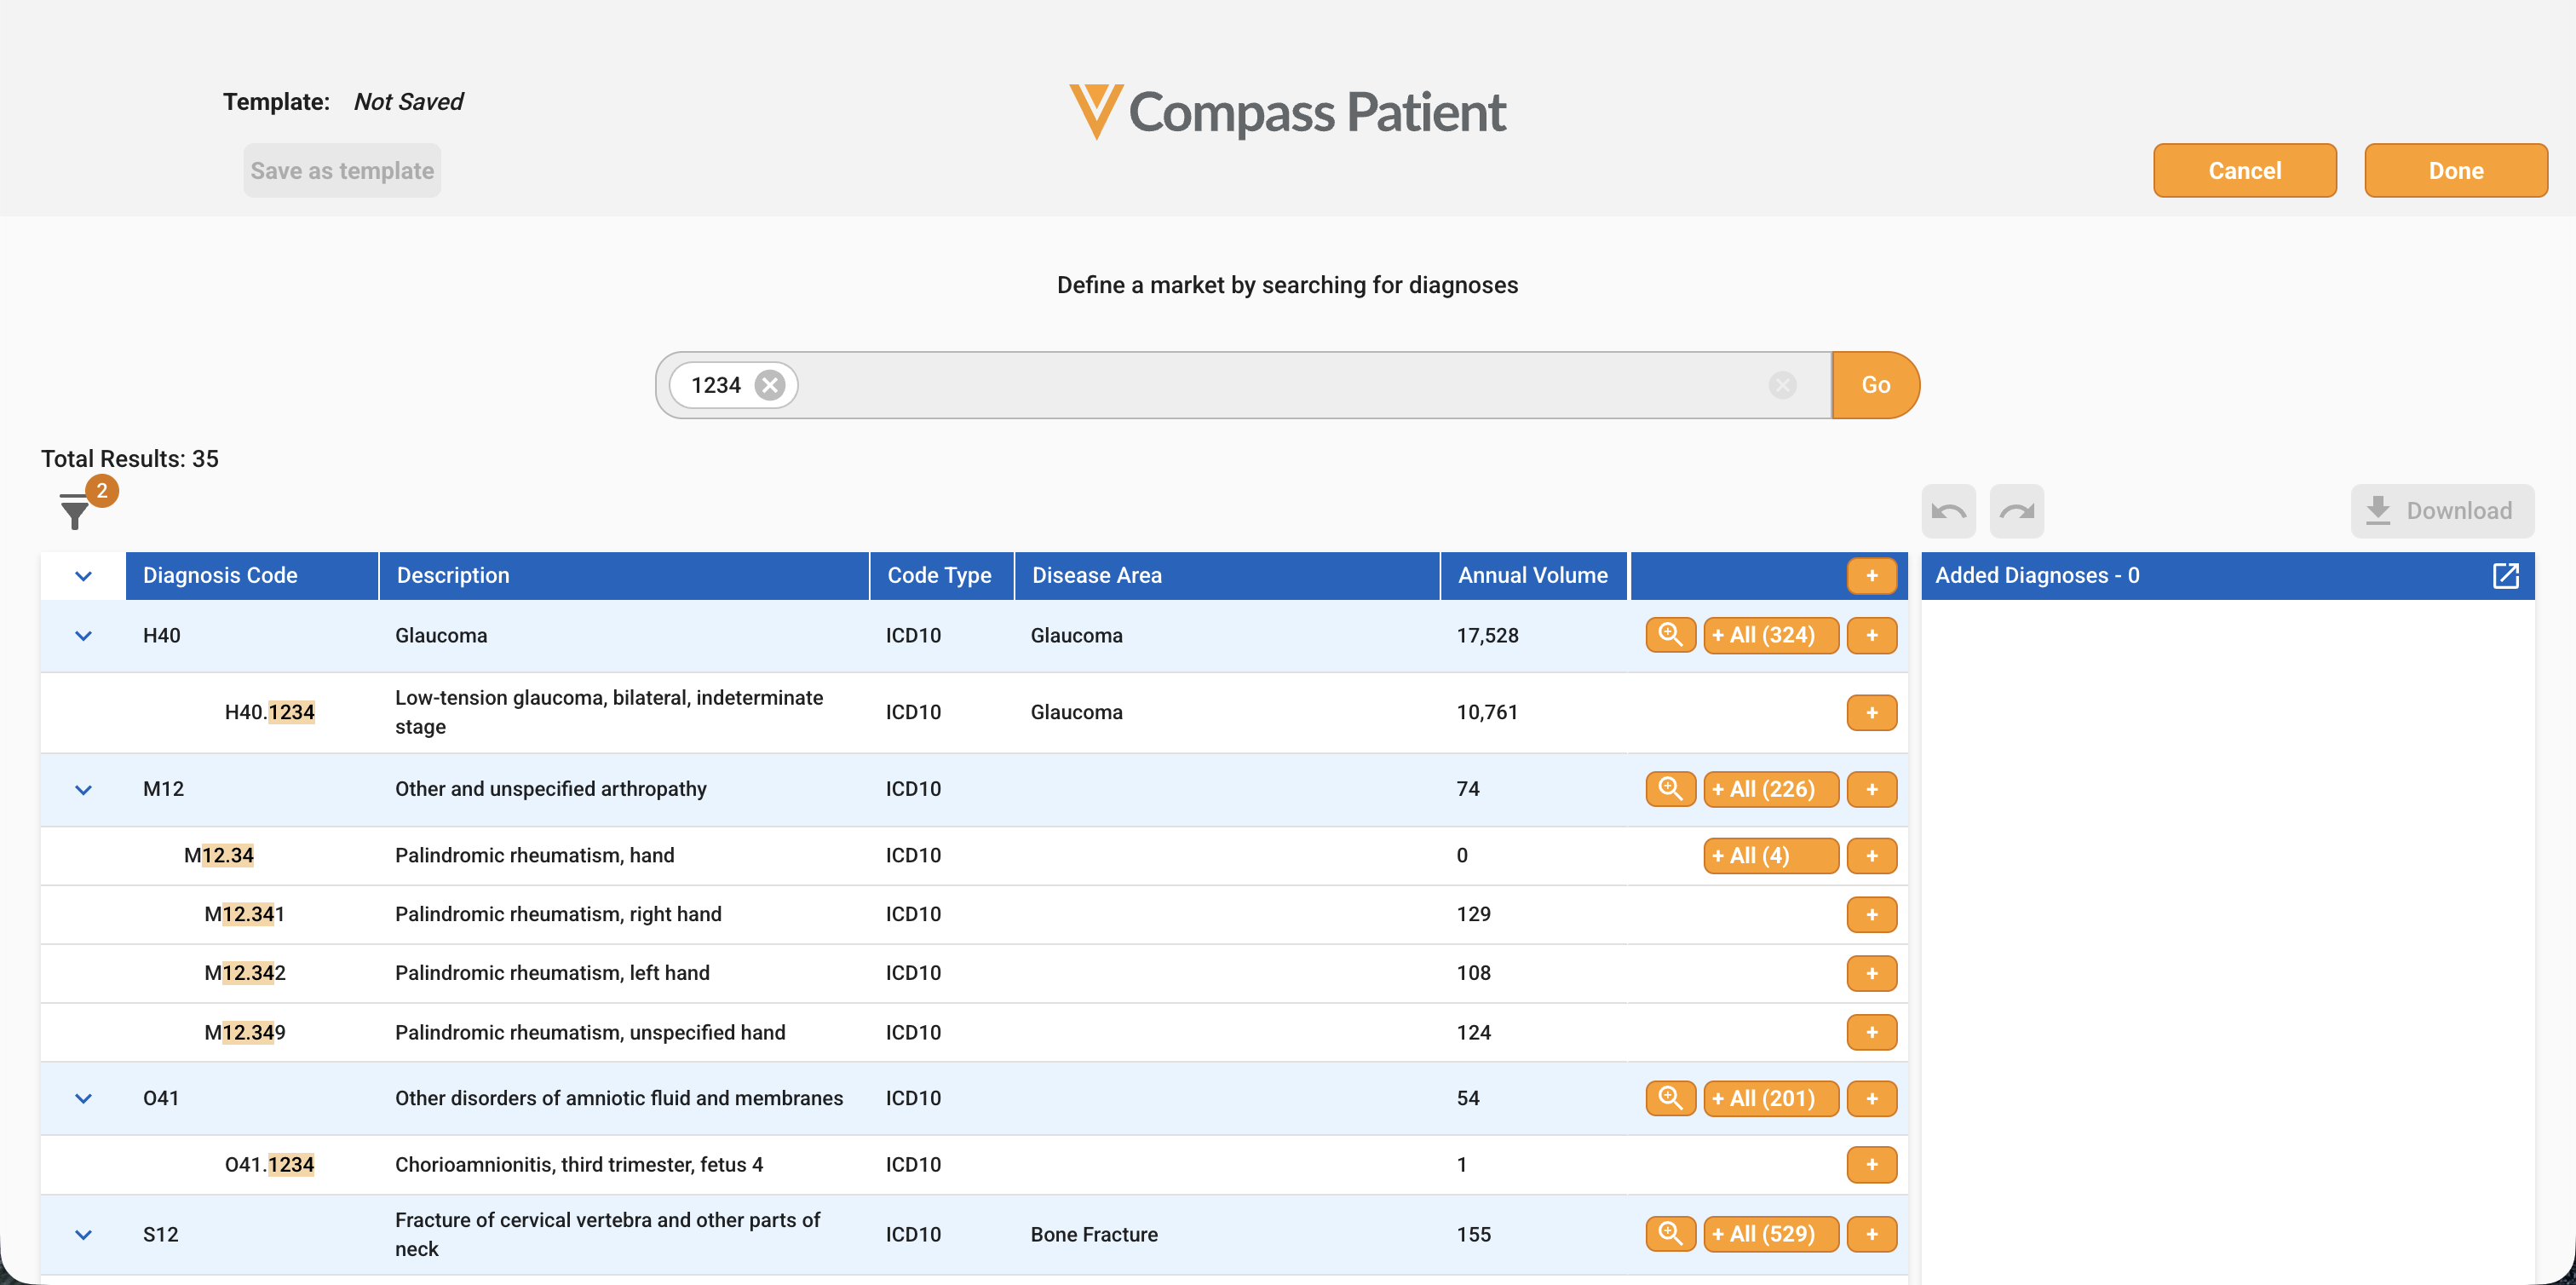
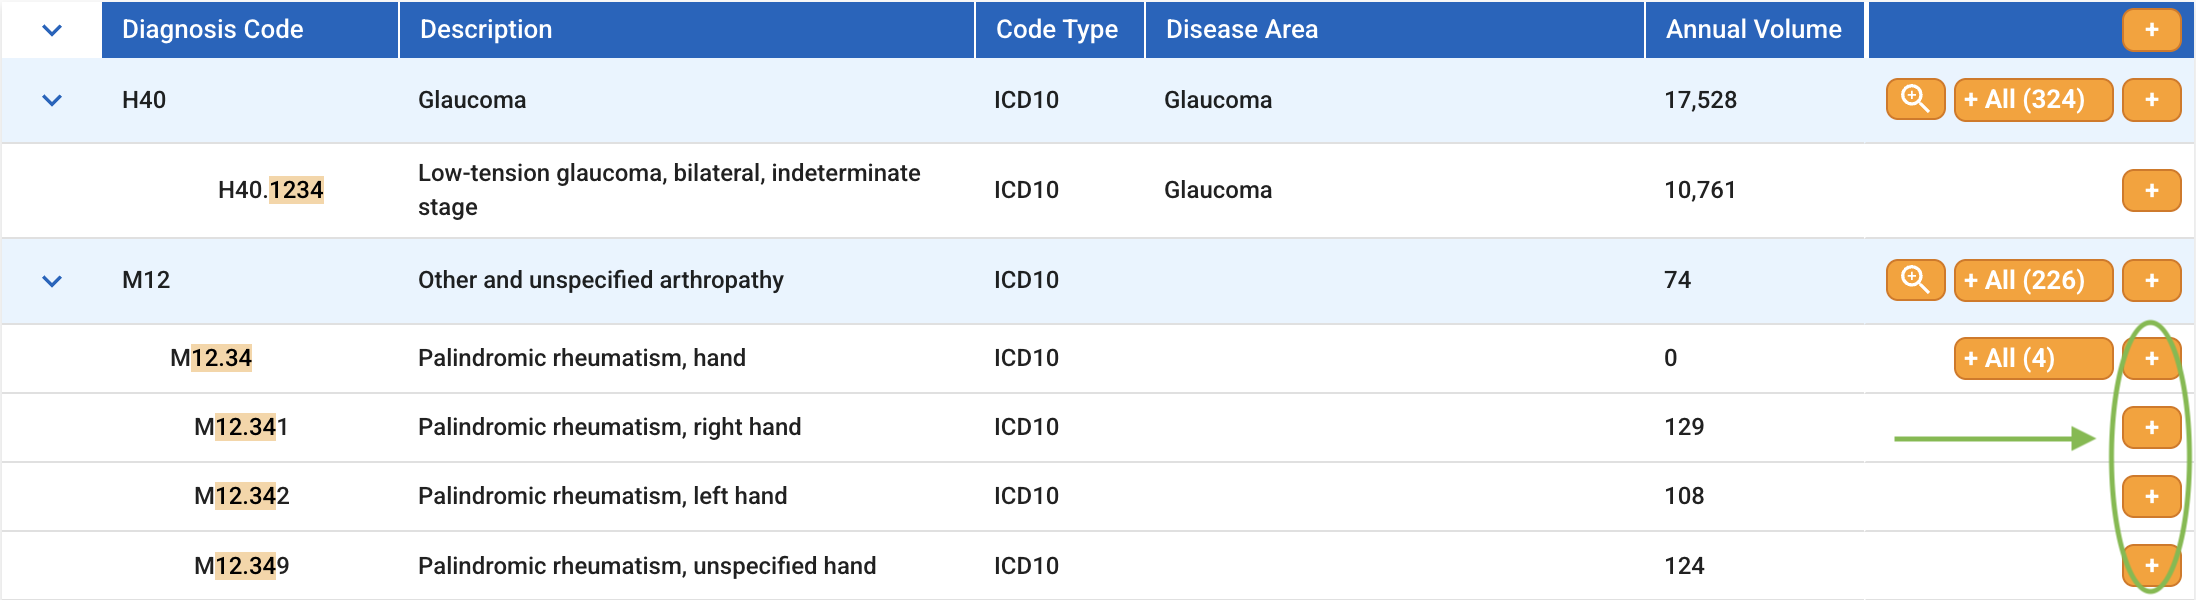
Diagnosis codes may be added individually or in bulk. For example, you may want to add the code “M12.34 - Palindromic rheumatism, hand” but not any of its descendants (such as M12.341, M12.342, etc.). To add individual diagnosis codes, click on the “+” button for a given code. This will add that code to the “Added Diagnoses” pane on the right.
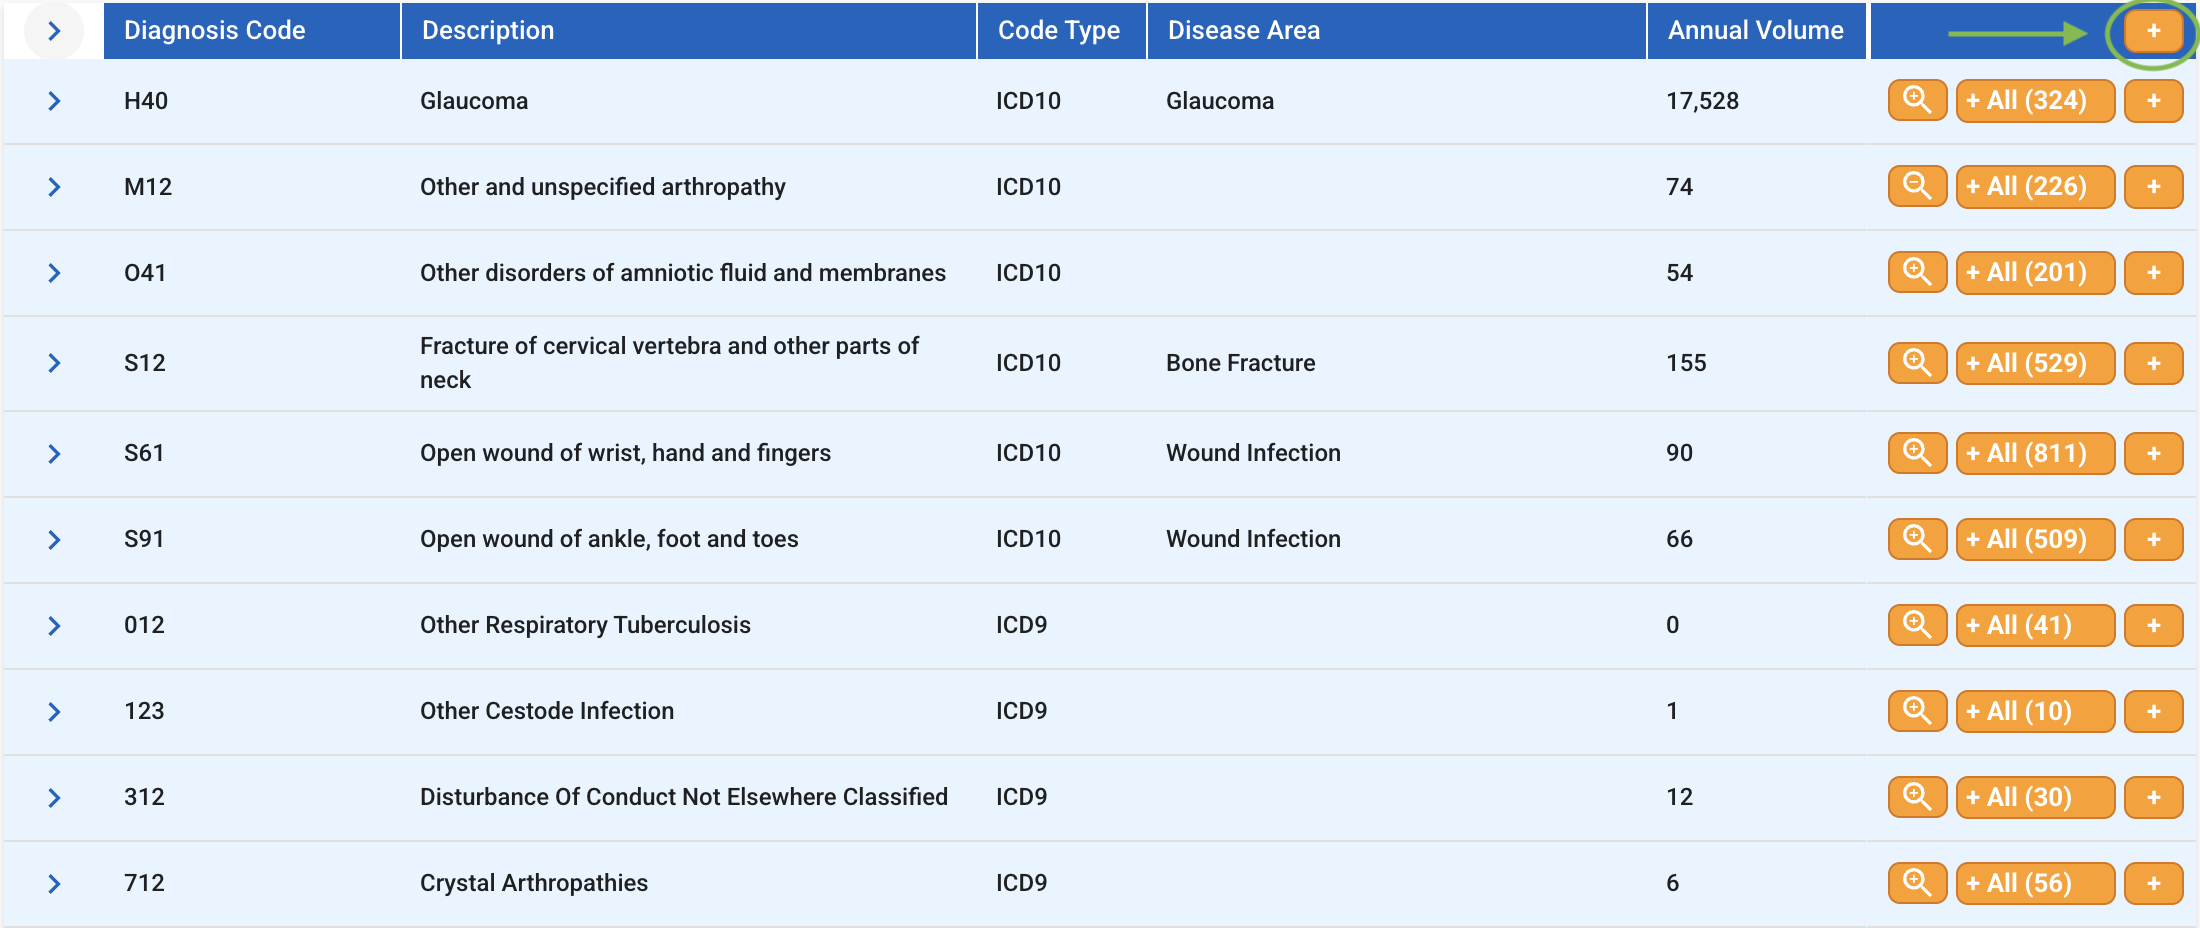
Diagnosis hierarchies can also be added in bulk. For example, you may want to add the hierarchy for M12.34 (e.g. M12.34 and all of its descendant codes such as M12.341, M12.342, etc). To add diagnosis codes in bulk, click on the “+ All” button for a given hierarchy.
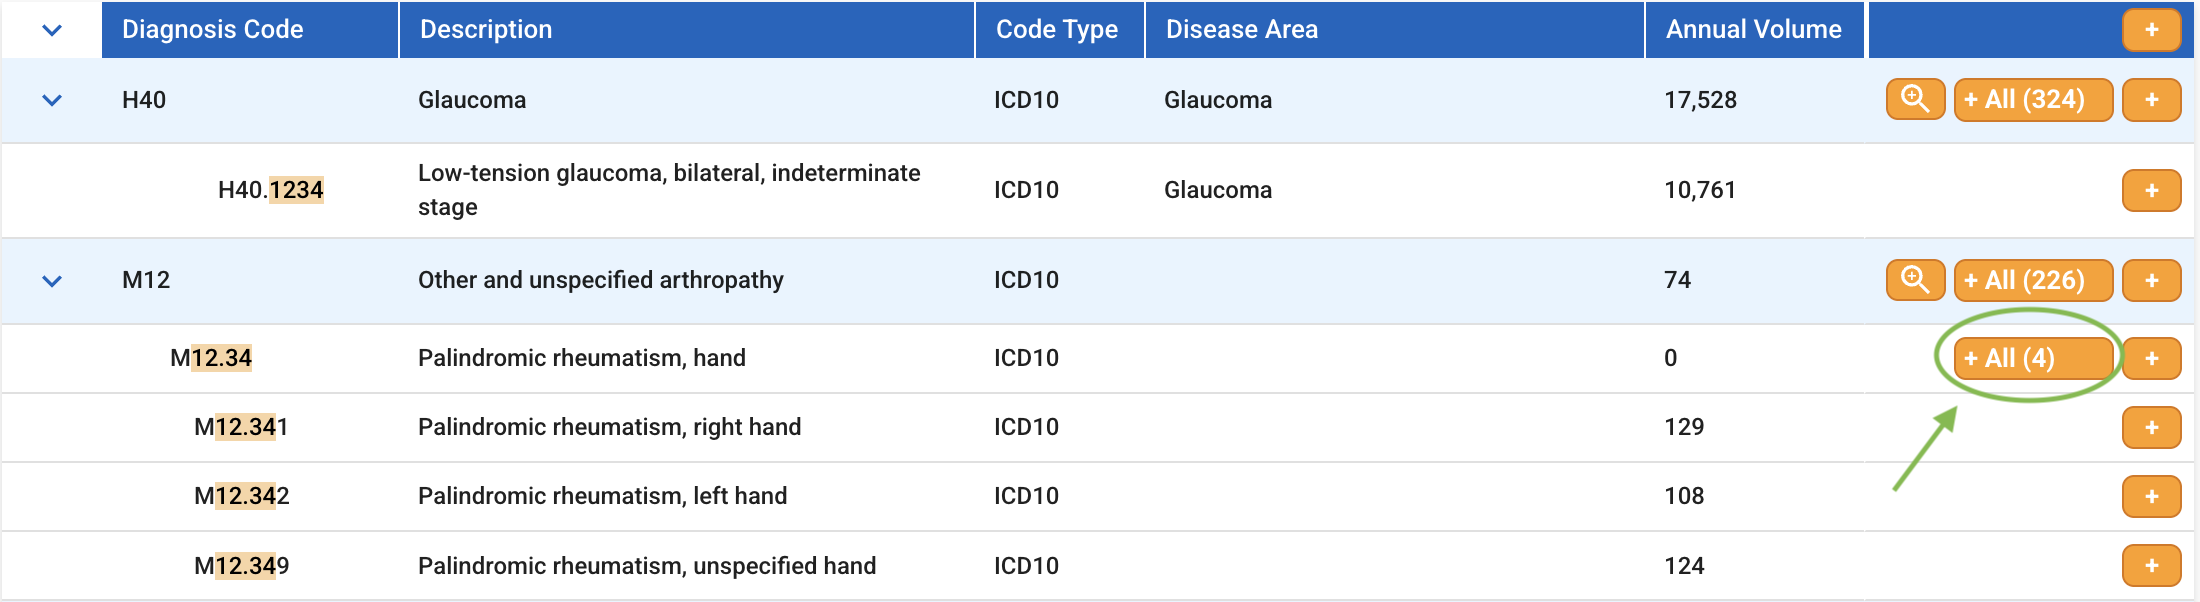
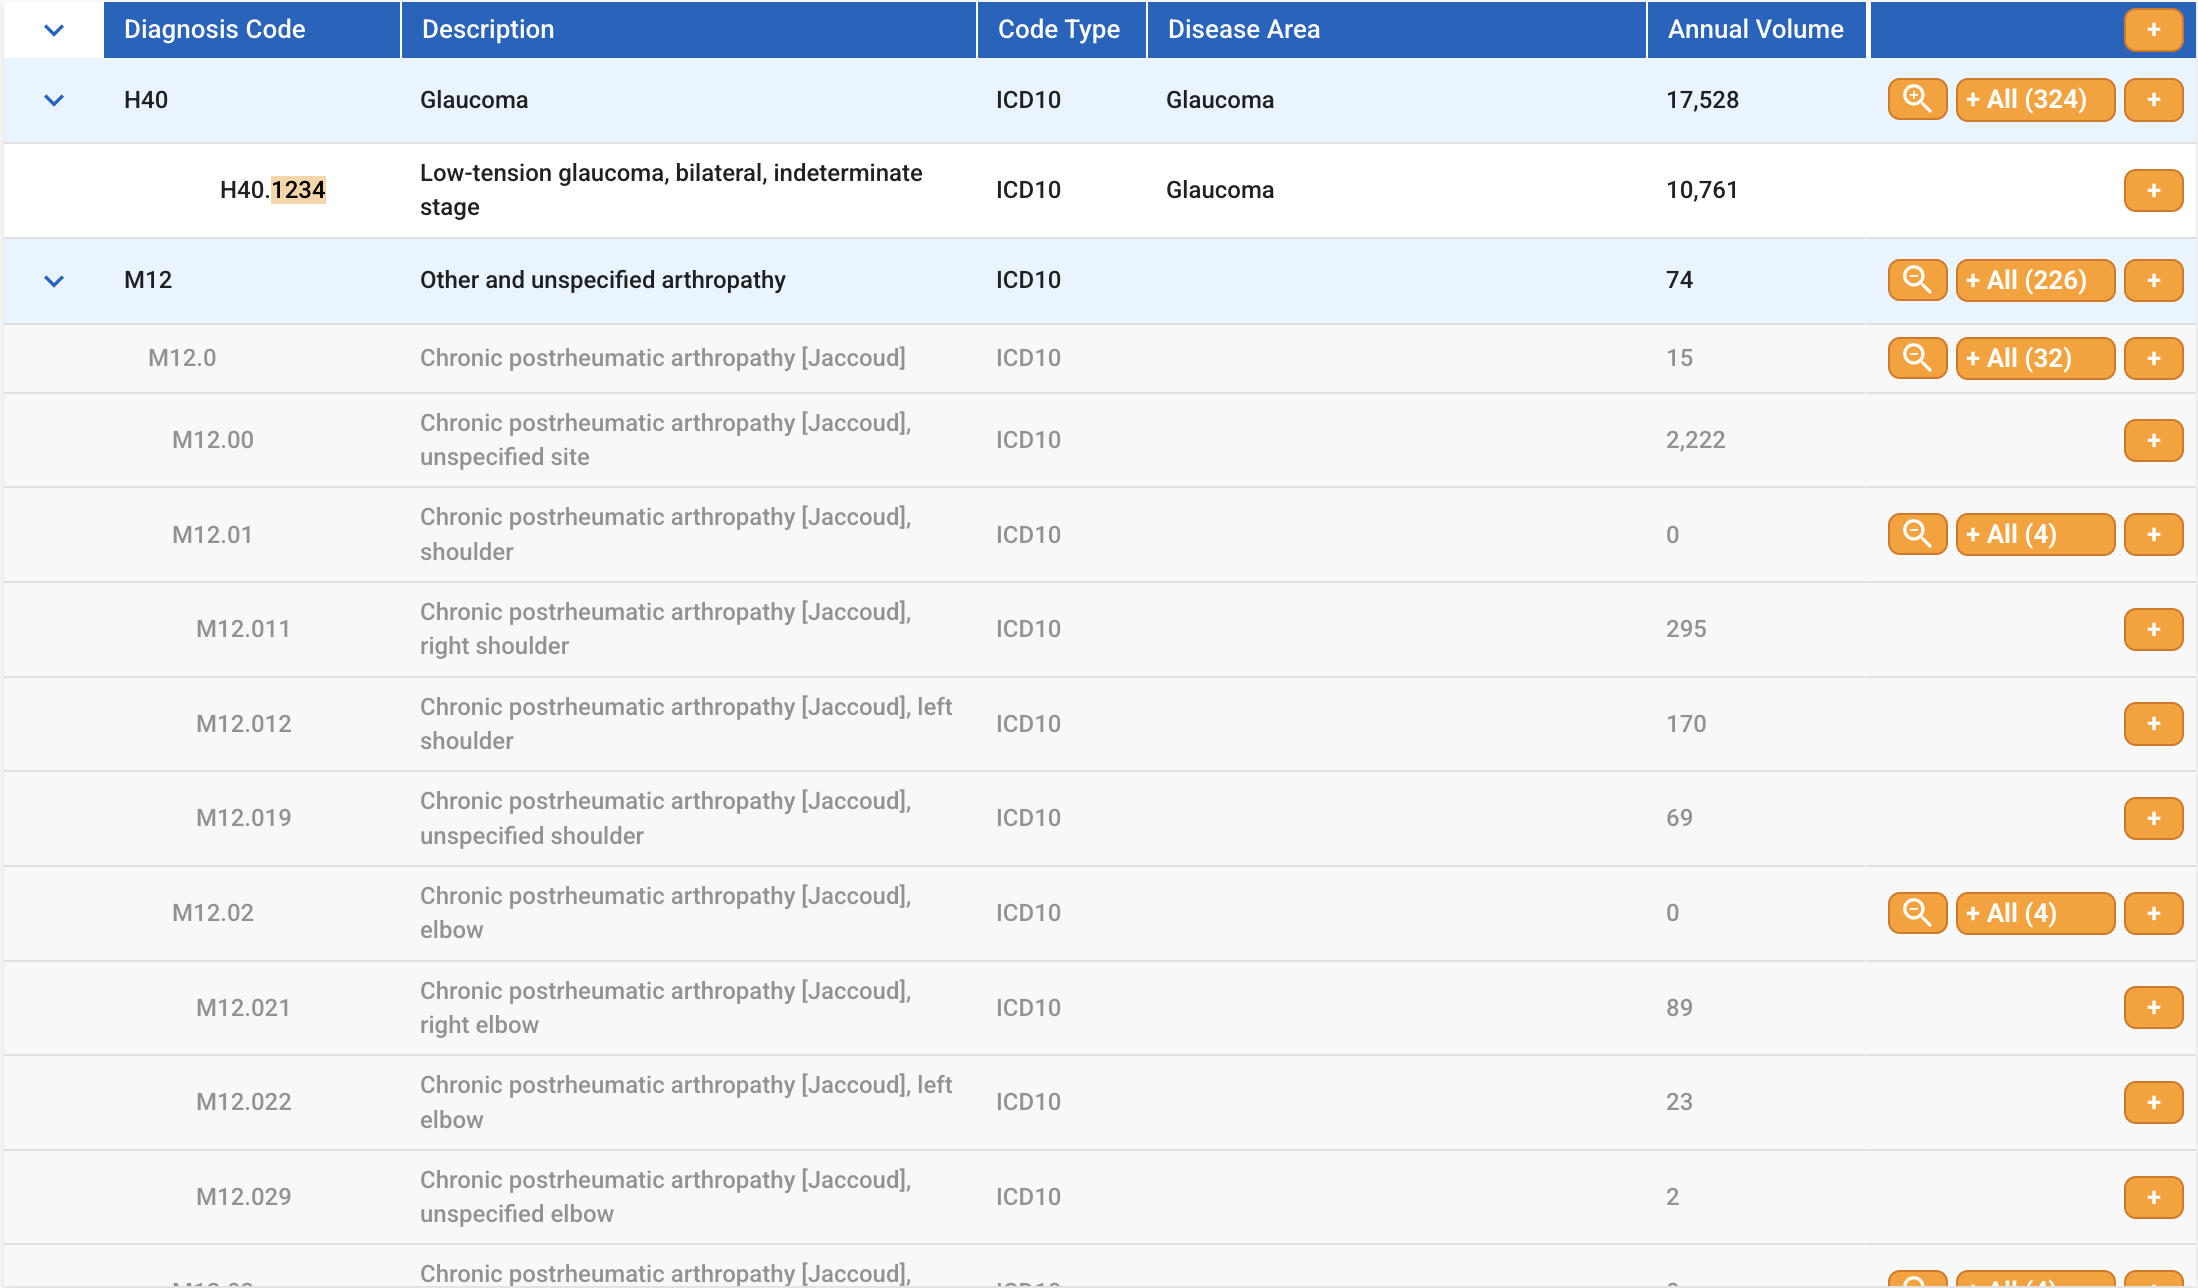
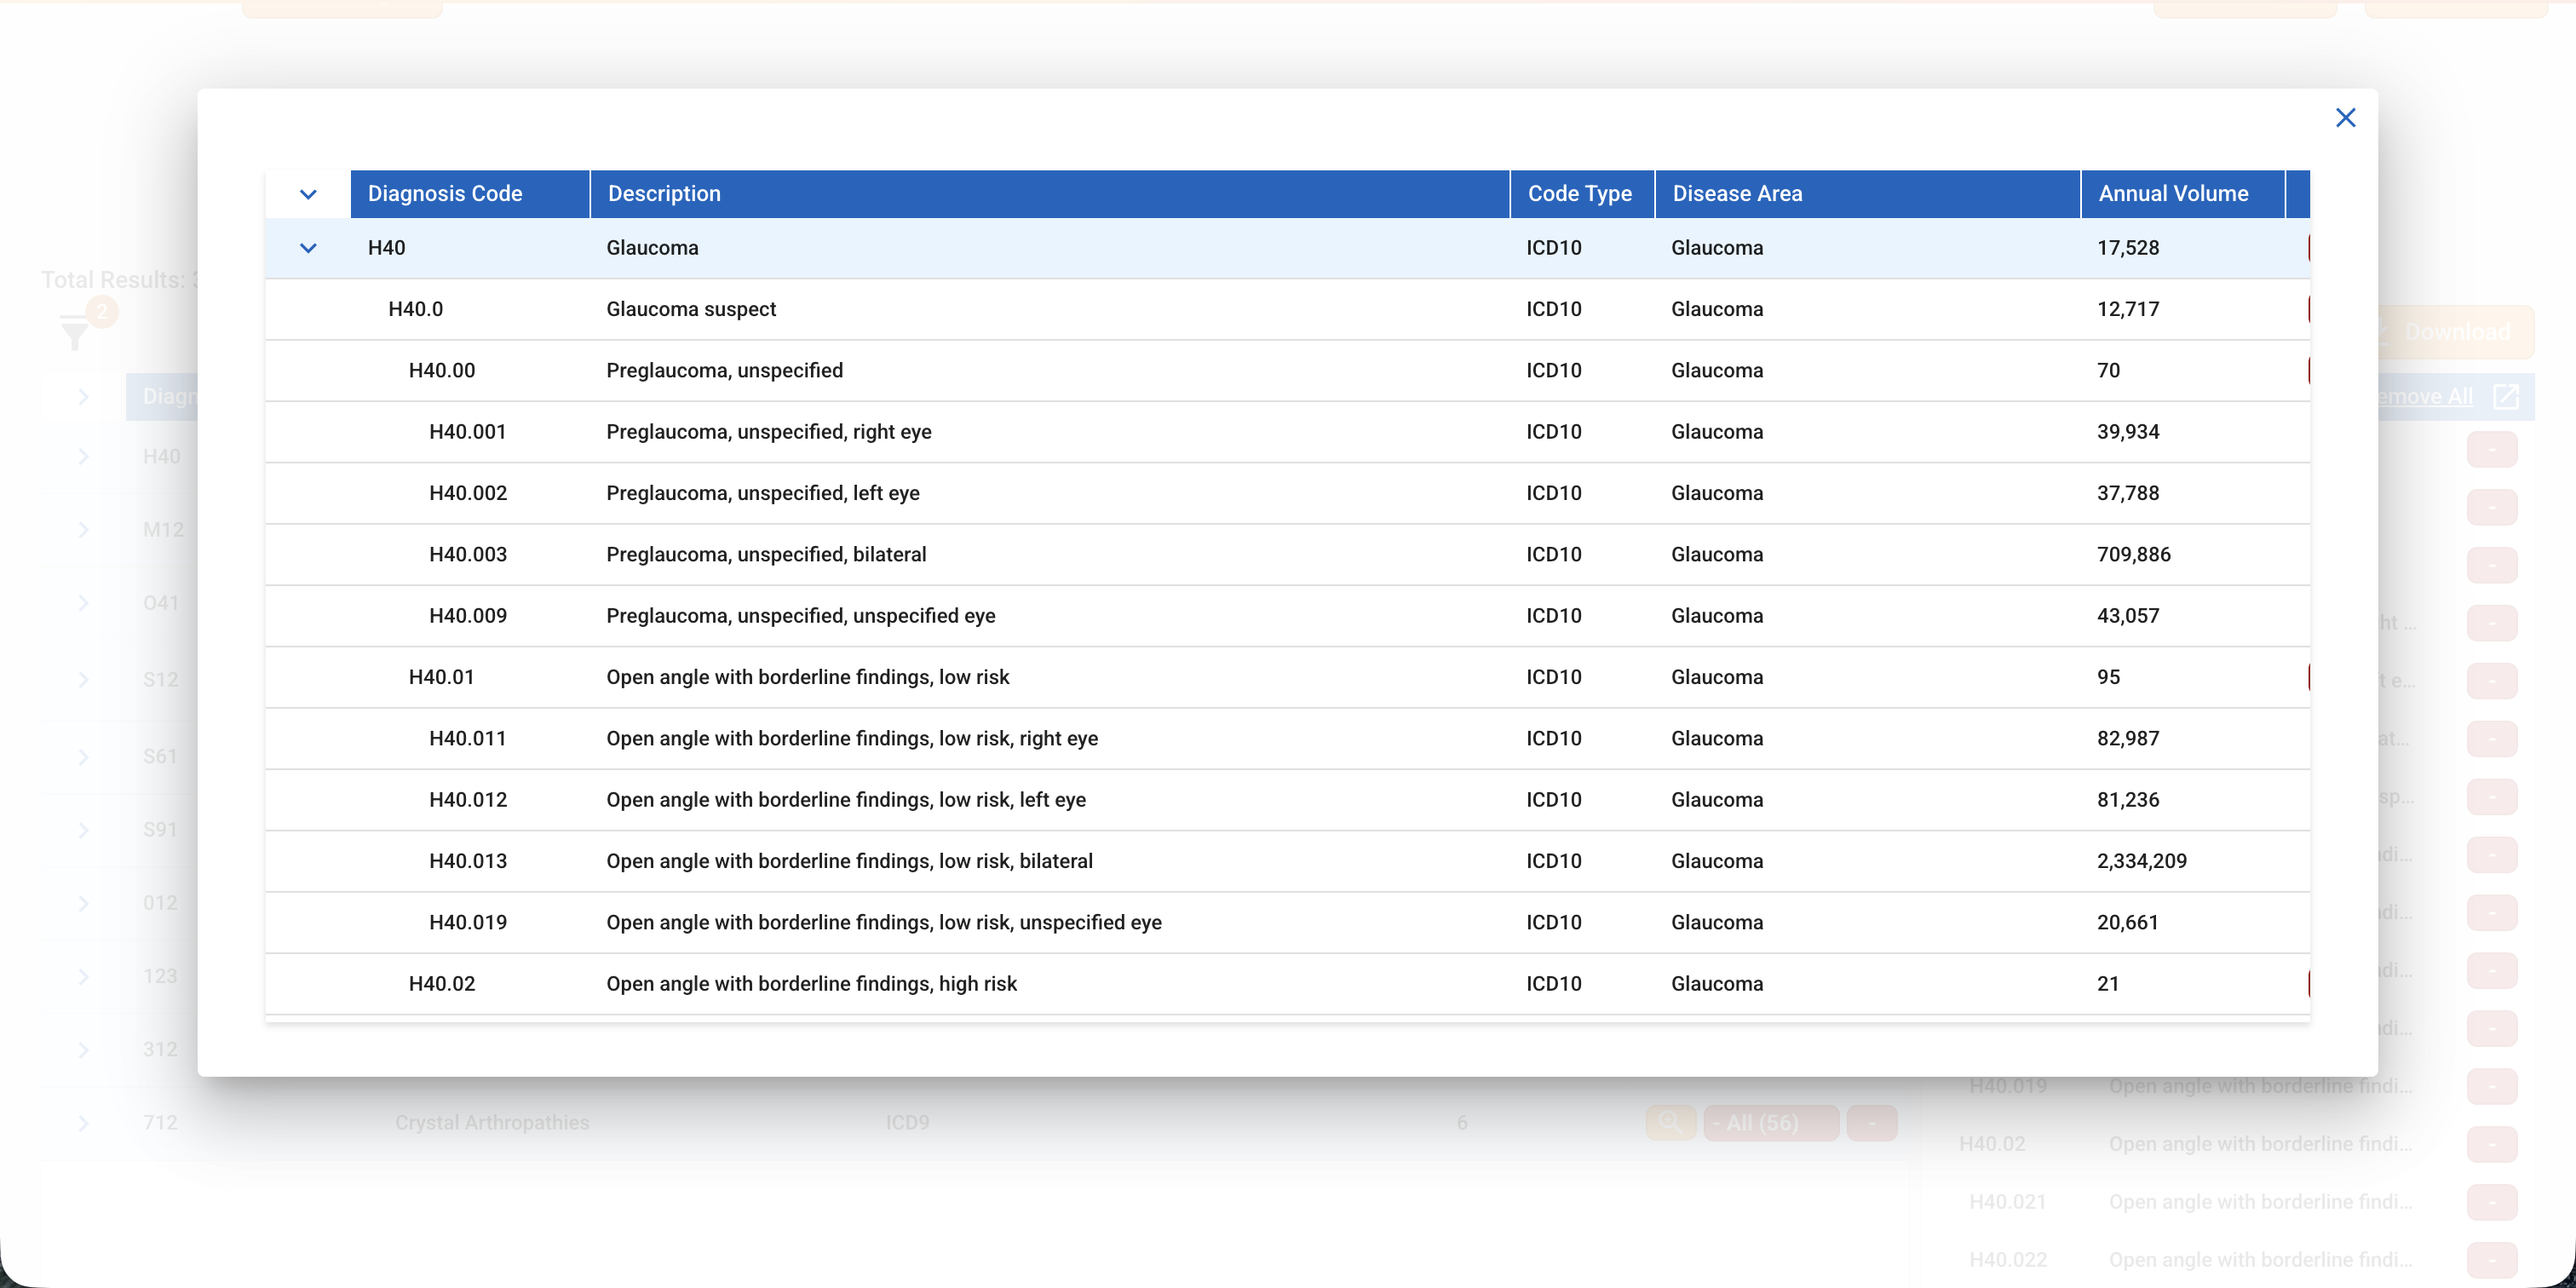
Since only the codes matching the search term and their Level 1 parent are returned with your search, the count on the “+All” button indicates the total number of codes within that hierarchy that will be added. For example, there are 226 total codes in the M12 hierarchy, but a search for “12.34” will only return the code, its Level 1 parent, and any child descendants that contain “12.34”. You may click the search button for a hierarchy to view the full hierarchy.
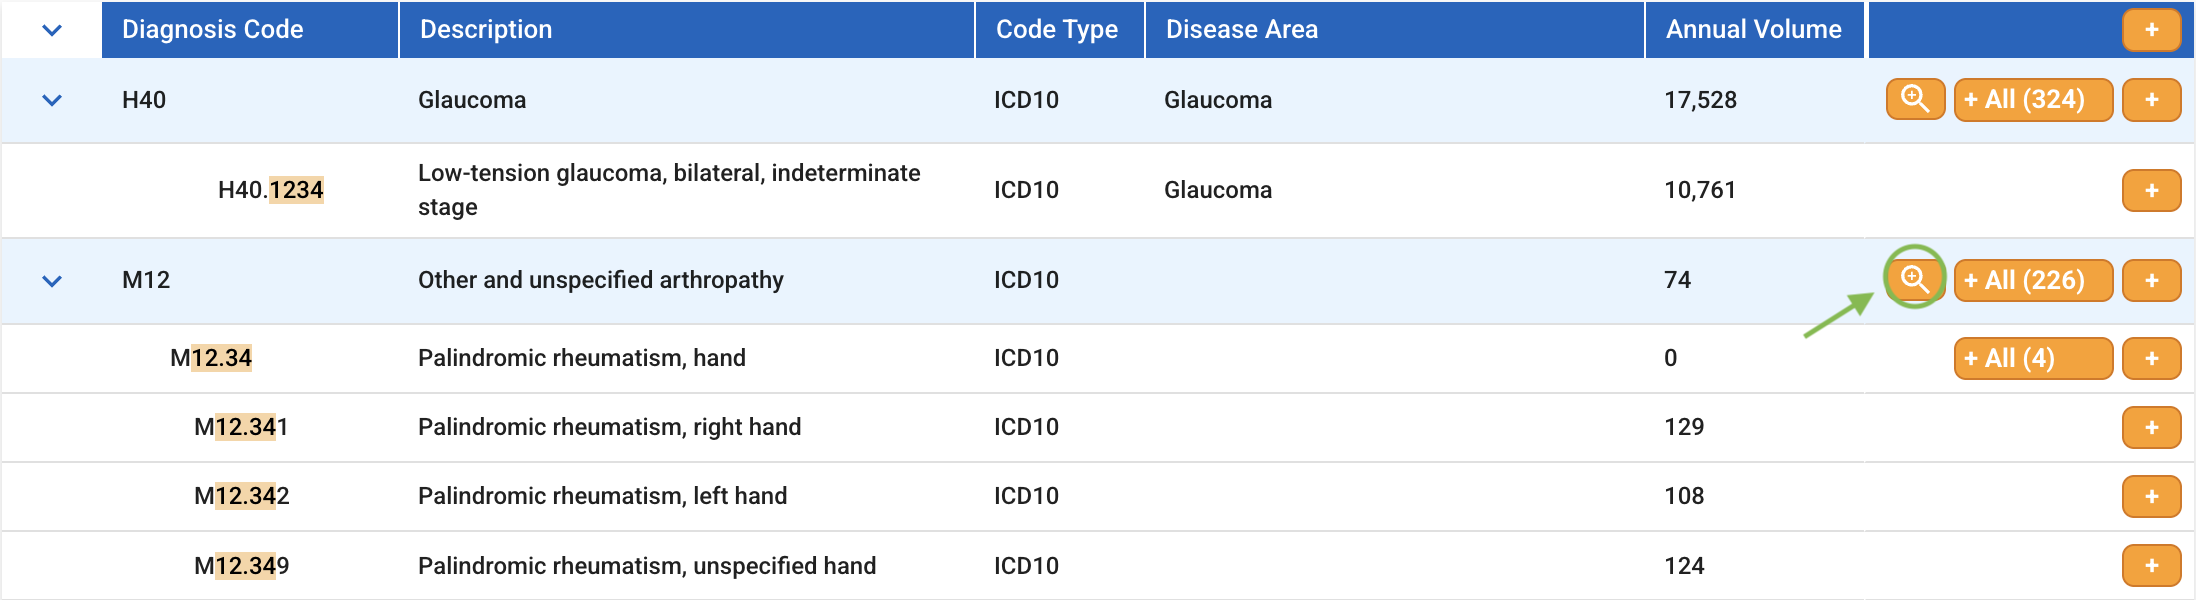
Clicking the search button will expand the results to display the full hierarchy. Child codes that do not match the search term are shaded in grey. All child hierarchies are expanded by default; you can click on the search buttons to expand and collapse hierarchies as you wish.
To add all diagnoses from your search results, click the add all “+” button at the top of the results list. This will add all Diagnoses in the search results, as well as any child descendants that belong to the codes in the search results.
The Added Diagnoses pane will display all the diagnosis codes that you have added to your qualification criteria. To view the details of your added diagnoses (description, code type, etc.), click on the Expand button in the upper-right corner. From the expanded Added Diagnoses pane, you can scroll to view all added diagnoses. Click on the Collapse button to close.

You can remove individual diagnosis codes from your qualification criteria by clicking the “-“ button next to a code from the Added Diagnoses pane or within the Code Searcher. To remove an entire diagnosis hierarchy, click the “- All” button on a hierarchy row; this can be done in Code Searcher or the expanded Added Diagnoses pane. You may also remove all codes by clicking the “Remove All” link in the Added Diagnoses pane.
Diagnosis Exact Match Searching
To perform an exact match search in the Diagnosis Code Searcher, click the Search Type dropdown on the left side of the search bar and select Exact Match.
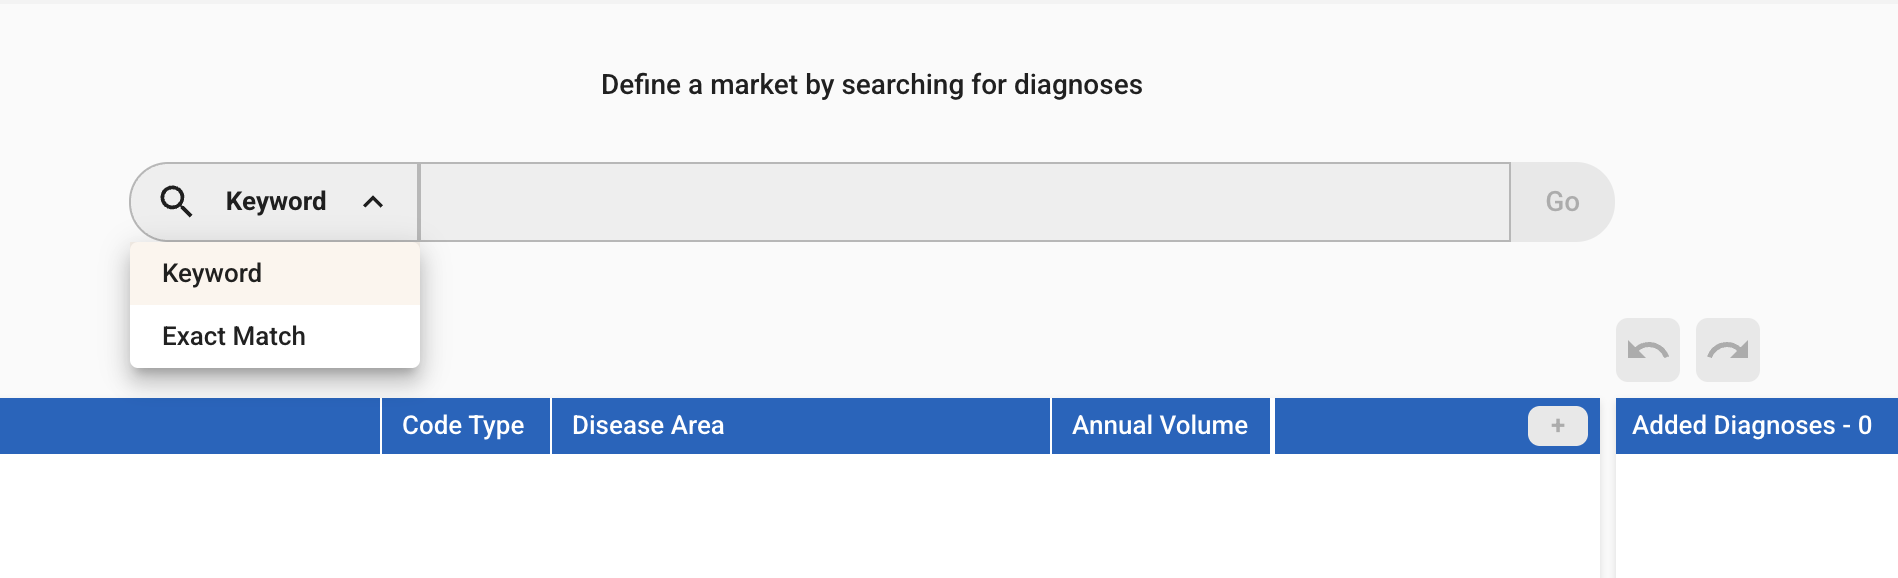
In the Exact Match popover, select the checkbox(es) for the specific attribute(s) you want to match against. In the Diagnosis Code Searcher, you can match against:
- Diagnosis Code
- Description
- Disease Area
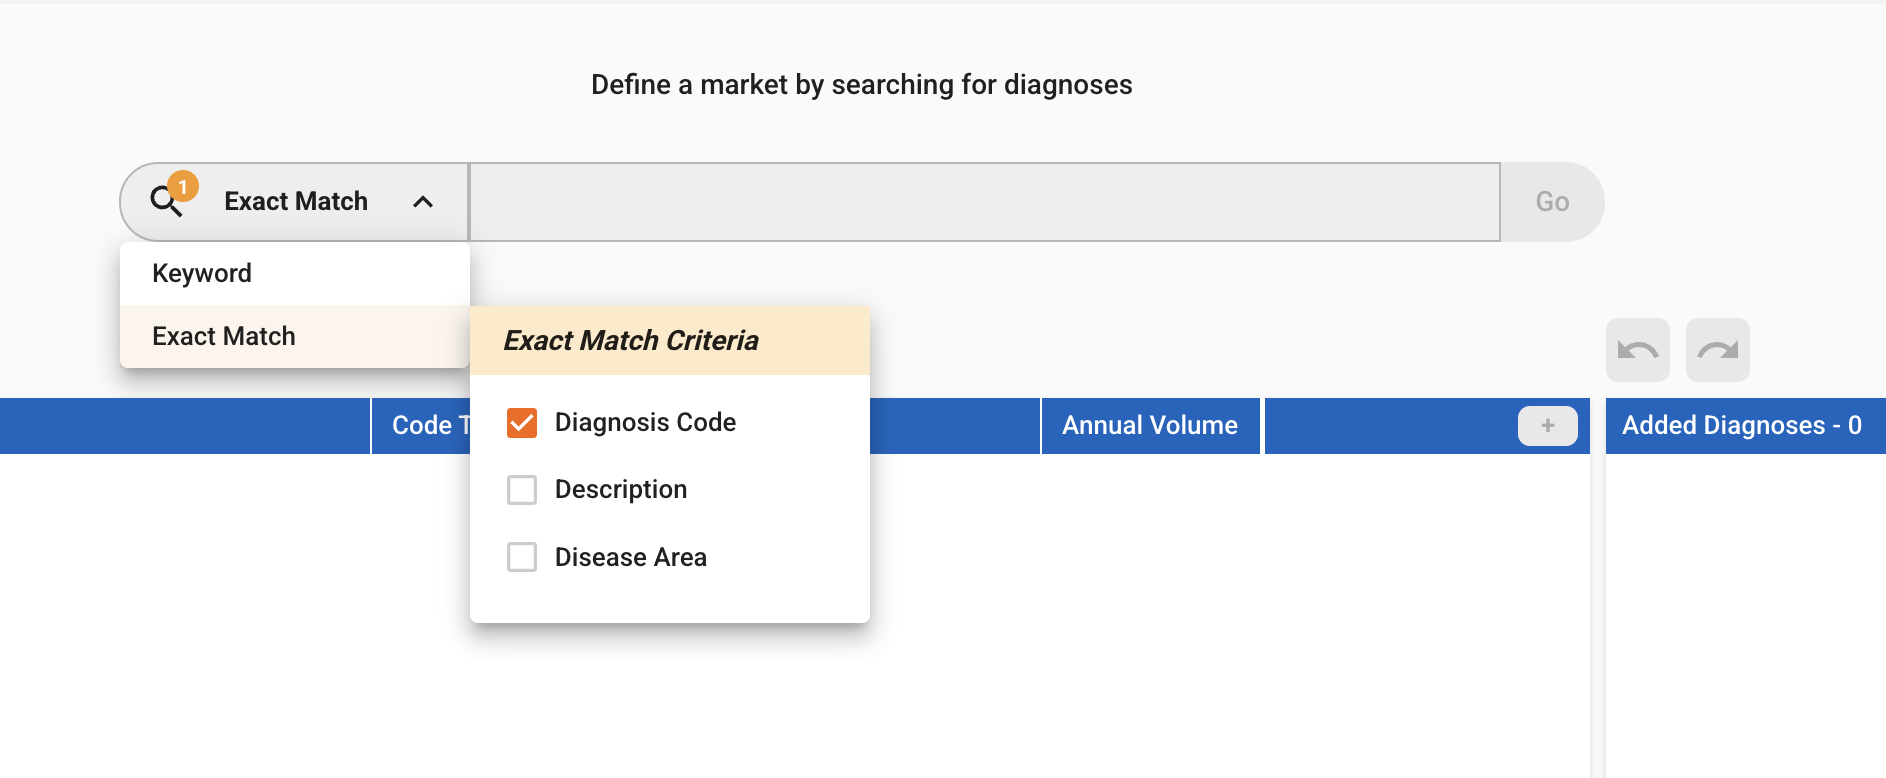
After selecting the criteria you want to match against, enter your search terms and click Go (or press Enter). The search evaluates all selected criteria and returns results matching at least one of them.
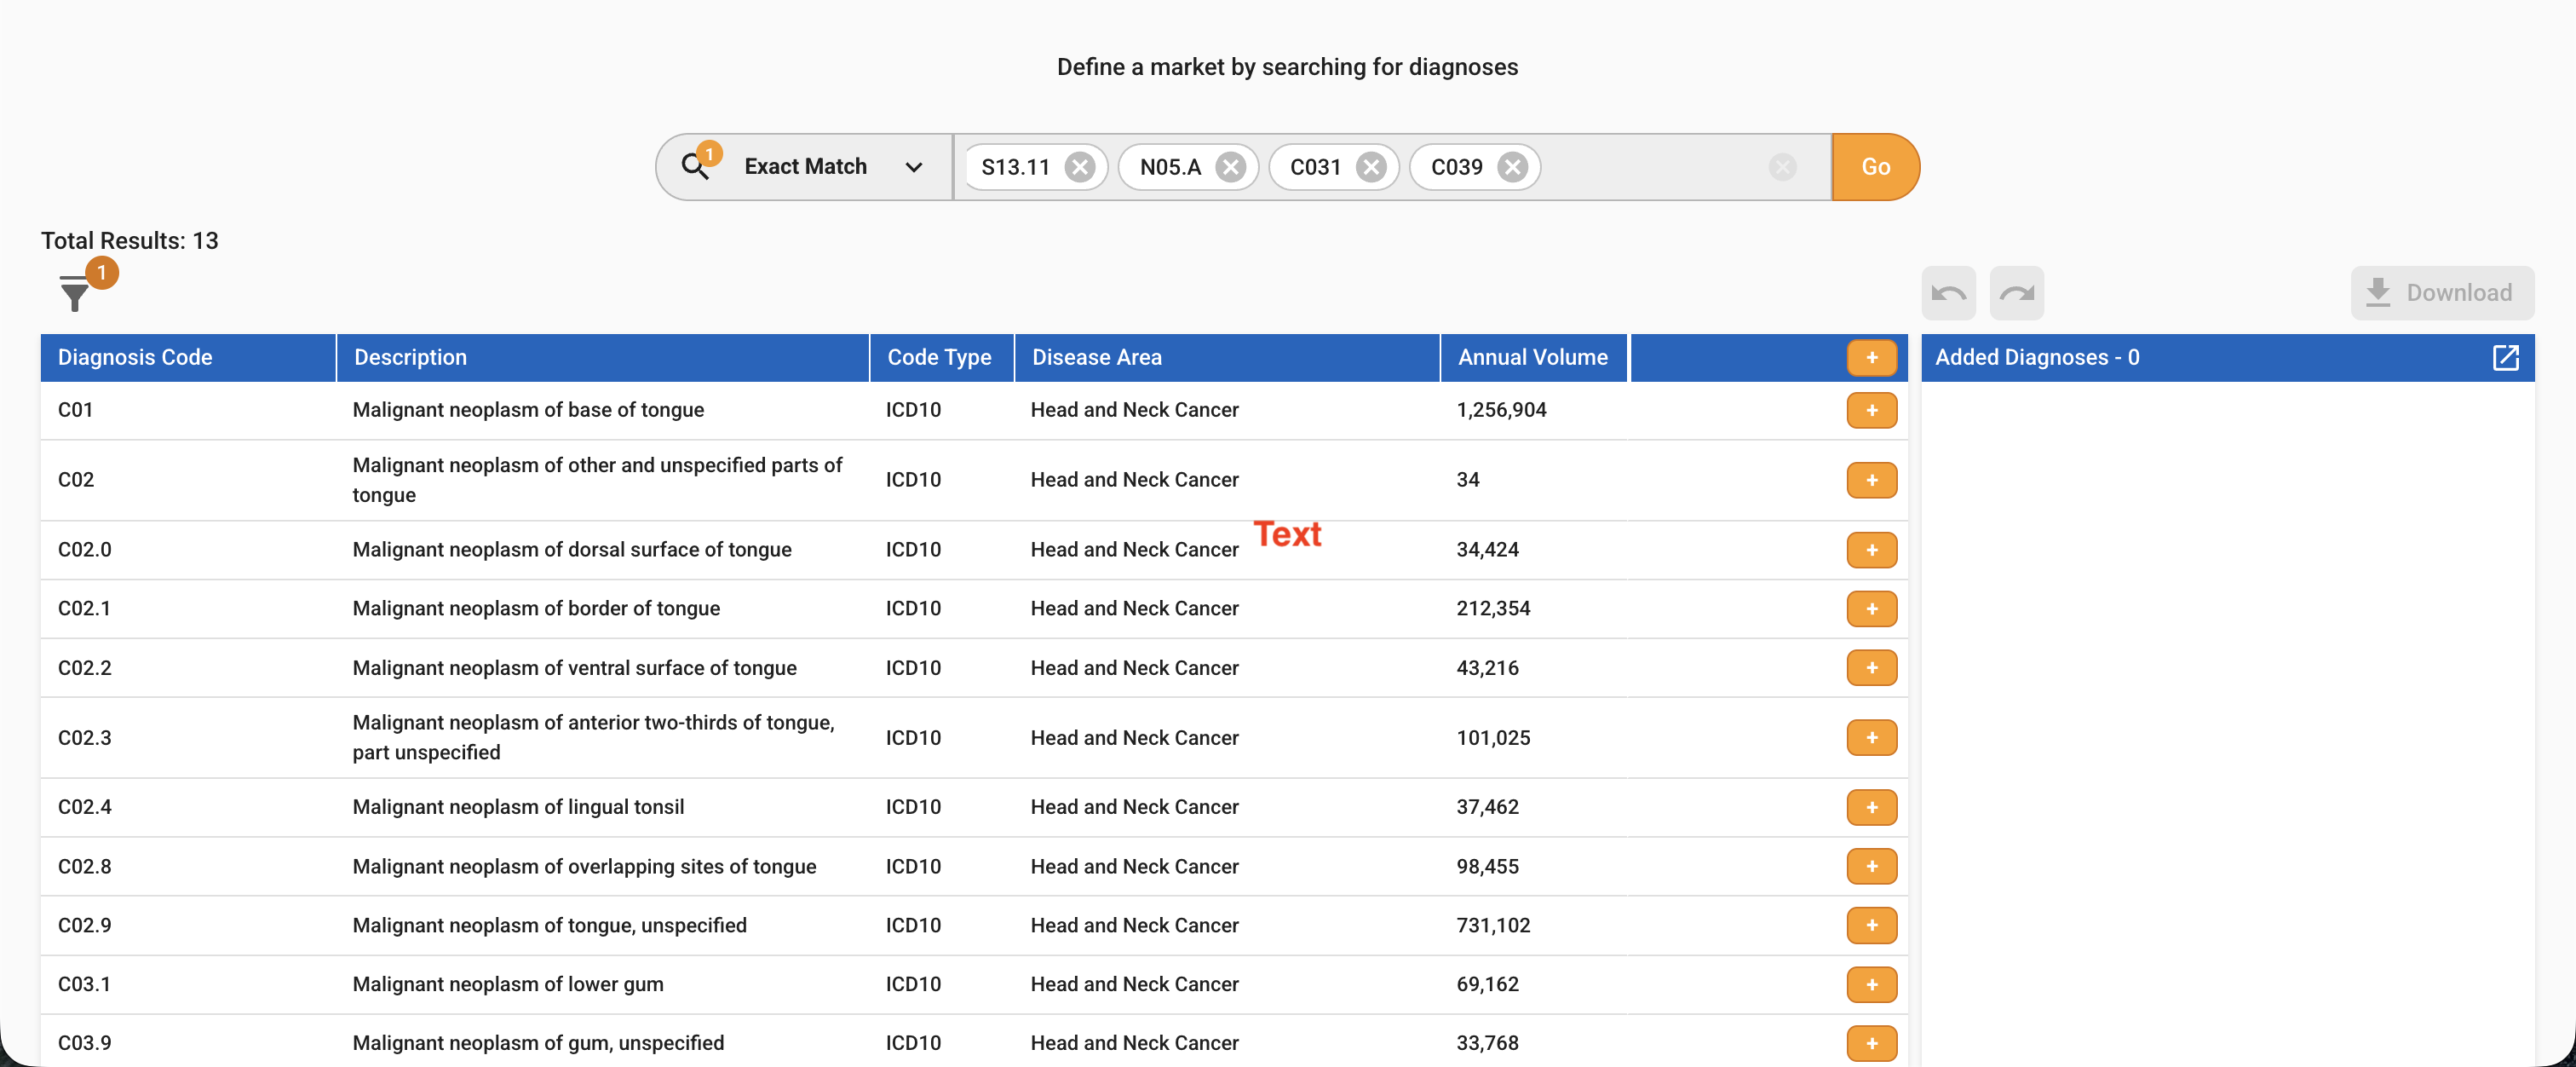
Search results are displayed in alphabetical order, A-Z, by Diagnosis Code. Unlike Keyword searches, exact match searches do not group results by their parent level 1 code. The parent level 1 code will not be included in the results unless it also meets the selected exact match criteria.
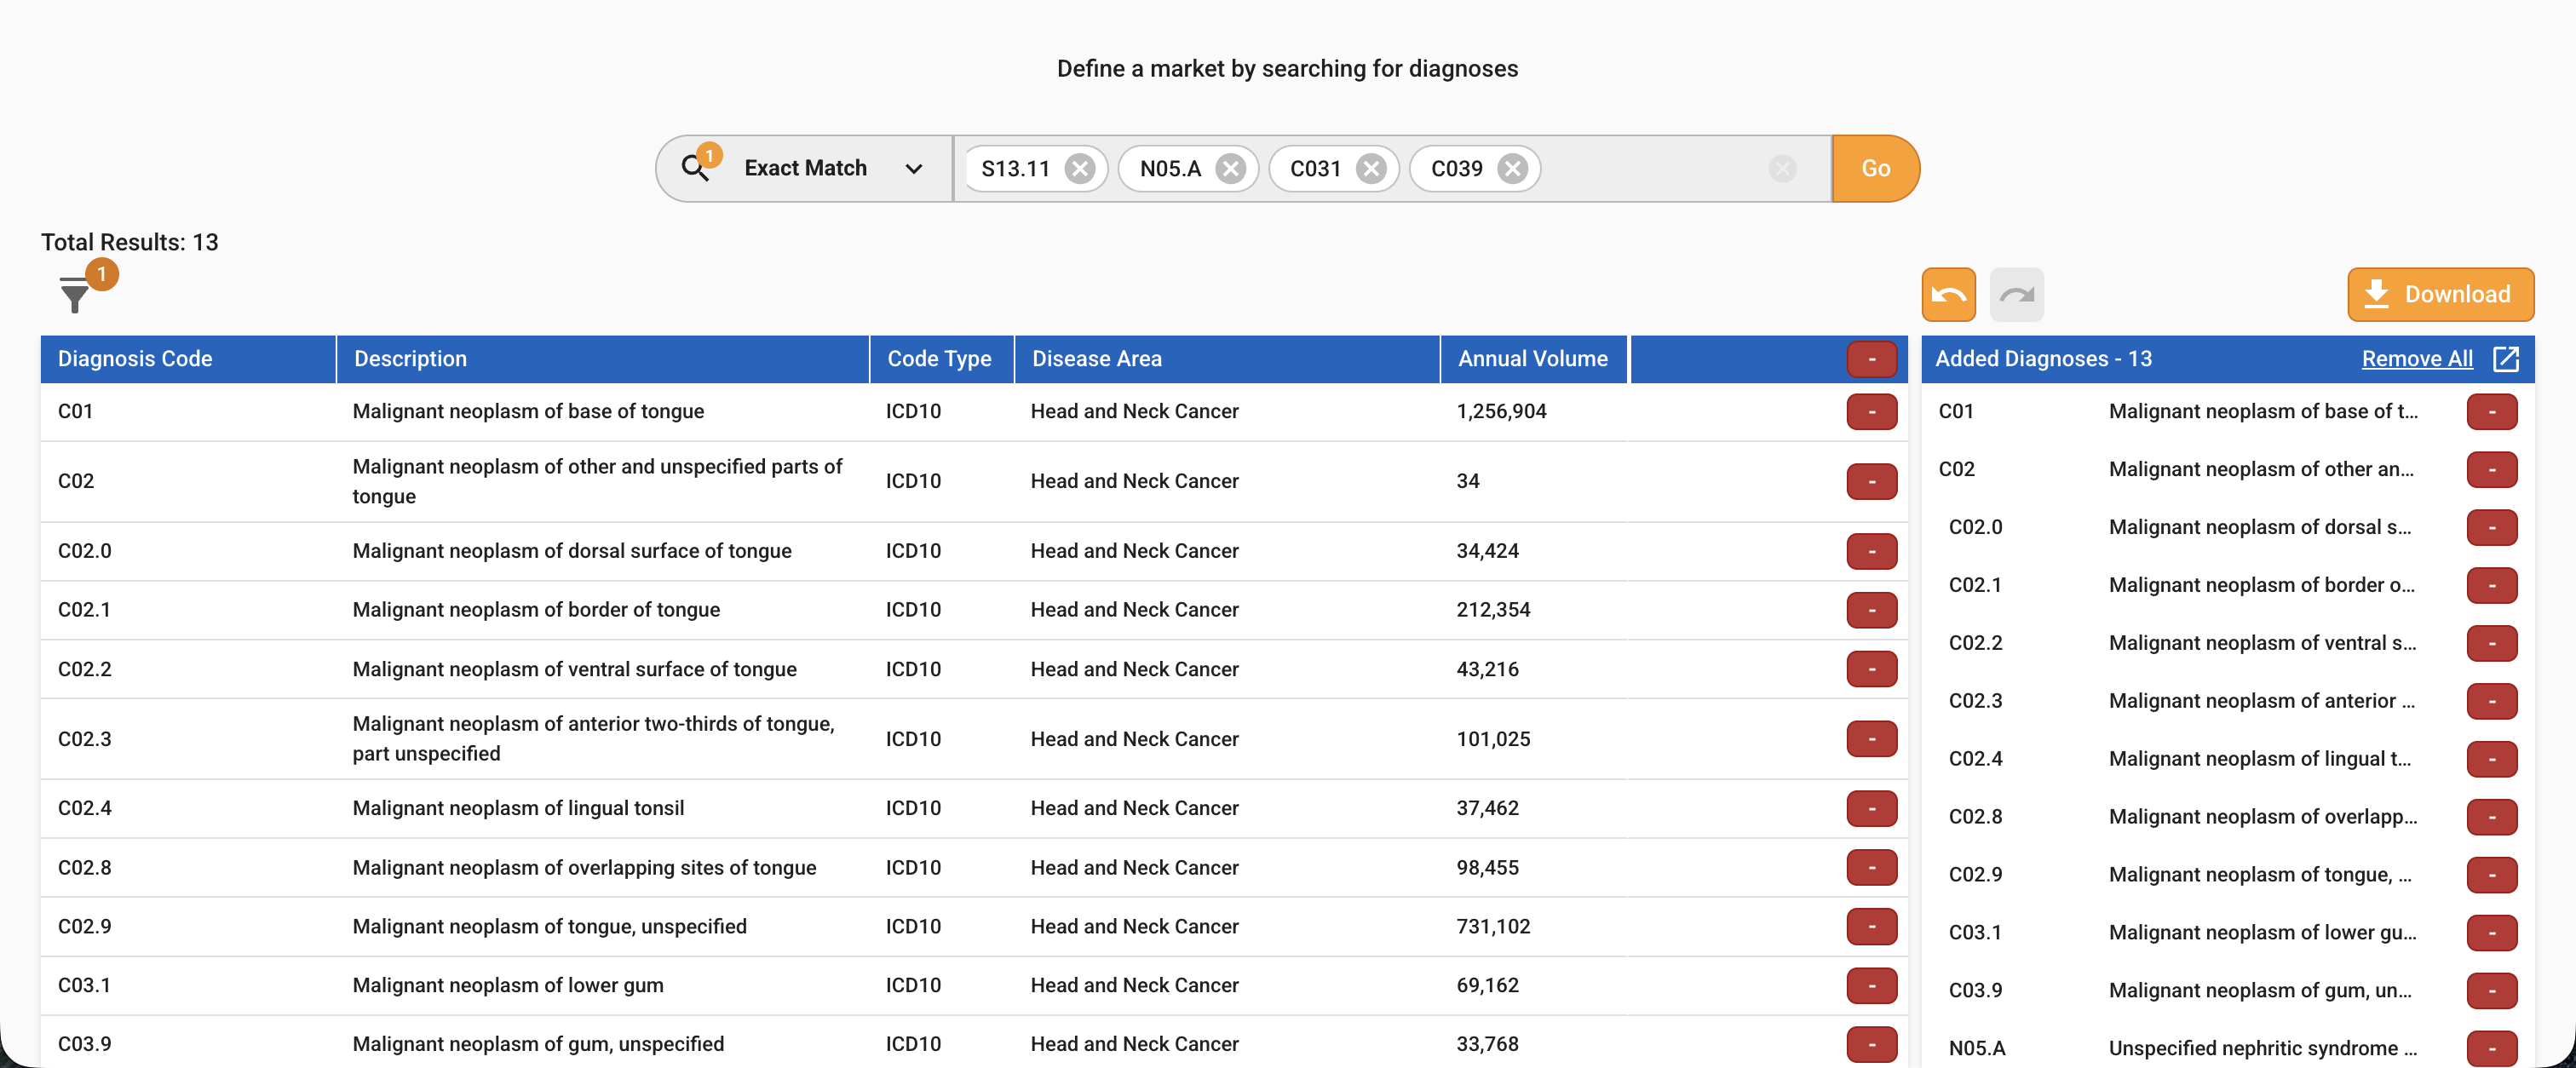
You can add items to the Added Diagnoses pane by clicking the “+” button on an individual diagnosis row, or by clicking the “Add All” button in the top-right corner of the results table. In the Added Diagnoses pane, items are automatically grouped by their level 1 parent for ease of organization.
Procedures
Procedure Keyword Searching
When searching for procedures, the search will locate procedures that match your search term for the following fields: procedure code and description. Note that CPT codes must be searched on by their procedure code, and cannot be searched on by description. Matching results will be alpha-sorted A-Z by default.
The details of each procedure code (procedure code, description, code type, annual volume) will be displayed in the Code Searcher. Description will be blank for CPT codes. Use the bottom scroll bar to view additional columns.
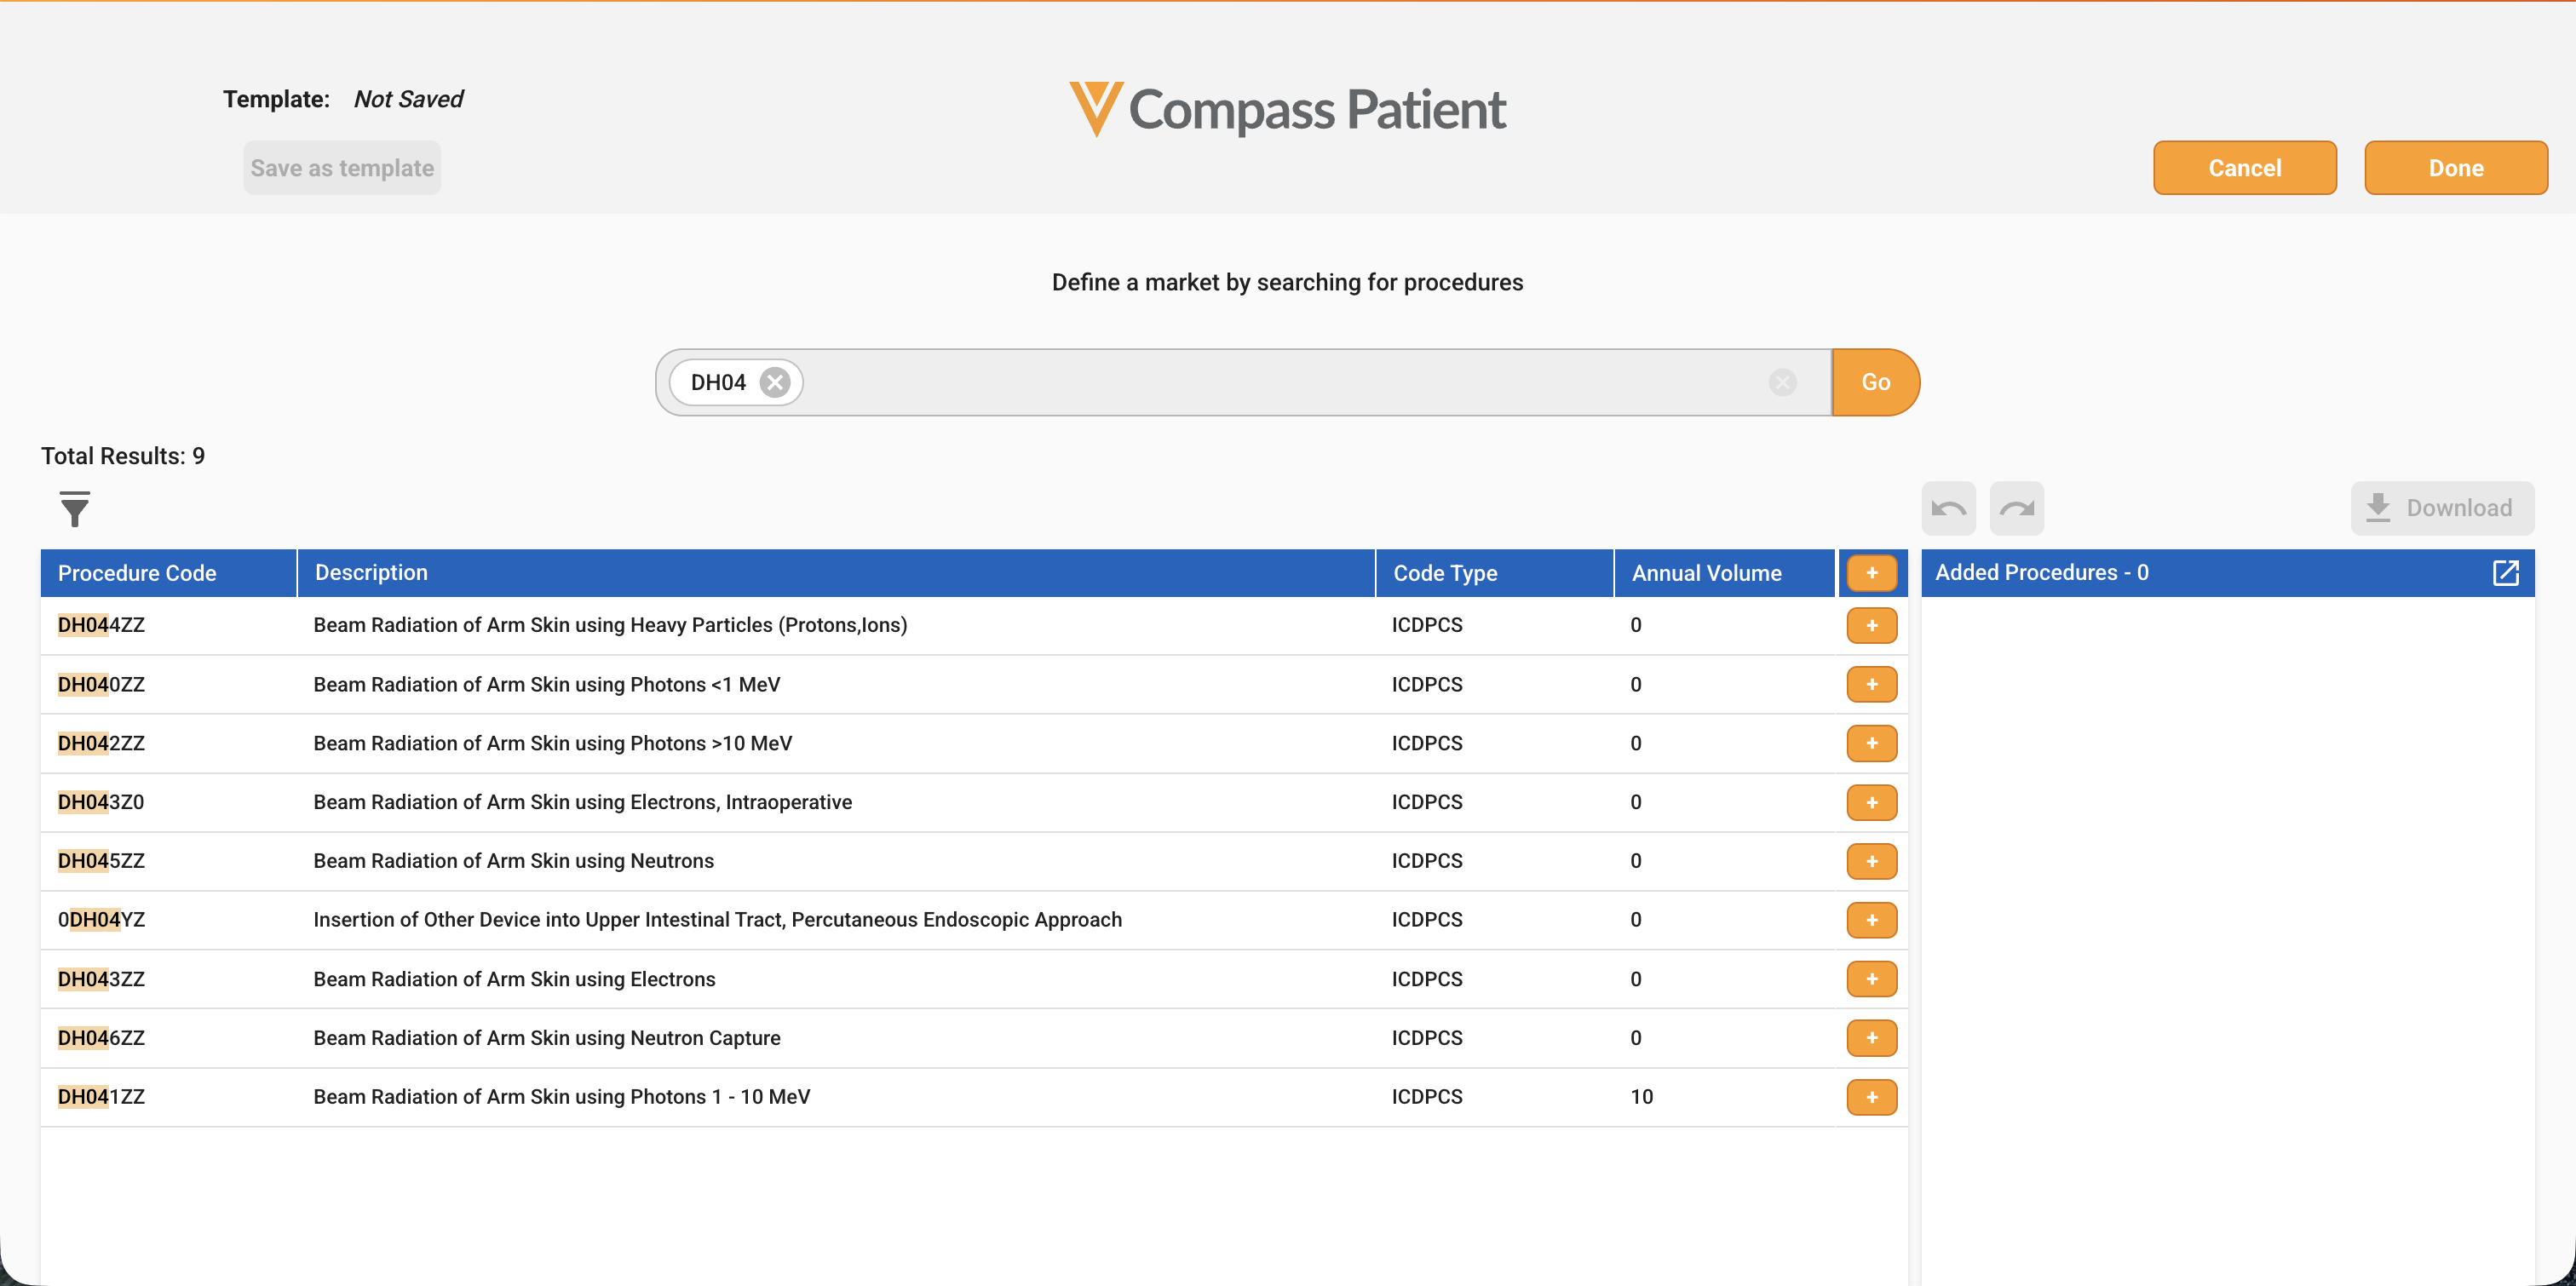
The filter button allows you to further filter your diagnosis codes by code type. By default, no filters are applied to procedure code searches.
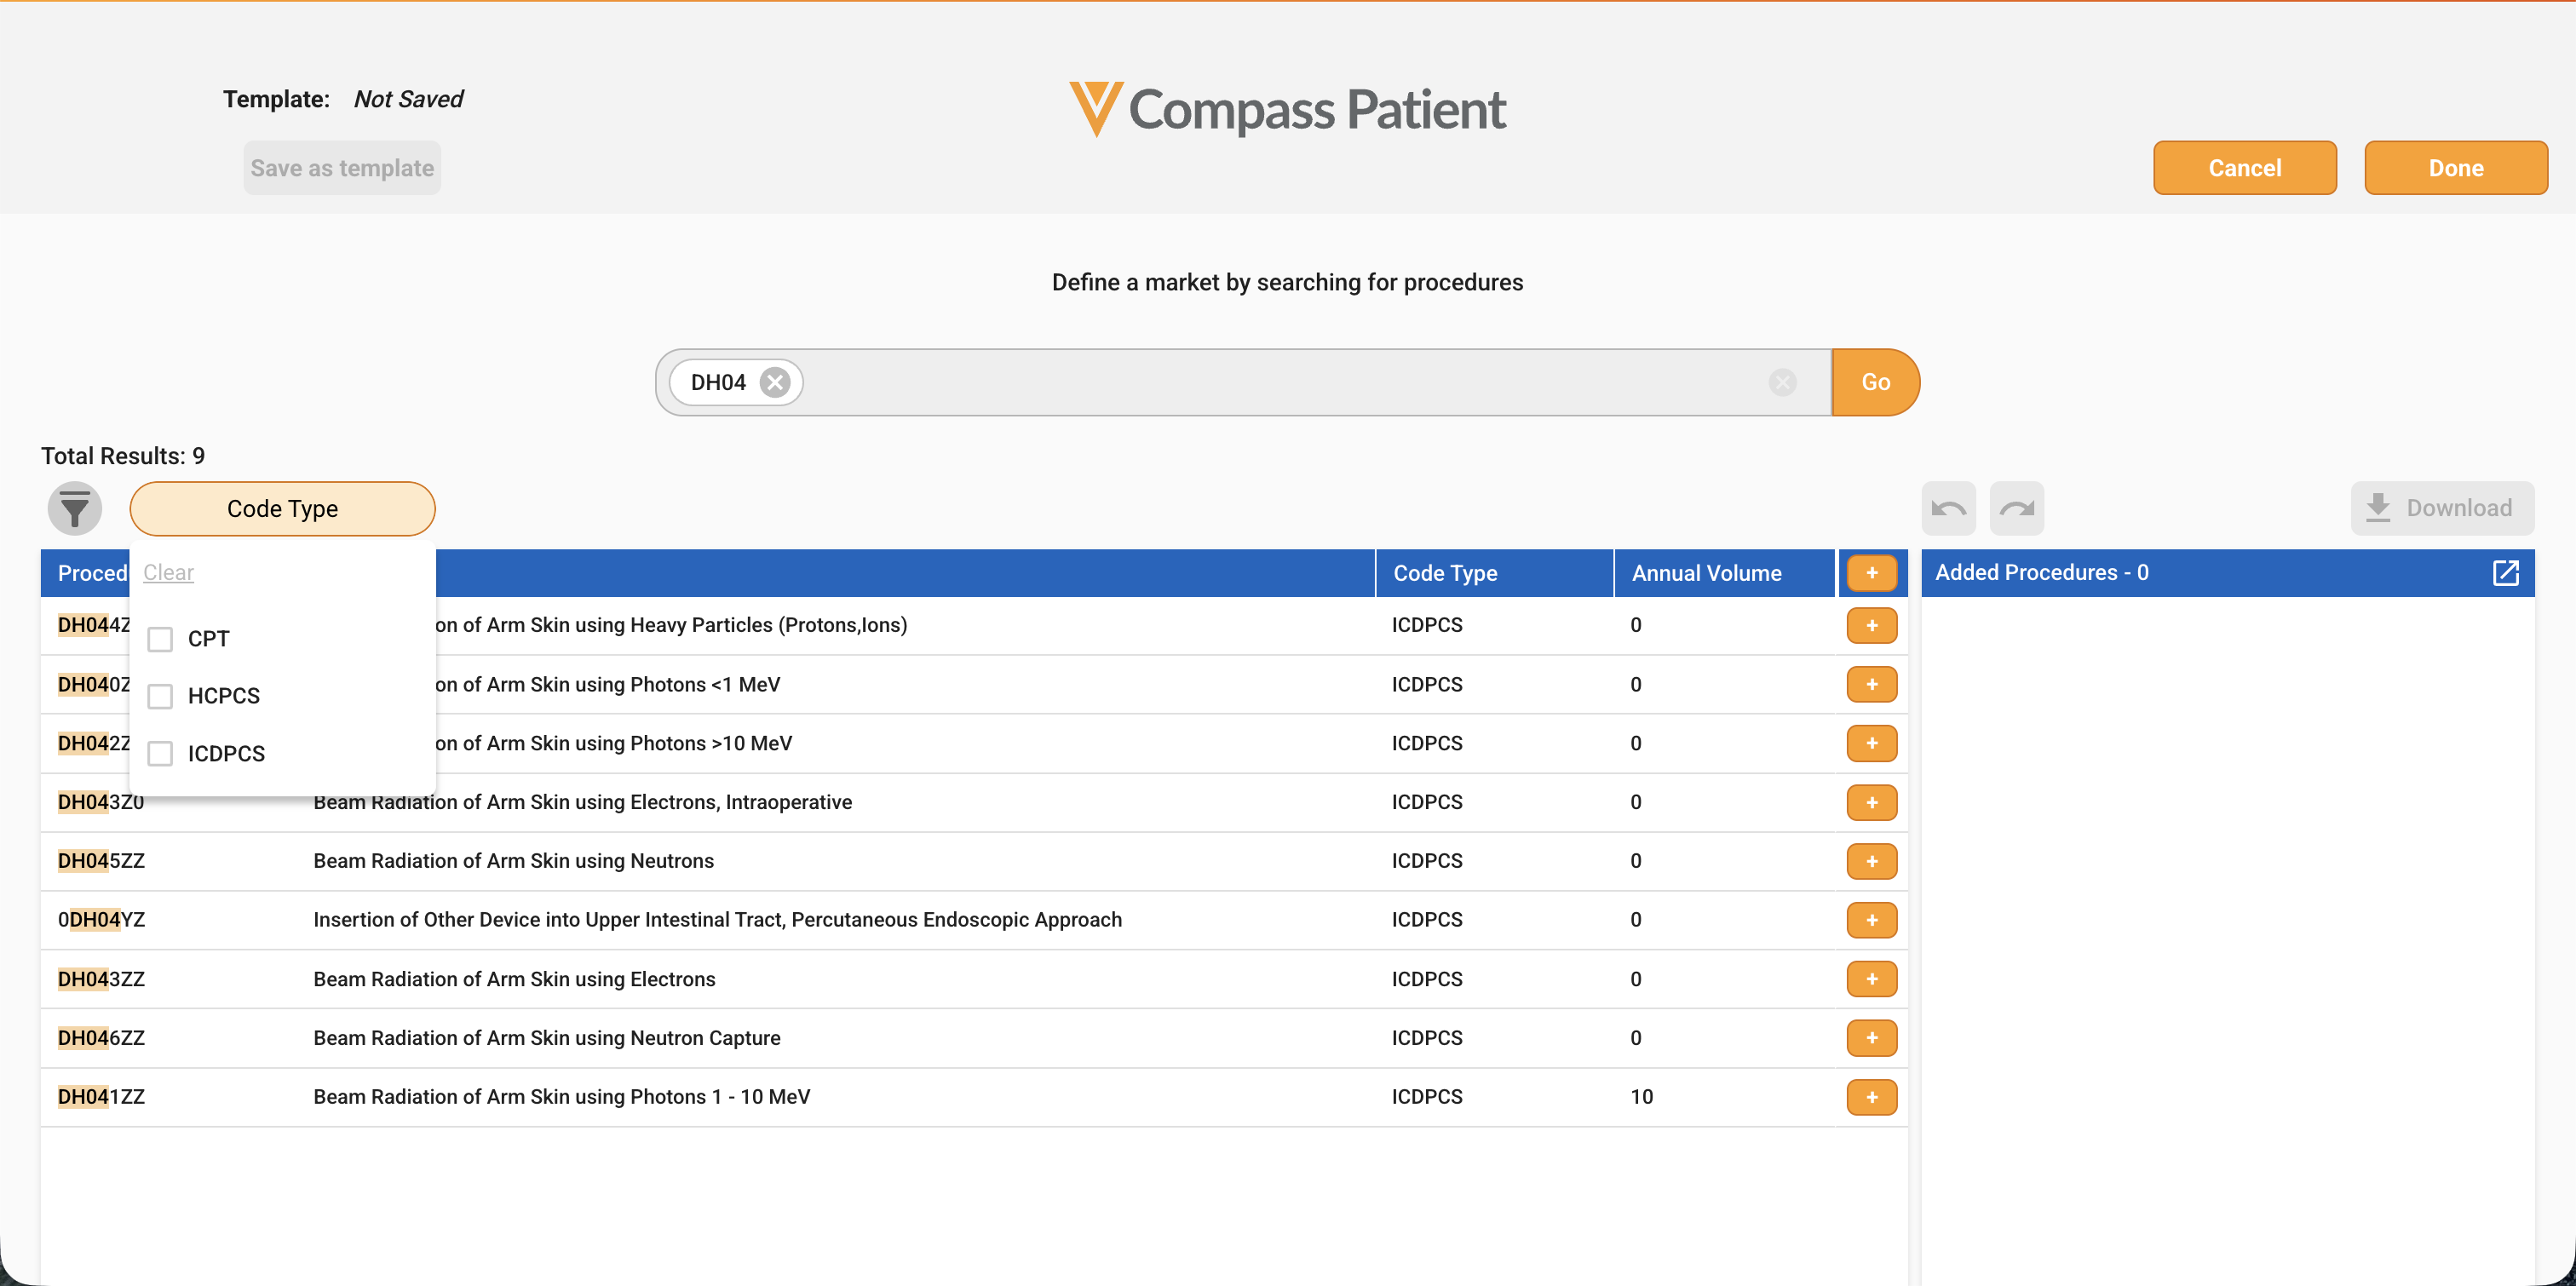
Clicking on the checkbox next to the filter will apply that filter to the returned procedure codes; the total results count and results table will update in real-time to reflect applied filters.
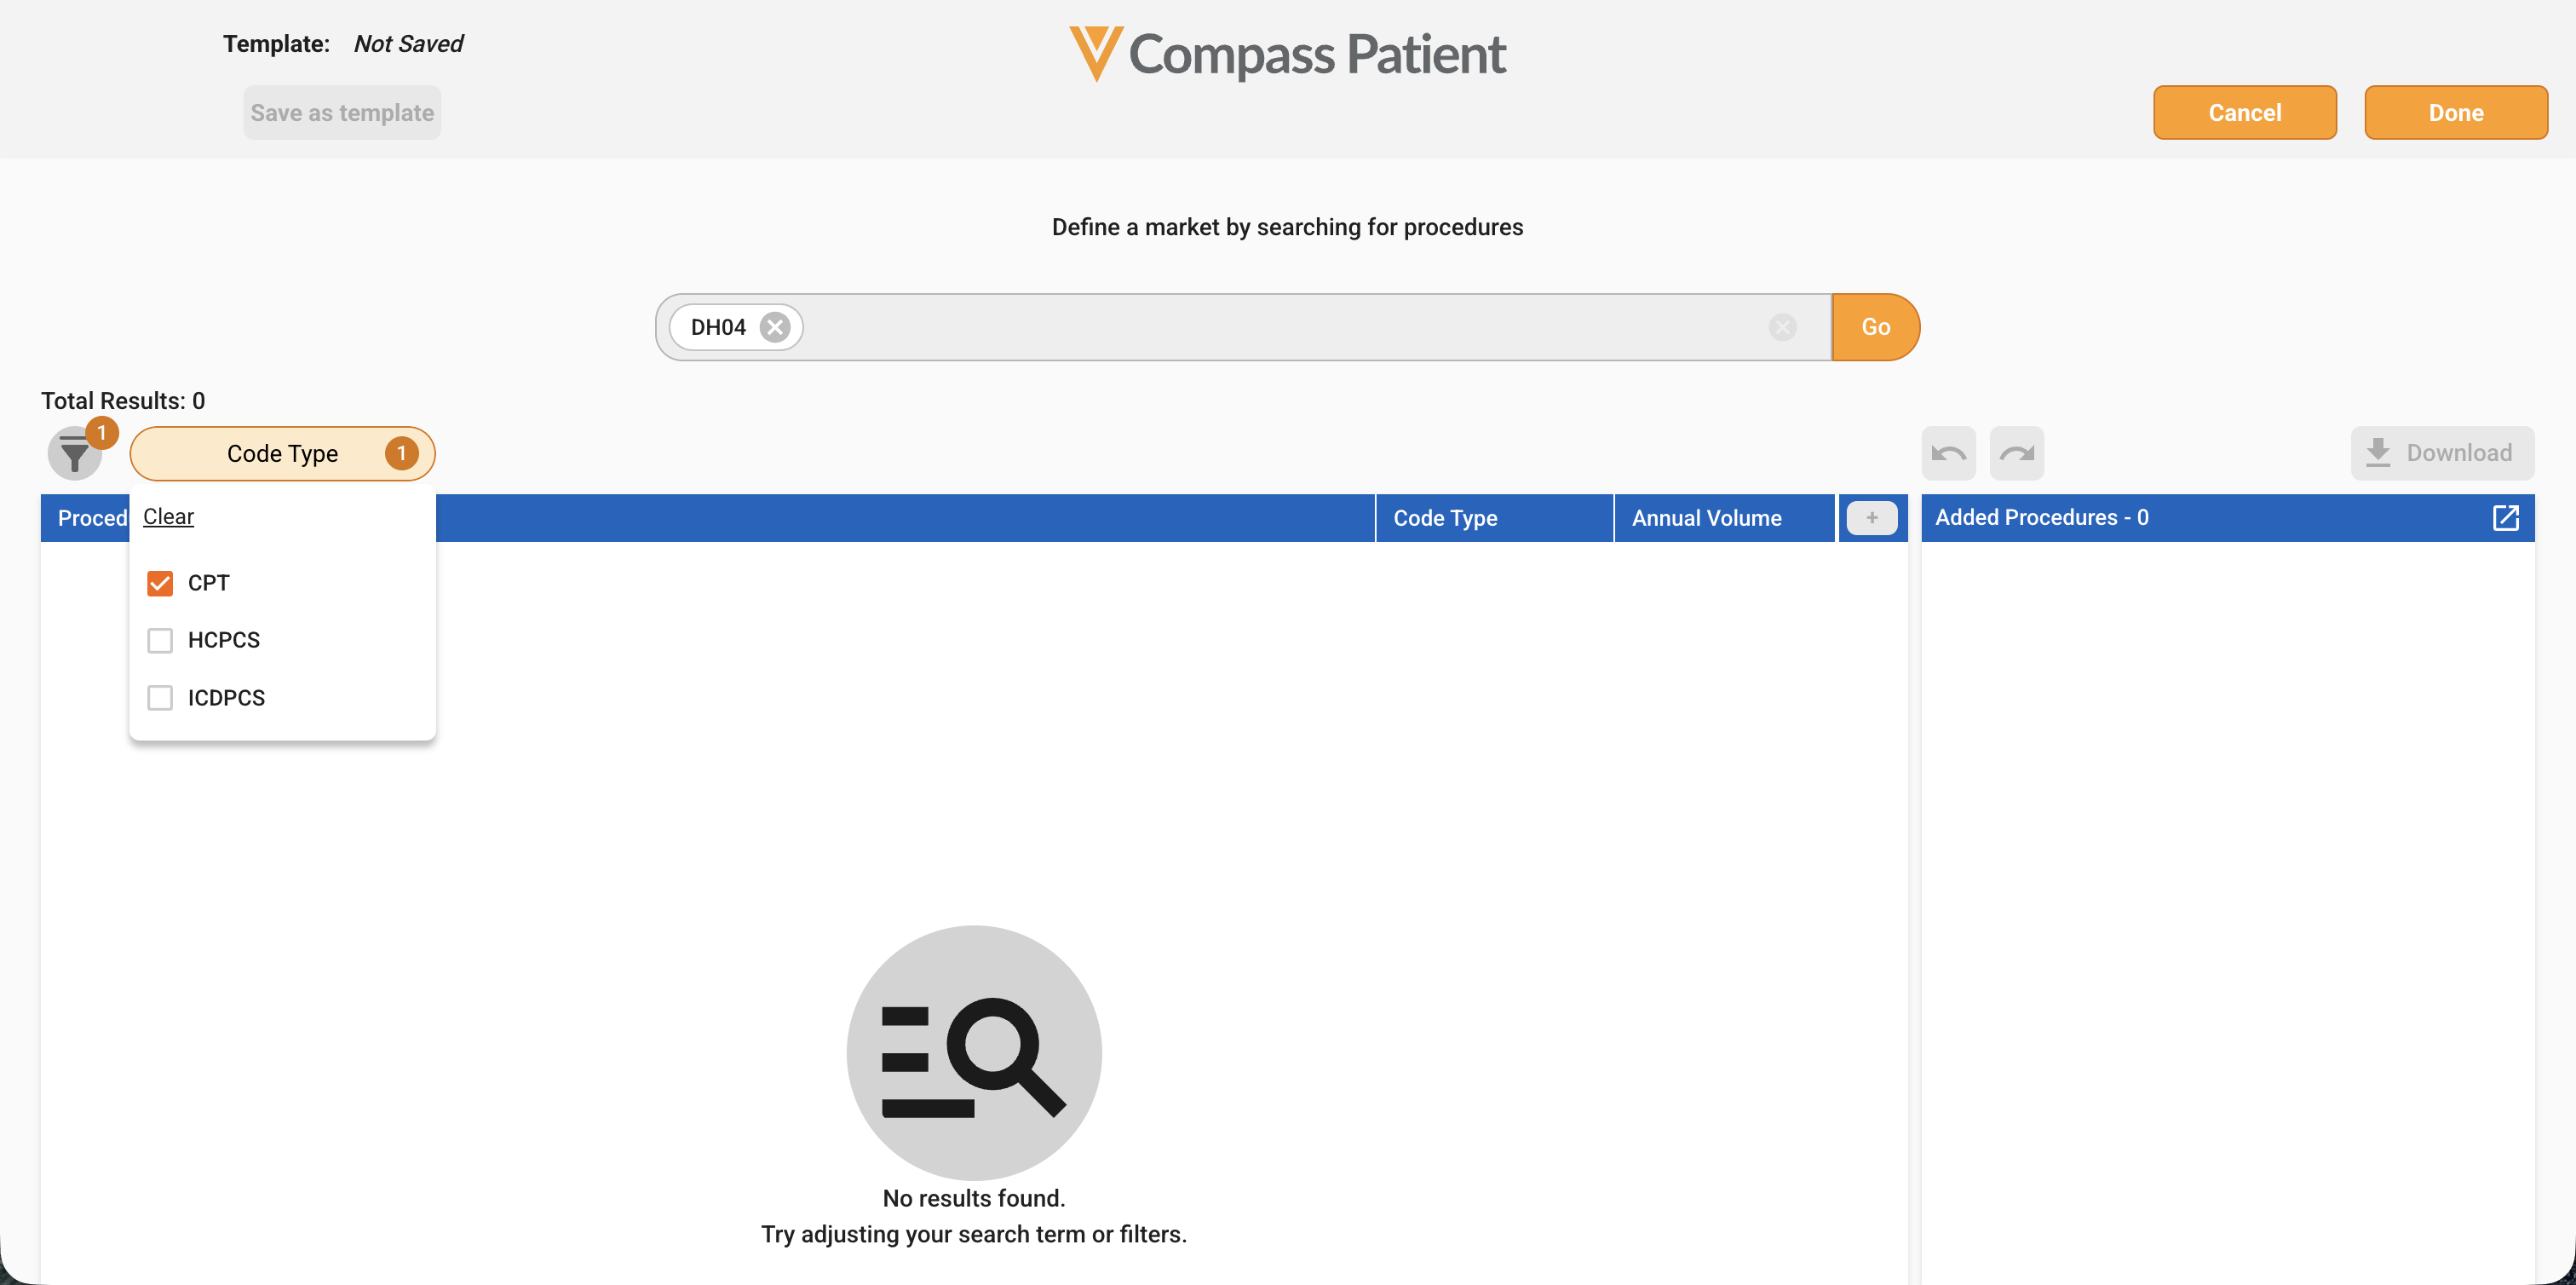
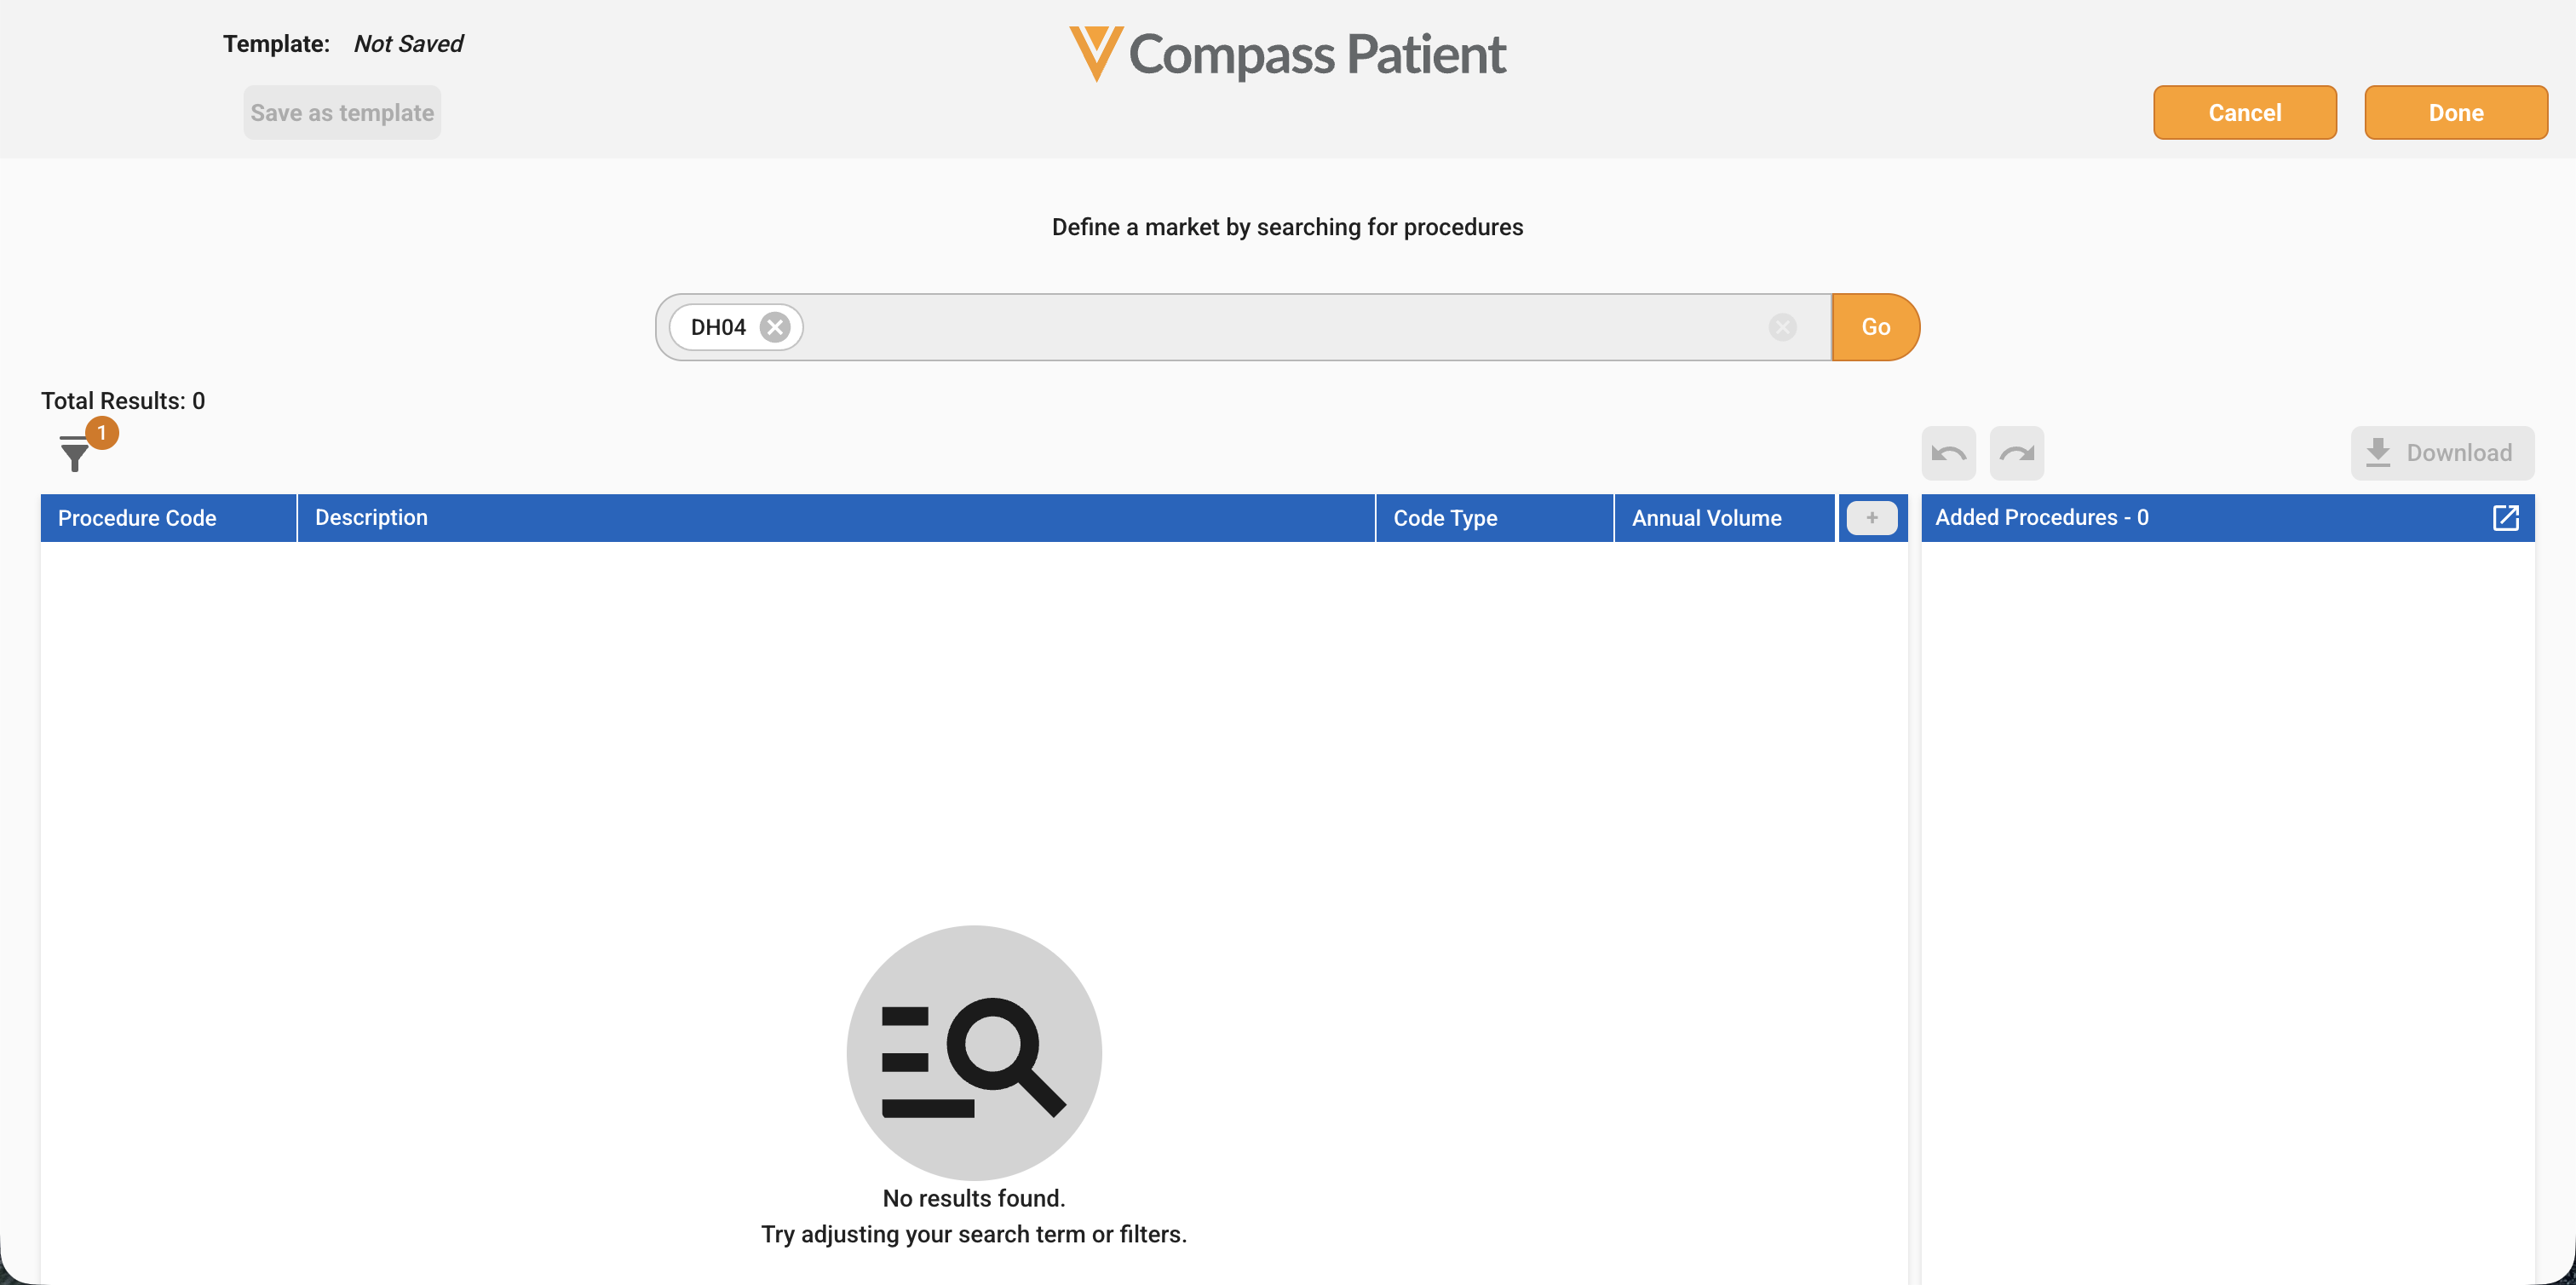
You can apply as many filters as you would like to the returned procedure codes. Counts will display in the filter category, as well as the filter button, so that you can keep track of how many filters have been applied. Counts will continue to display if you choose to collapse the filter categories.
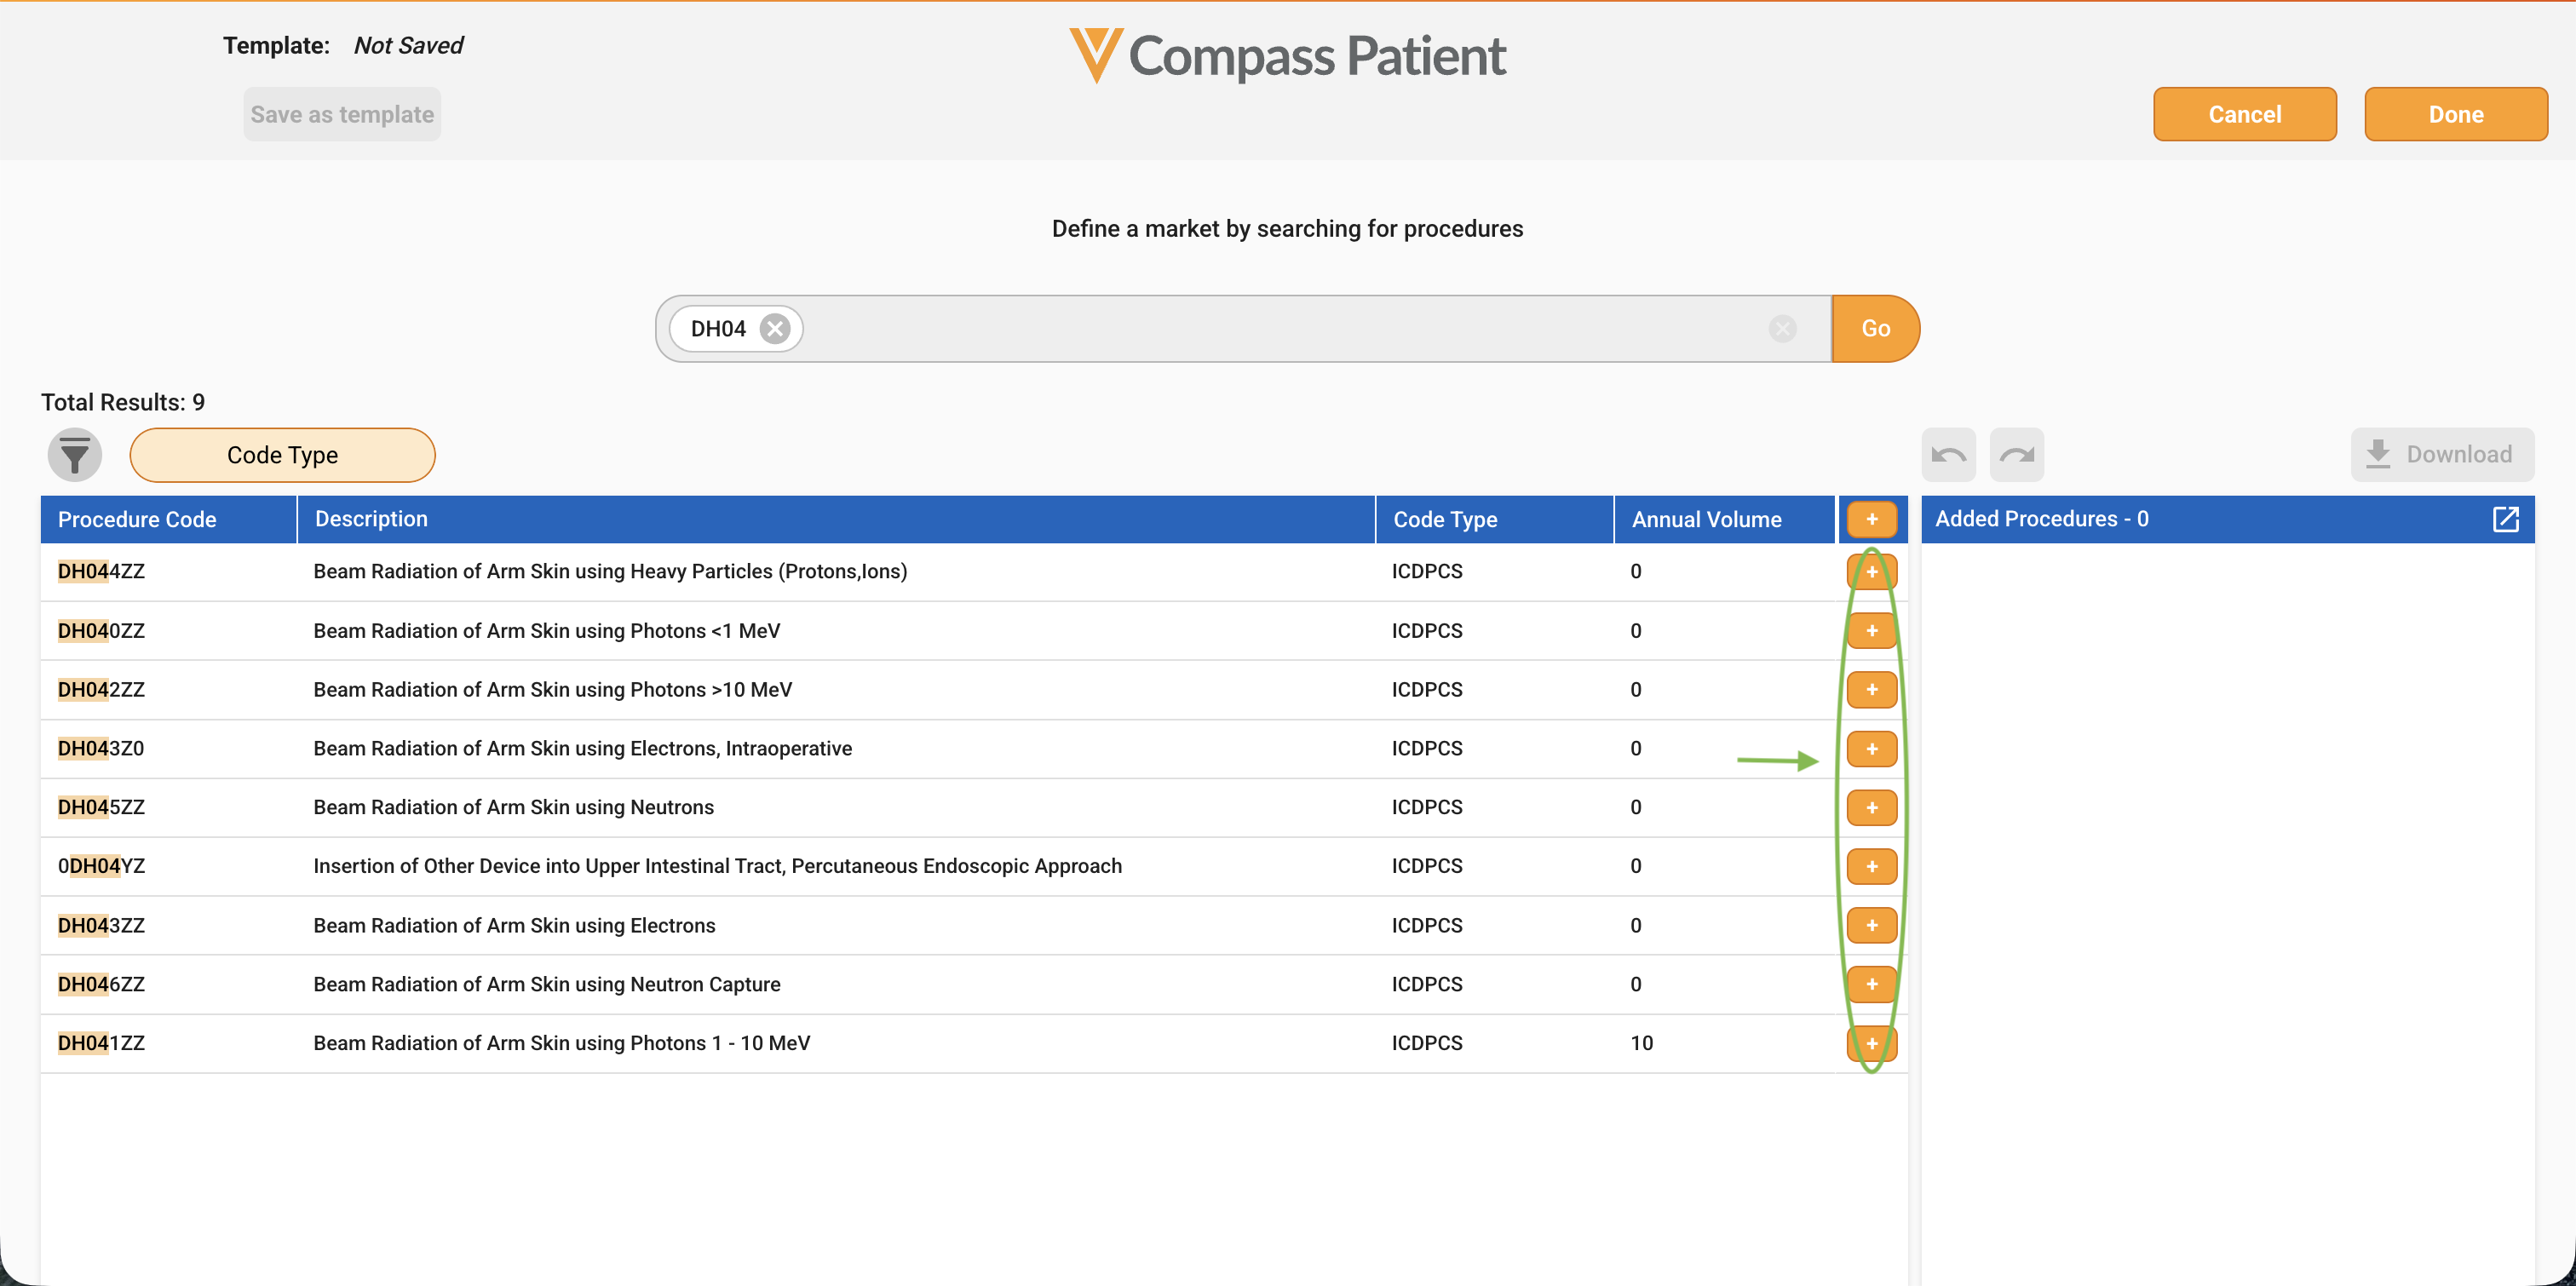
To add individual procedure codes, click on the “+” button for a given code. This will add that code to the “Added Procedures” pane on the right.
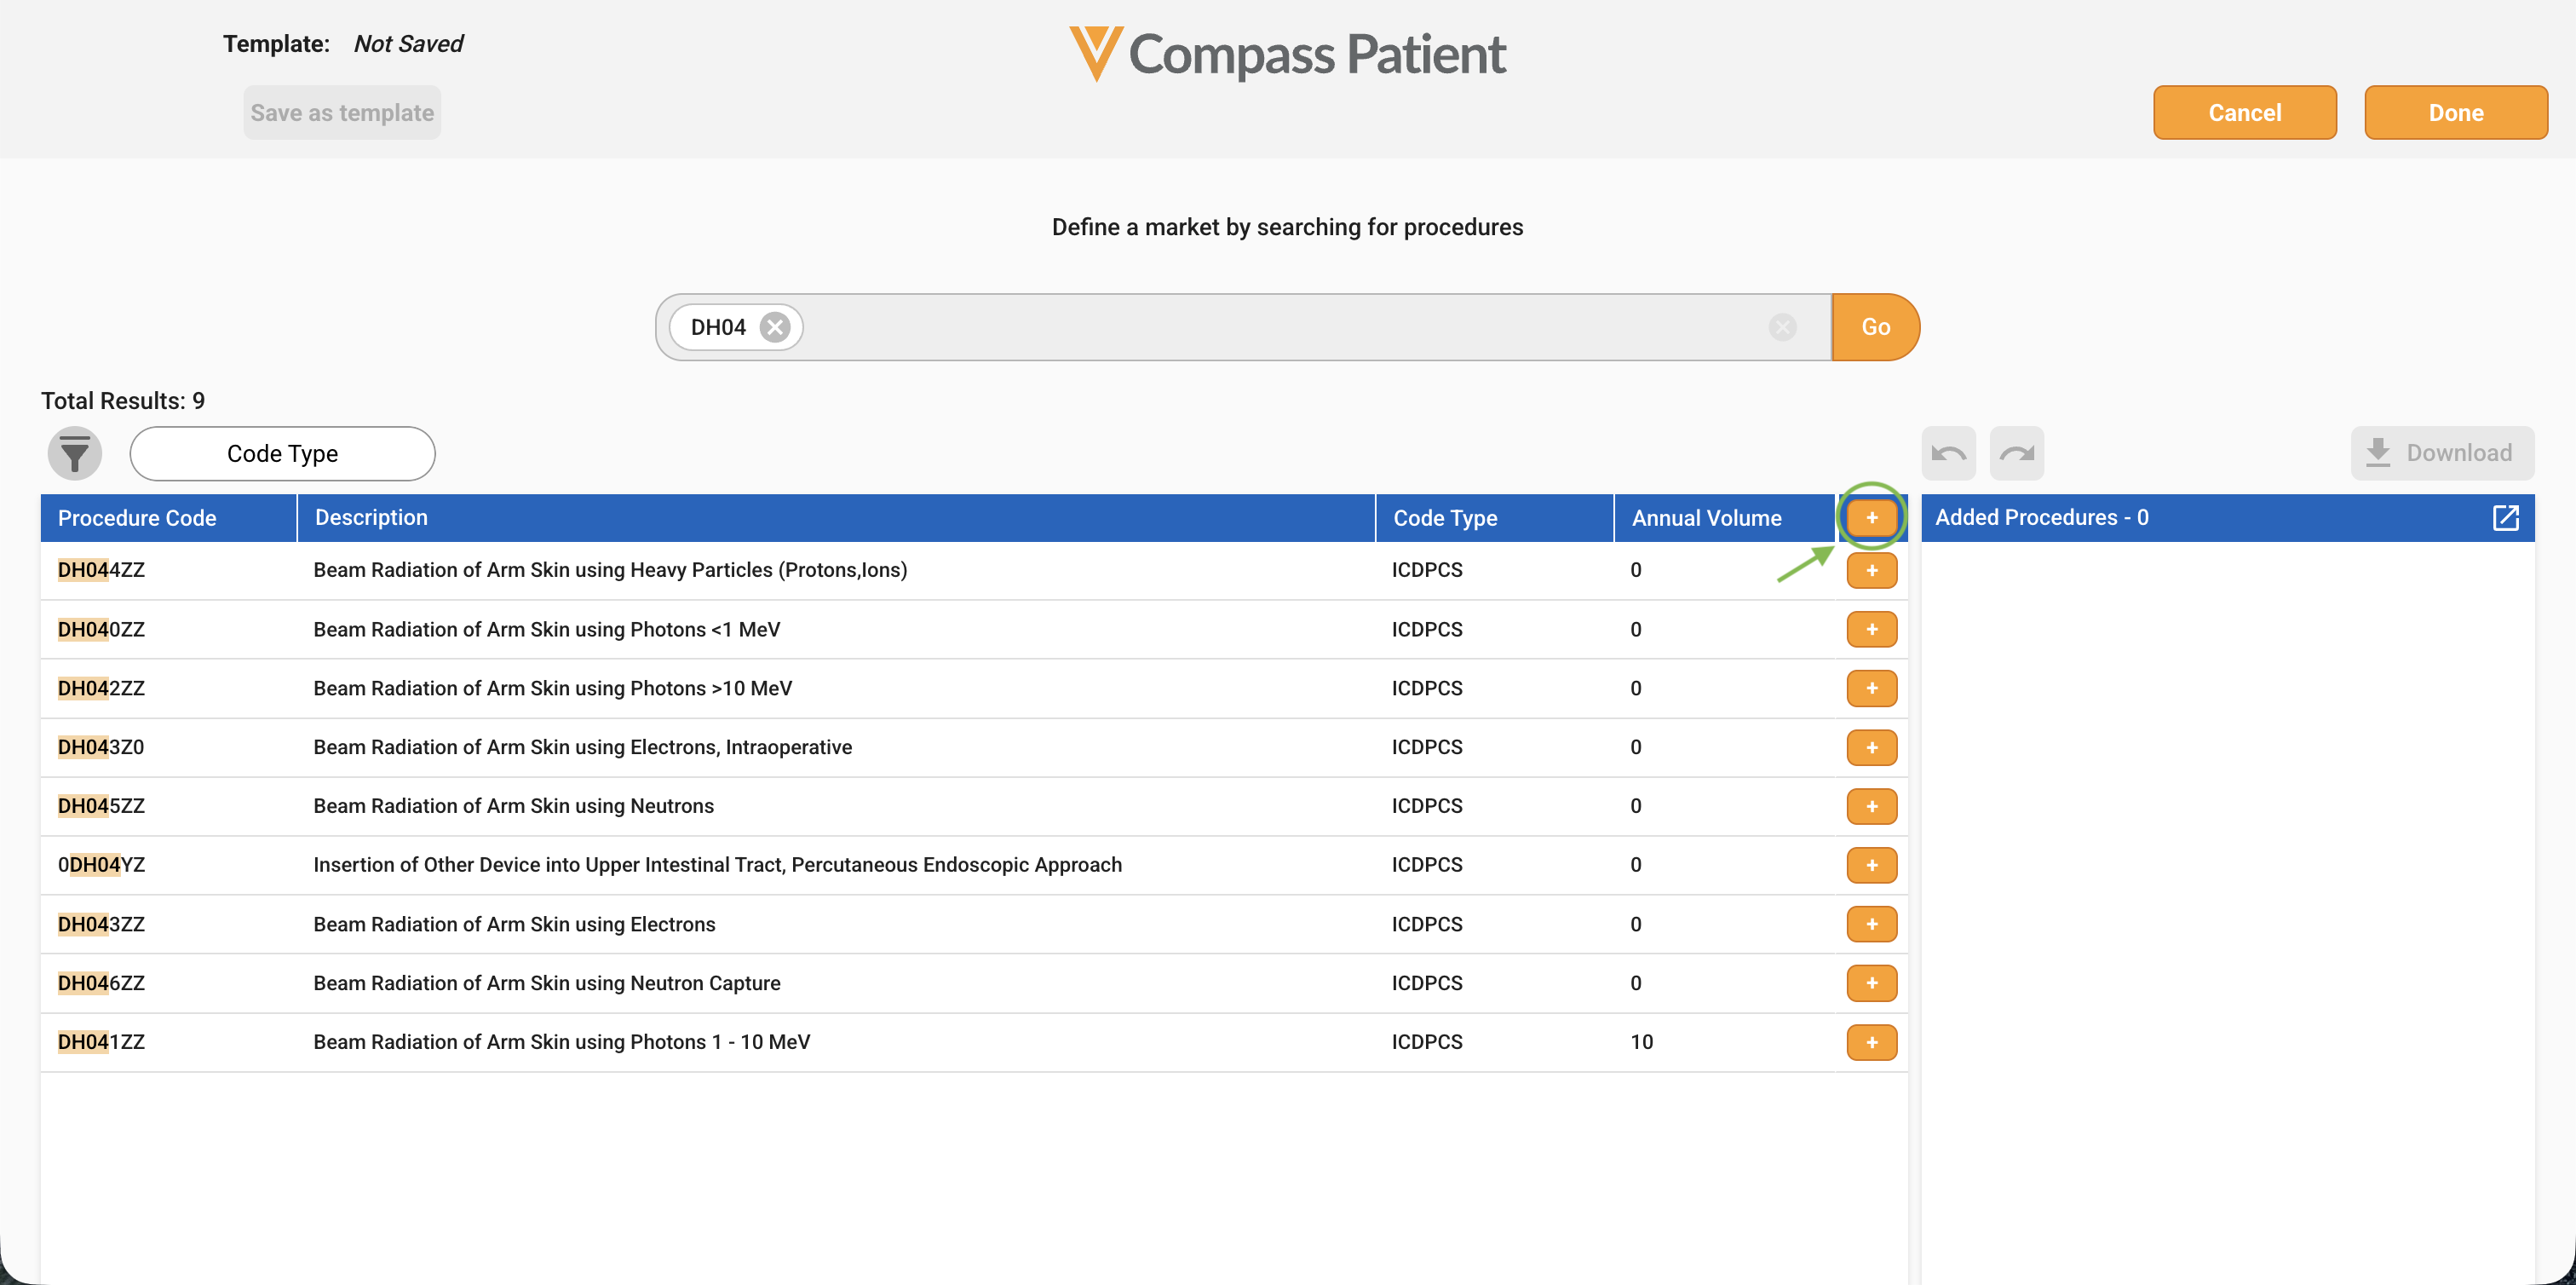
To add procedure codes in bulk, click on the “+” button at the top of the results list.
The Added Procedures pane will display all the procedure codes that you have added to your qualification criteria. To view the details of your added procedures (description, code type, etc.), click on the Expand button in the upper-right corner. From the expanded Added Procedures pane, you can scroll to view all added procedures. Click on the Collapse button to close.


You can remove individual procedure codes from your qualification criteria by clicking the “-“ button next to a code from the Added Procedures pane or within the Code Searcher. To remove procedure codes in bulk, click the “-“ button at the top of the results list of the “Remove All” link in the Added Procedures pane.
Procedure Exact Match Searching
To perform an exact match search in the Procedure Code Searcher, click the Search Type dropdown on the left side of the search bar and select Exact Match.
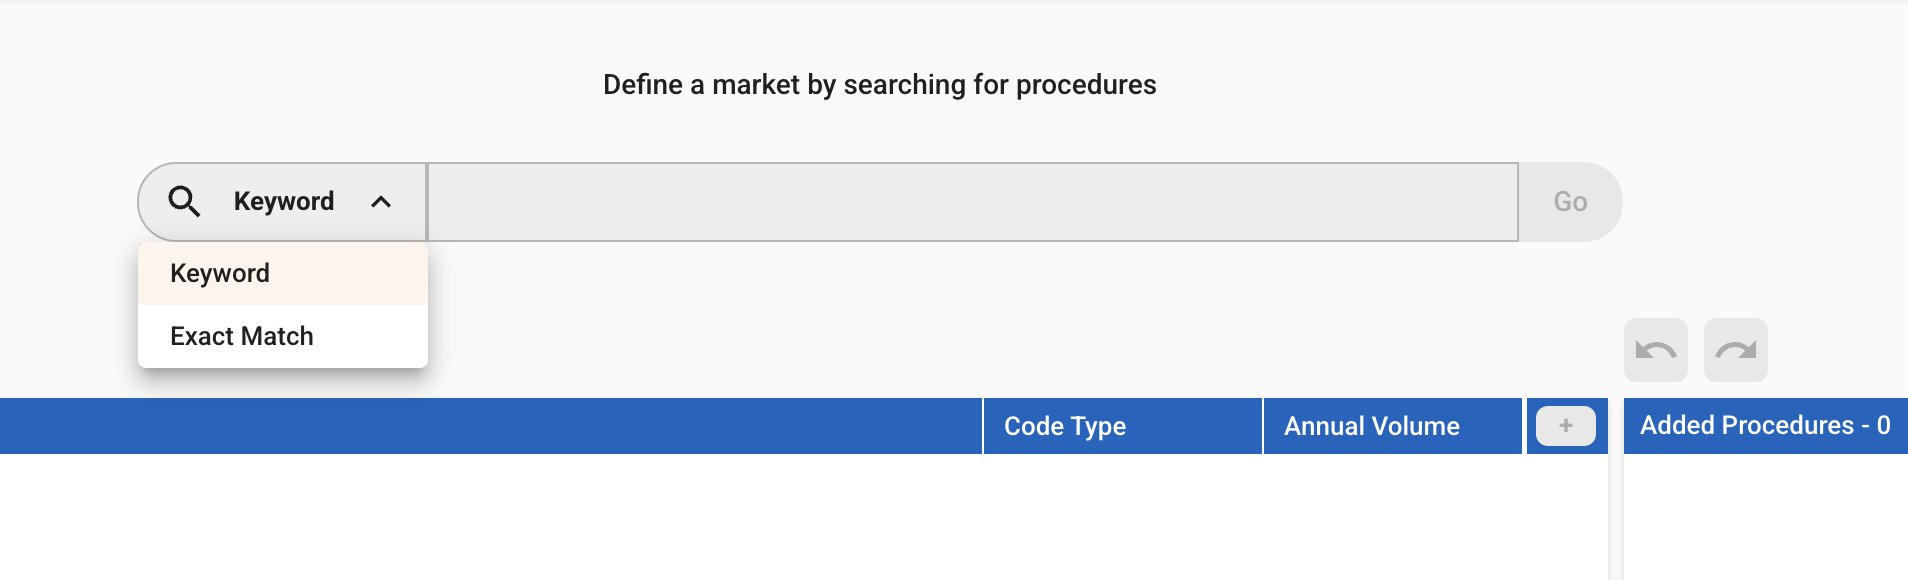
In the Exact Match popover, select the checkbox(es) for the specific attribute(s) you want to match against. In the Procedure Code Searcher, you can match against:
- Procedure Code
- Description
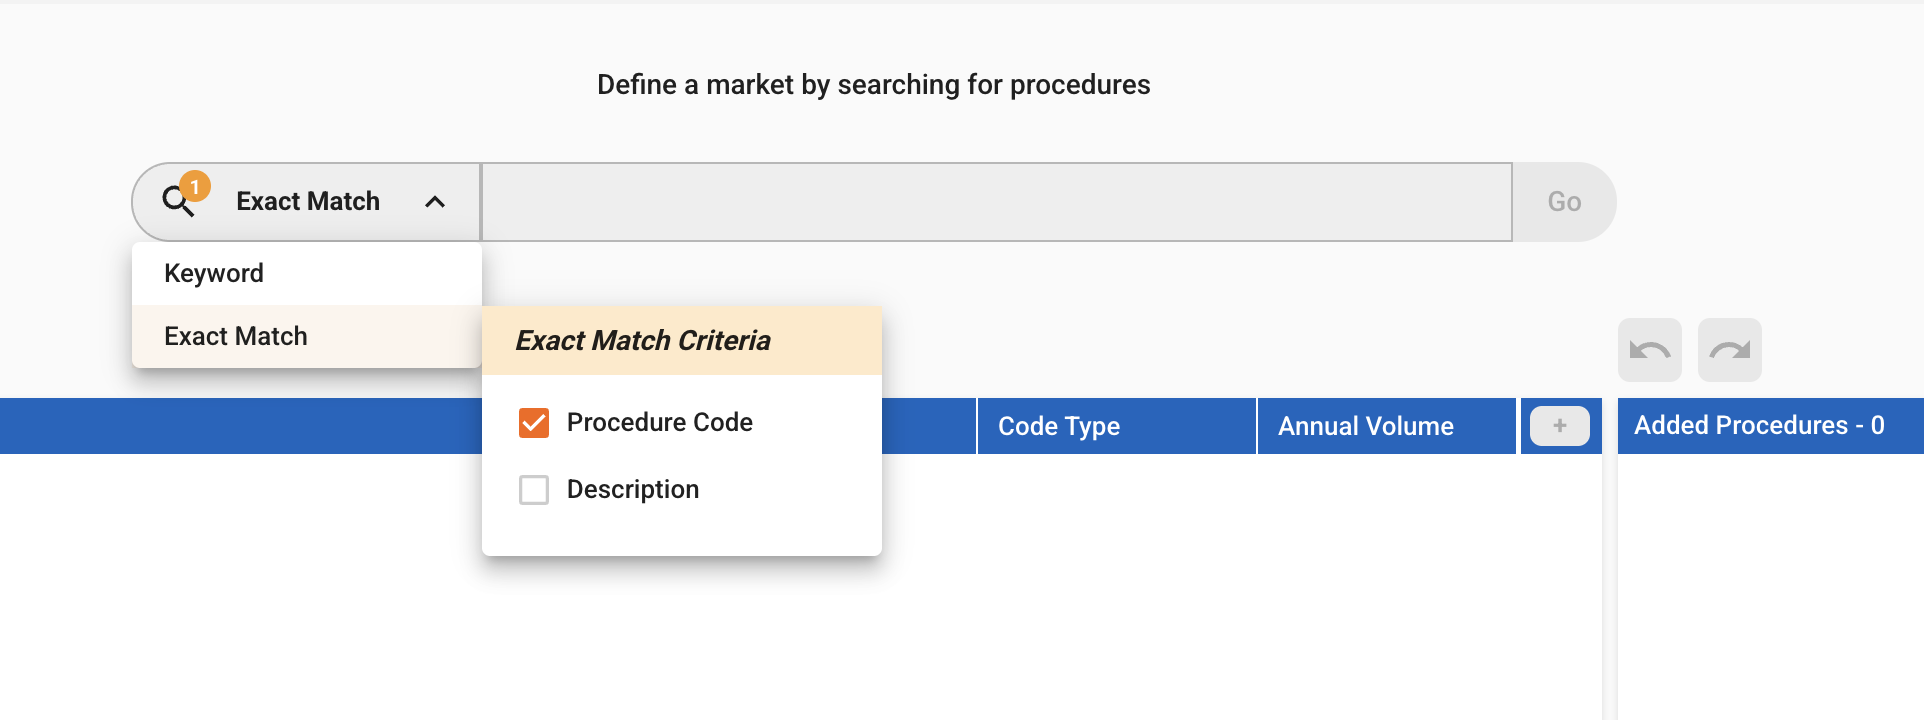
After selecting the criteria you want to match against, enter your search terms and click Go (or press Enter). The search evaluates all selected criteria and returns results matching at least one of them. Search results are displayed in alphabetical order, A-Z, by Procedure Code.
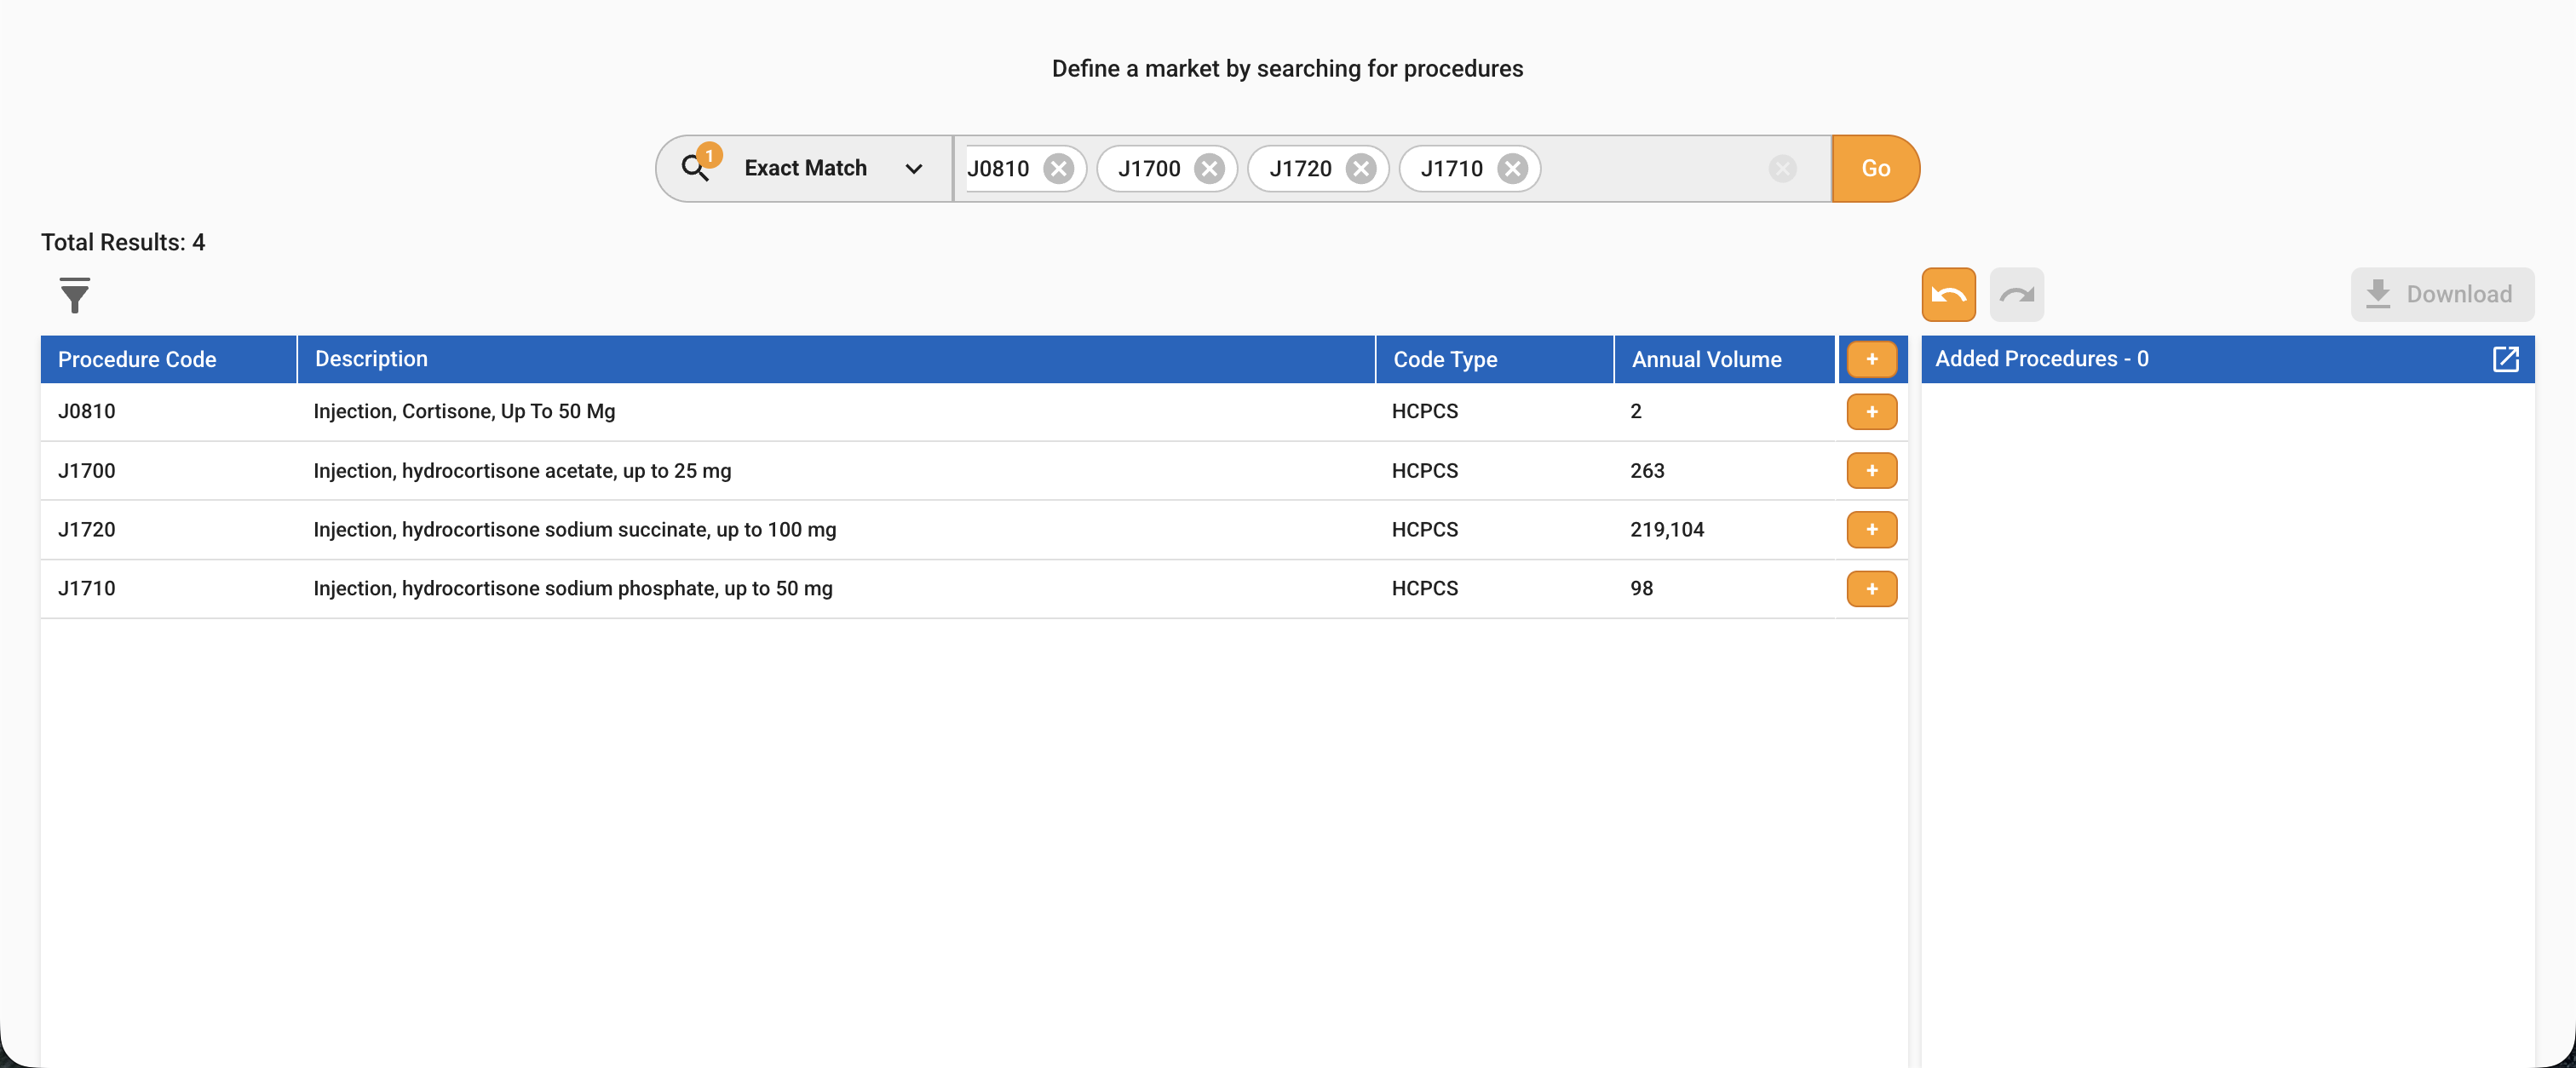
You can add items to the Added Procedures pane by clicking the “+” button on an individual procedure row, or by clicking the “Add All” button in the top-right corner of the results table.