On This Page
Managing Groups
Groups are used to associate Compass licenses with individual users. The license is the first level of access control applied to a user. Licenses determine a user’s access to Veeva Compass products and the ability to submit their own data pulls. See Creating and Managing Groups for more details on assigning licenses to groups.
The Veeva Compass All Access license allows for unlimited access to all Veeva Compass data and data pull functionality. This license allows you to set-up both one time and recurring data pulls. Once submitted, the data pulls can be viewed and managed in Job Manager, shared with service providers as needed, and accessed from the selected delivery location(s).
Creating and Managing Groups
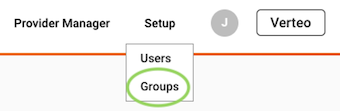
The Group Manager can be accessed via the Setup > Groups tab. Group Manager allows you to create and manage existing groups in your Portal.
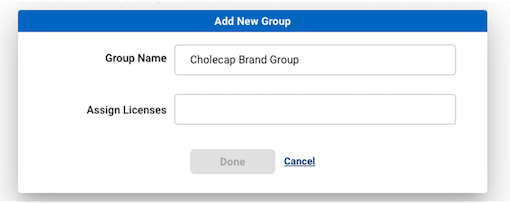
To create a new group, click on “Add Group”.

You will be prompted to enter a group name and assign license(s) to the group. Each group must have at least one assigned license. Once you have finished entering your group details, click “Done”.
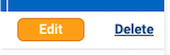
Groups can be edited and/or deleted from within the Group Manager using the “Edit” and “Delete” buttons.
Managing Users
Profiles are the second level of access control applied to a user, and determine access to portal functionality. Both the license and profile must grant access to a user in order for that user to access the functionality.
There are four types of profiles: Read-Only User, Standard User, System Administrator, and Integration User.
Read-Only Users have access to data viewing functionality, but do not have access to data pull or data share functionality. Read-only users cannot access the SFTP.
Standard Users have access to data viewing, data pull, and data share functionality. Standard users also have access to the SFTP.
System Administrators have access to data viewing, data pull, and data share functionality. In addition to SFTP access, System Administrators can also manage users, groups, and delivery locations in their Portal.
Integration Users only have access to the SFTP and API. Integration users cannot access the Portal, and cannot create data pulls, data shares, or manage configurations within the Portal.
Please refer to the table below for a more detailed breakdown of features available to each user profile.

Creating and Managing Users
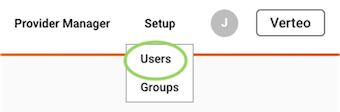
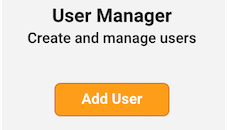
The User Manager can be accessed via the Setup > Users tab. User Manager allows you to create and manage existing users in your Portal.
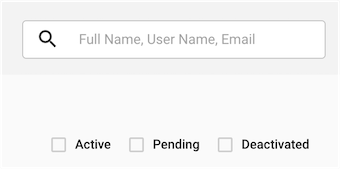
The search bar allows you to locate a specific user based on their name, username, or email. The groups filter (defaulted to all groups) allows you to filter users based on their group. The status filters allow you to filter users based on their status (active, pending, or deactivated).
To create a new user, click on “Add User”.
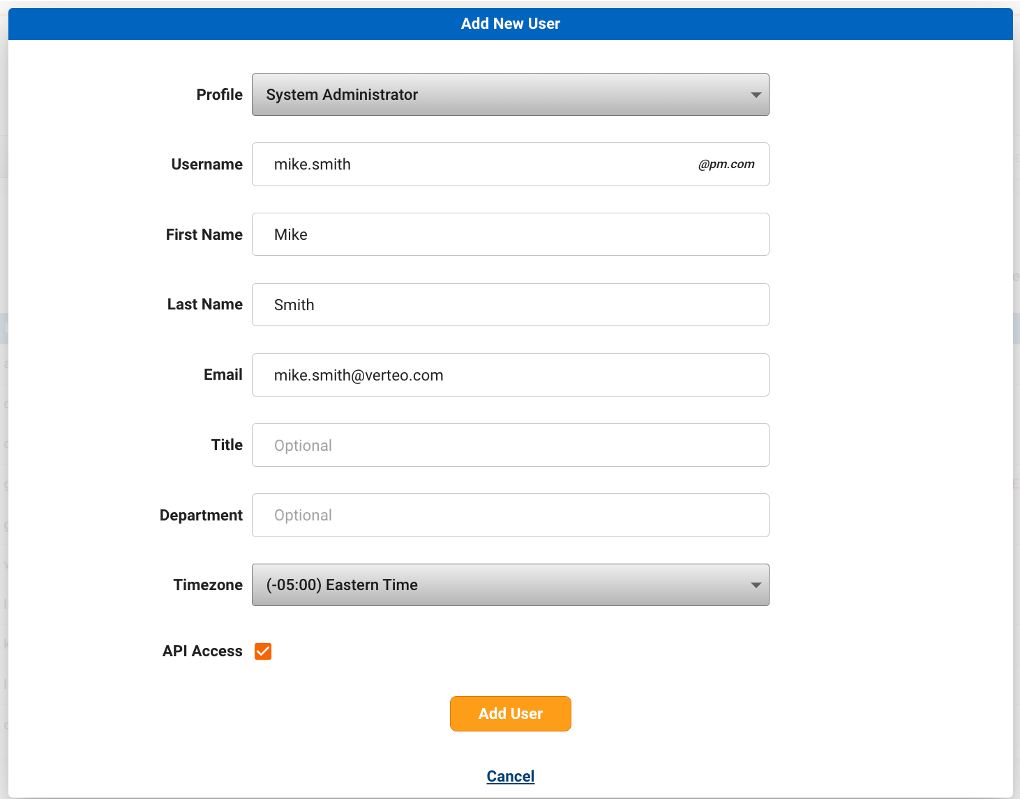
You will be prompted to assign a profile, group(s), and enter details about the user such as their name, department, and timezone. See Managing Users for more details on user profiles.
To enable access to the Compass API for a user, select the “API Access” checkbox. Note that API access for Integration Users is default enabled and cannot be disabled. For more information on the Compass API, refer to the Compass API Help Site.
If Single Sign-On (SSO) is configured for your Compass instance, you will see an “Enable SSO” checkbox for users. This will allow users to login with your company’s SSO provider, rather than a standard Compass password. To enable SSO for a user, select the “Enable SSO” checkbox and provide the Identity Provider User ID and Username for that user. Note that SSO cannot be enabled for Integration Users. For more information on SSO, refer to Single Sign-On
When you are finished populating the details, click “Add User”. This will send an activation email to the user’s email address.
To edit an existing user, click on “Settings” for the desired user.

This will allow you to update their user information or API settings, send a password reset email or resend the activation email, or deactivate the user. Click “Done” to save your changes or “Cancel” to discard any changes.