On This Page
- Query Builder Overview
- Define Qualification Criteria
- Define Returned Records
- Define Schedule
- Delivery Options
- Review & Submit
Query Builder Overview
Veeva Compass Pathway allows you to pull customized prescription and medical claims Pathway Data via the Query Builder. Veeva Compass Pathway output comprises of records affecting all the interim stages a prescription could encounter. Veeva Compass Patient includes final dispensed records while Veeva Compass Pathway includes reversed, rejected, and interim records as well. At this time, Query Builder functionality and filters are identical to Compass Patient.
Using Query Builder, you can: select product, diagnosis, and procedure codes; filter patients by age and gender; utilize OR/AND/AND NOT logic; specify which records should be returned for qualified patients; and customize timeframes for identifying patients and records of interest. In addition, Compass Pathway pulls can be delivered on a one time or recurring basis. One time pulls are a single delivery with the selected criteria and timeframes, while recurring jobs provide deliveries on a monthly, weekly, or daily basis.

Compass Pathway pulls consist of the following steps:
- Qualification Criteria allows you to select product, diagnosis, and procedure codes, filter on patient age and gender, apply logic, and define a time frame that will be used to identify patients for your query.
- Returned Records allows you to specify which records you would like to return for the qualified patients (e.g. patients meeting the qualification criteria).
- Schedule allows you to select a cadence for your data delivery (one-time, monthly, weekly, or daily).
- Review & Submit allows you to select a delivery location, as well as confirm the details of your query prior to submitting it.
Once you have completed each step, click “Next”. You can navigate back to previous steps by clicking “Back”.

Define Qualification Criteria
Qualification Criteria are the set of criteria (products, diagnoses, procedures, age, gender), along with any applied logic, that will be used to identify patients for your query. For example, you may want to look at patients who were:
- Diagnosed with high cholesterol AND
- Treated with products in the statin market AND
- Underwent bypass surgery AND
- Age is greater than 18
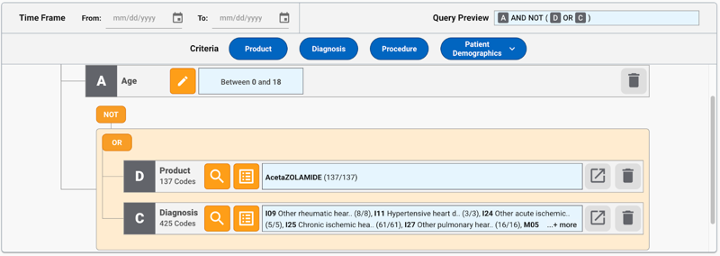
The Qualification Criteria step allows you to define specific criteria (products, diagnoses, procedures, age, gender), apply logic (OR/AND/AND NOT) to the criteria, group criteria together with parentheses, and define a time frame that will be used to locate your patient population of interest.
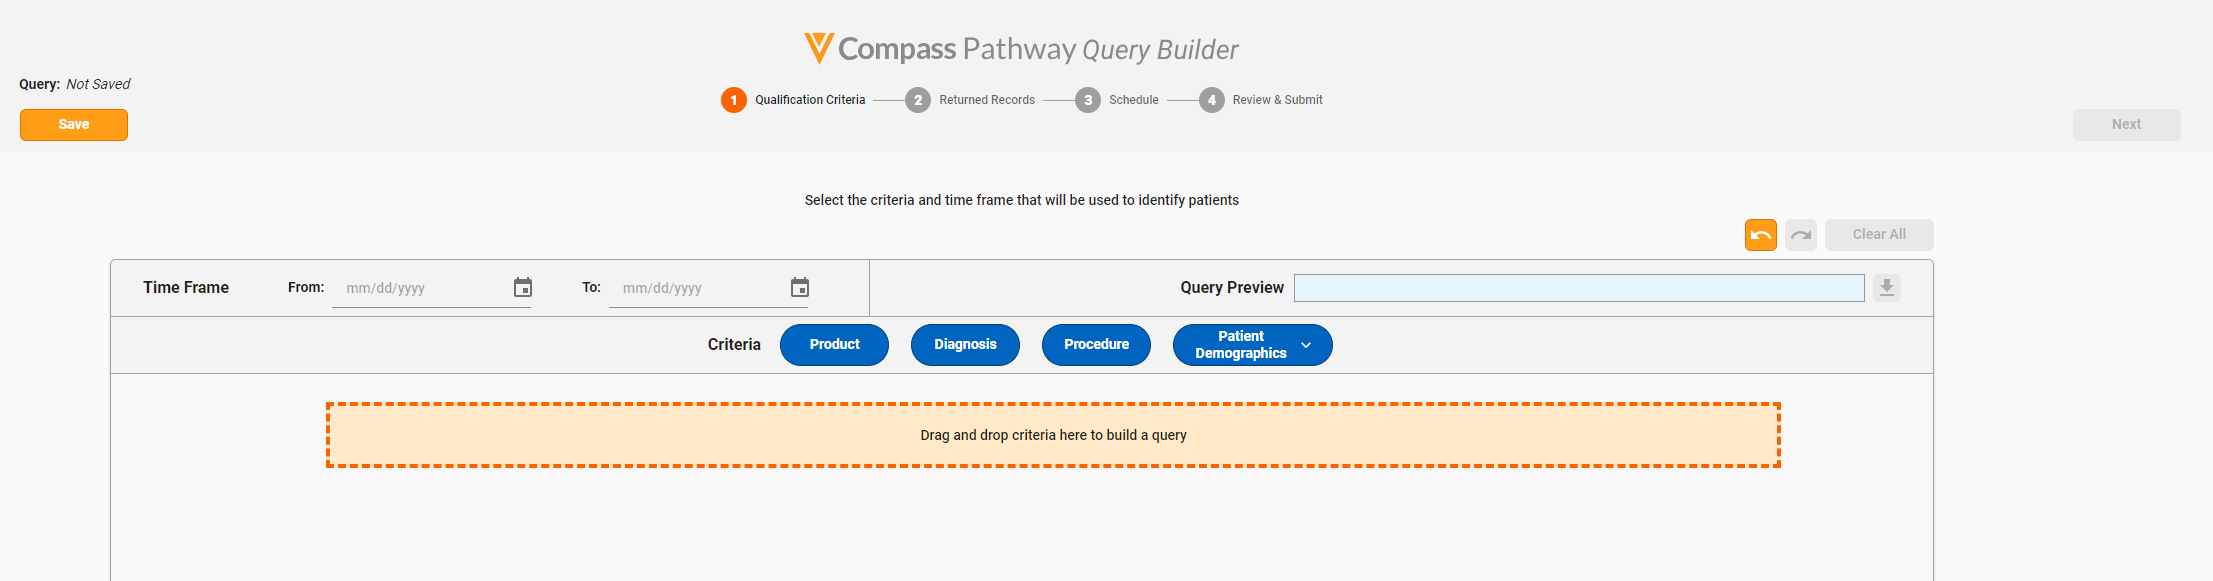
The Criteria pane lists the available criteria that will be used to identify patients.

The following criteria are currently available:
- Product
- Diagnosis
- Procedure
- Age
- Gender
Adding and Moving Criteria
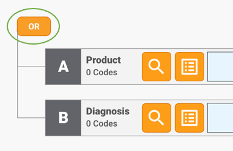
To start building a query, click and hold on the blue pill for your desired criteria, then drag and drop it into the indicated area.

Age and gender can be added to the query by expanding the Patient Demographics drop-down, then dragging and dropping the blue pills in the expanded menu.
Once added to your query, the criteria box will be labeled with a letter (A, B, C, D, etc.) for easier identification, as well as the criteria type and code count (for products, diagnoses, and procedures).

You can add additional criteria by dragging and dropping the blue criteria pills into the query. A maximum of 6 criteria boxes can be added to your query.
To move existing criteria in the query, click and hold anywhere within the criteria box, then drag and drop it to your desired location. A preview box denoted with a dotted line border and letter will indicate where the criteria will be dropped within the query.
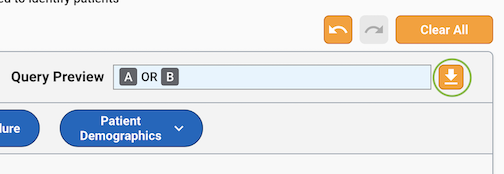
Query Preview
The Query Preview pane displays a high-level summary of your query. This includes any applied logic (OR/AND/AND NOT) as well as grouping with parentheses. The query preview dynamically updates as the query is modified. Note that the query preview is currently read-only; users cannot type in the query preview to edit the query.

To download an Excel file containing the full list of codes (products, diagnoses, and procedures), age/gender criteria, and query logic from Query Builder, click on the Download button next to the Query Preview.
Logic Operators and Criteria Groups
Logic operators allow you to select logic (OR/AND/AND NOT) in order to define a more specific set of criteria for identifying patients. For example, if you wanted to look for patients who were diagnosed with major depressive disorder and treated with SSRIs, but not diagnosed with bipolar disorder, you could form the query as “A AND B AND NOT C”, where A = major depressive disorder diagnosis, B = treatment with SSRIs, and C = bipolar disorder diagnosis. This would look for patients who meet both A and B, but exclude any patients meeting C.
Currently, Query Builder supports queries with up to one level of grouping (e.g. one level of parentheses). The top level logic operator is located above the criteria boxes. By default, OR is selected. The same logic will be applied to all criteria at the top level (e.g. outside of parentheses).
To change the applied logic to AND, hover over the logic operator to expand and select AND.

Criteria groups allow you to build a query with a combination of AND/OR logic by indicating the order in which the logic should be applied in the query.

For example, if you wanted to look for patients with a breast cancer diagnosis and treatment with either chemotherapy or radiation, you could form the query as “A AND (B OR C)”, where A = breast cancer diagnosis, B = treatment with chemotherapy, and C = treatment with radiation. The grouping with (B OR C) indicates that all qualified patients must meet criteria A, as well as either B or C.
However, if you wanted to look for patients who have both a breast cancer diagnosis and treatment with chemotherapy, or any patient treated with radiation, you could form the query as “(A AND B) or C”, where A = breast cancer diagnosis, B = treatment with chemotherapy, and C = treatment with radiation. The grouping with (A AND B) indicates that all qualified patients must meet both criteria A and B, or C alone.
To group together criteria, drag and drop a criteria box until it is overlapping with the criteria box you would like to group it with. A preview box denoted with a dotted line border will be connected to the box that it will be grouped with. Criteria groups are grouped together with an orange box. A criteria group can have up to 6 criteria boxes.
To move a criteria group, click and drag anywhere in the orange area of the group, then drag and drop it to your desired location. A preview box denoted with a dotted line border and letters will indicate where the group will be dropped within the query. Groups can be combined with other groups, individual criteria boxes, or moved within the query.
Logic can be defined for your group by hovering over the logic operator within the group. The same logic will be applied to all criteria within the group (e.g. within parentheses).
You can also apply AND NOT logic to criteria in your query. This allows you to exclude patients who meet a specific set of criteria.
To apply NOT logic to an individual criteria box, hover over the letter label. A NOT operator will appear, which you can click on to select NOT for that criteria. To remove NOT logic, click on the enabled NOT. This will disable it and hide it from the view.
To apply NOT to an entire group in your query, hover over the upper-left corner of the group. A NOT operator will appear for that group, which you can click on to select NOT for the group.
You can also apply NOT to criteria within your group by hovering over the letter label for the criteria inside the group.
Note that NOT cannot be applied at the very top of the overall query, or at the very top of a group. Additionally, NOT logic is only available when AND is applied to the criteria level. For example, if your query is A AND B AND C, NOT is available; however if your query is A OR B OR C, NOT is not available.
Removing Criteria, Undo, Redo
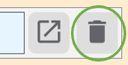
To remove an individual criteria box, click on the delete button (trash can icon) for the criteria you wish to remove.
To undo and/or redo actions that you have taken, use the undo and redo buttons at the upper-right of the query area. You can also clear out your entire query by clicking on Clear All.
Time Frame
The Time Frame pane allows you to define the time frame that will be used to identify patients. For example, you may want to look for patients meeting the criteria from January 1st, 2019 - today’s date.

To add a starting time frame, type or click the “mm/dd/yyyy” or the calendar picker next to “From:”. After selecting the starting time frame, specify the ending time frame. To add an ending time frame, type or click the “mm/dd/yyyy” or the calendar picker “To:”. The Qualification Criteria time frame can be revised at any point during the Qualification Criteria step, as well as during the Schedule step.
Note that the “From” date must be prior to the “To” date.
Types of Criteria
Products, Diagnoses, Procedures
In order to define your criteria for products, diagnoses, and procedures, you may use the Code Searcher to search for specific codes, or you can choose to utilize a query template containing a list of predefined codes. Once codes have been added to the criteria box, you may view the detailed list of codes by clicking the Expand button on a given criteria box.
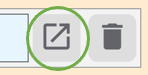
From the expanded code list, you can review and/or remove your added codes. Click on the Collapse button to close.

Code Searcher
Code Searcher is used to search for specific codes to add to your qualification criteria. To use Code Searcher, click on the Code Searcher button (magnifying glass icon) for the criteria you would like to add codes to.

This will open the Code Searcher for products, diagnoses, or procedures (depending on which type you have selected).
- Refer to Products for more information on how to search for and add products.
- Refer to Diagnoses for more information on how to search for and add diagnosis codes.
- Refer to Procedures for more information on how to search for and add procedure codes.
Select Templates
You can also add products, diagnoses, and procedures to your qualification criteria by using query templates. Templates are created and managed in the Templates tab. See Query Templates for more information on creating and managing templates.
To add templates to your qualification criteria, click on the templates button (notepad icon) for the criteria you would like to add codes via templates.

This will open a new window where you can select the template(s) you would like to add. To exit the window without applying any changes, click “Cancel”.
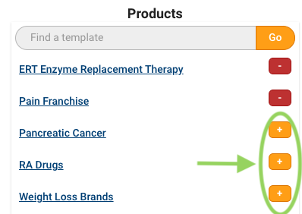
Use the search bar to search for a specific template. To preview the template, click on the template name. This will open a new window with the details of the codes in the template.
You can add a template to your qualification criteria by clicking on the + button next to the template name. You may add more than one template at a time. To deselect a template, click the - button.
Once you have finished selecting your templates, click Apply. This will apply all the selected templates and add the corresponding codes to your qualification criteria. You may then refine your qualification criteria as needed by adding or removing additional codes via Code Searcher.
Saving Templates (Compass Pathway)
You may want to save your qualification criteria to use in future queries. You can save query templates directly from the qualification criteria step by clicking on the “Save as Template” button.

Upon clicking Save as template, you will be prompted to name your template. Then, click “Save”. You may then use the templates in future queries.
Note that for product templates, the products are saved at a brand level so that they can be used for Explorer queries, even if you have not added the entire brand to your qualification criteria. For example, if you added one NDC from the brand Motrin to your qualification criteria, saving a product template will save the entire Motrin brand.
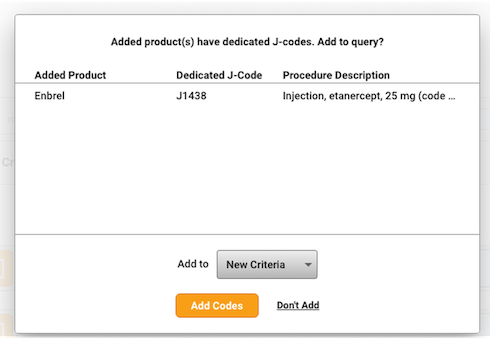
Adding Dedicated J-codes
When adding products that have a dedicated J-code (meaning J-codes specific to that product), users will be prompted to add the J-codes within the Query Builder. Upon adding products, a notification icon will appear over the Procedure filter if there is an available dedicated J-code.
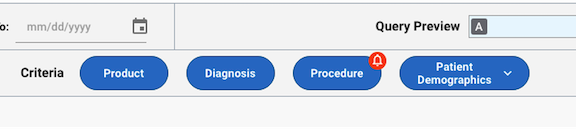
Users can choose to add the J-codes to their query in an existing criteria box (if applicable) or a new criteria box. Users can also ignore the notification if they do not wish to add the dedicated J-code(s) to their query.
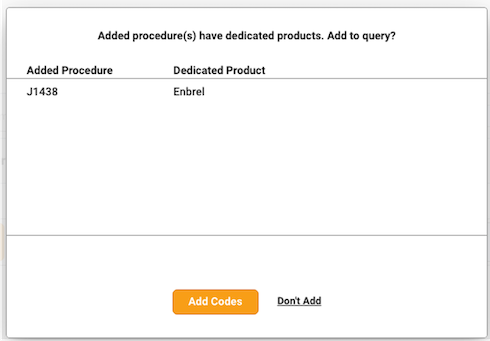
Adding Dedicated Products
When adding J-codes that have dedicated products, a notification icon will appear over the Product filter prompting users to add the dedicated products. Users can choose to add the products to their query or ignore the notification.

Age
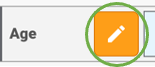
To define age criteria for your query, click on the edit button (pencil icon) in the age criteria box.
This will open up a pop-up window where you can define an age range for filtering qualified patients.
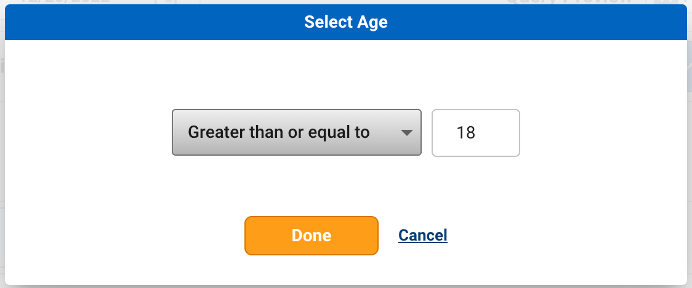
You may select from the following operators:
- Between
- Equal to
- Greater than
- Less than
- Greater than or equal to
- Less than or equal to Then, enter age(s) in the input boxes provided.
Age criteria for qualifying patients uses the patient’s age at the time of the transaction, meaning if you input “Less than 18”, this will look for patients less than 18 at the time of treatment or diagnosis. Note that for the “Between” operator, the ages provided are inclusive, meaning that if you input “Between 30 and 50”, this will include patients whose ages equal 30 and 50. In addition, due to HIPAA requirements, only ages between 0 and 80 can be inputted in the age criteria; patients over the age of 80 cannot be filtered by age.
Once you have inputted your age criteria, click “Done”. You may revise your age criteria at any time by clicking on the edit button.
Gender
To define gender criteria for your query, click on the edit button (pencil icon) in the gender criteria box.

This will open up a pop-up window where you can select a gender (Male, Female) for filtering qualified patients.
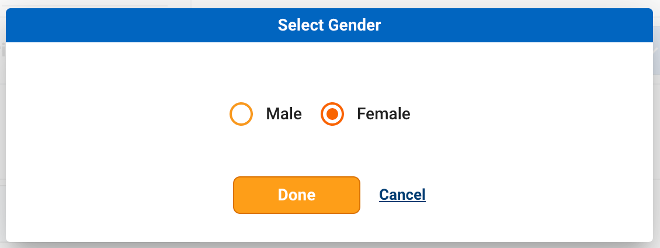
By default, if no gender criteria is applied, patients from all genders will be returned.
Once you have inputted your gender criteria, click “Done”. You may revise your gender criteria at any time by clicking on the edit button.
Define Returned Records
You can specify which records you would like to return for the qualified patients (i.e. patients meeting the qualification criteria) during the Returned Records step.

There are 3 options for defining returned records:
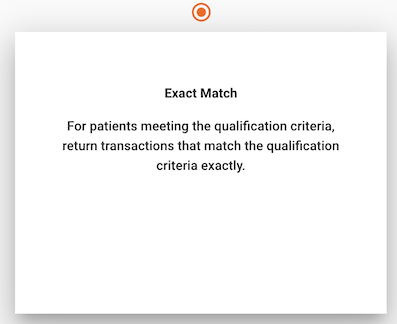
- Exact Match allows you to return only transactions that match the qualification criteria for the patients meeting the qualification criteria.
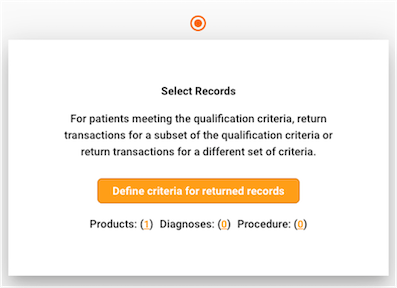
- Select Records allows you to return transactions based on a set of criteria different from what you used to define patients, for the patients meeting the qualification criteria.
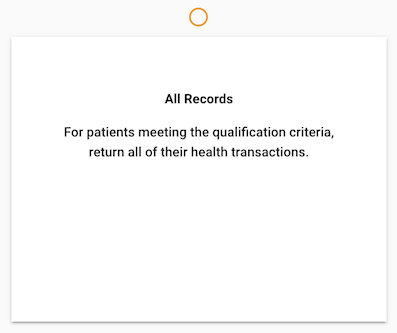
- All Records allows you to return all health transactions for patients meeting the qualification criteria.
Exact Match
This option allows you to return transactions that match the qualification criteria exactly for patients meeting the qualification criteria. Note that this is the default returned records option.
For example, for the patients who are treated with products in the statin market, you might only want to return records where patients are treated with those products in the statin market.
Note that if AND logic is utilized for products, diagnoses, or procedures, choosing Exact Match will return transactions meeting any of those products, diagnoses, or procedures for the patients meeting the AND logic. For example, if I want to look for patients treated with chemotherapy AND diagnosed with breast cancer, choosing the Exact Match option will return transactions for chemotherapy OR breast cancer diagnosis for the qualified patients meeting both criteria.
If age or gender criteria is utilized, only those records with the requested age range/gender are returned. If NOT logic is utilized, those records meeting the NOT criteria will be excluded from the returned data set.
Select Records
This option allows you to return transactions that meet a set of criteria that you define for patients meeting the qualification criteria.
For example, for the patients who are treated with products in the statin market, you might want to return records that are:
- Treated with those products in the statin market OR
- Diagnosed with high cholesterol OR
- Underwent bypass surgery
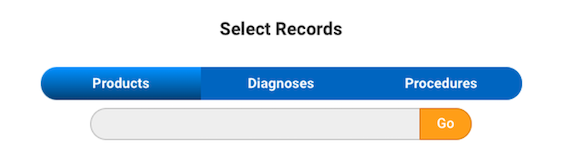
In order to define your returned records, you may use the Code Searcher to search on specific product, diagnosis, and procedure codes. You can also add codes using query templates.
To add templates to returned records criteria, click on the “pre-set template” link above the Code Searcher. This will open a new window where you can select the template(s) you would like to add.
Once you have finished selecting your templates, click “Apply”. This will apply all the selected templates and add the corresponding codes to your returned records criteria. You may then refine your returned records criteria as needed by adding or removing additional codes via Code Searcher.
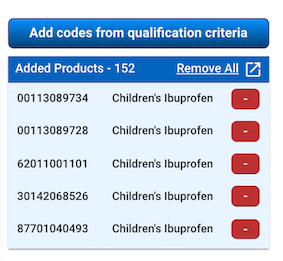
To speed up the process of defining criteria for returned records, you can quickly add codes that you previously selected in the Qualification Criteria step by clicking the “Add codes from qualification criteria” button. The codes you previously selected will appear in the “Added Products”, “Added Diagnoses”, “Added Procedures” panes.
Note that Select Records will return any records meeting the specified products, diagnoses, or procedures for the qualified patients, and does not utilize any logic or filters applied in the qualification criteria.
All Records
This option allows you to return all transactions for patients meeting the qualification criteria.
For example, for the patients who are treated with products in the statin market, you might want to return all of their Prescription and Medical Claims records.
Note that All Records will return all historical records for the qualified patients, regardless of any logic or filters applied in the qualification criteria.
Define Schedule
The Schedule step allows you to select how often you would like your data to be delivered, as well as specifying time frames for your data.
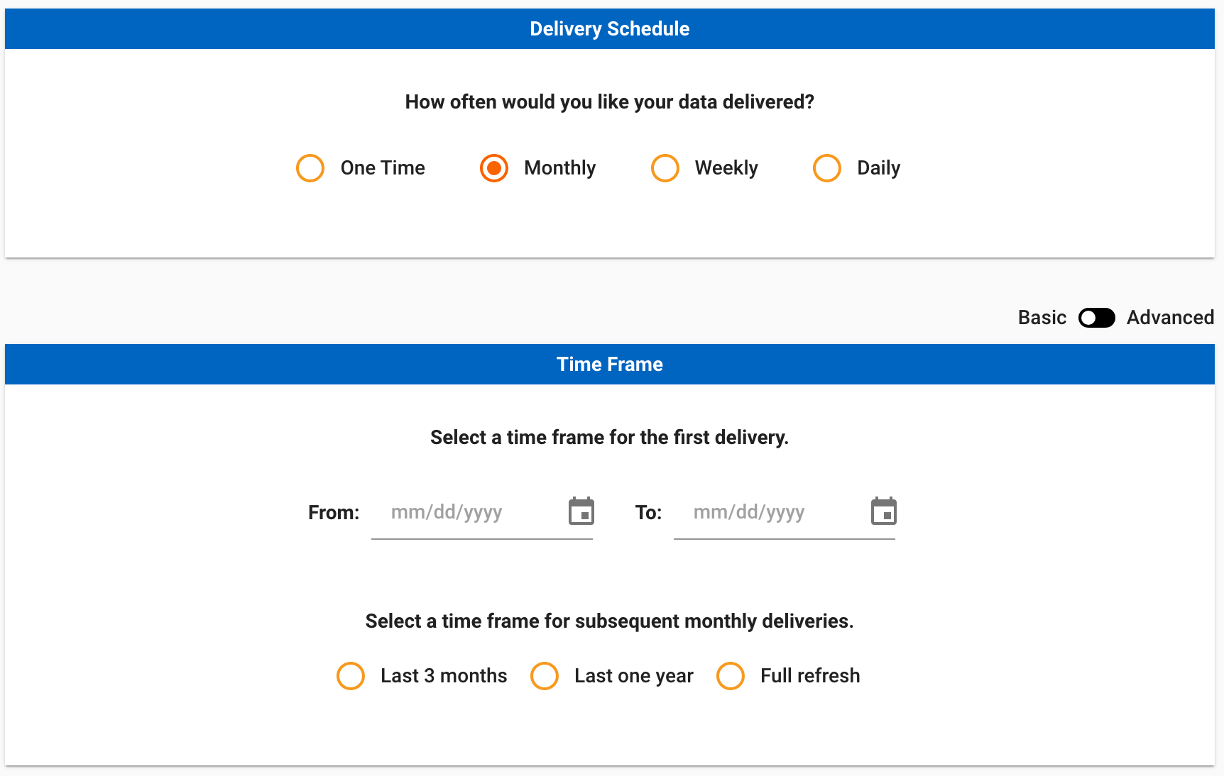
Delivery Schedule
Delivery Schedule allows you to select how often you would like your data delivered. The delivery schedule options for Compass Pathway are:
- One Time - A one time pull provides a single delivery with the selected qualification criteria and returned records time frames.
- Monthly - A monthly job allows you to specify a set of criteria and receive data on a recurring monthly basis. Monthly jobs are run on the 20th of each month.
- Weekly - A weekly job allows you to specify a set of criteria and receive data delivered on a recurring weekly basis. Weekly jobs are run at 2:00PM EST each Sunday.
- Daily - A daily job allows you to specify a set of criteria and receive data on a recurring daily basis. Daily jobs are run at 12:00PM EST each day.

One Time
Qualification Criteria Time Frame (One Time)
Qualification Criteria Time Frame is used to identify the time frame when patients met the qualification criteria. For example, you may want to look for patients meeting the qualification criteria from January 1, 2019 to the current date.
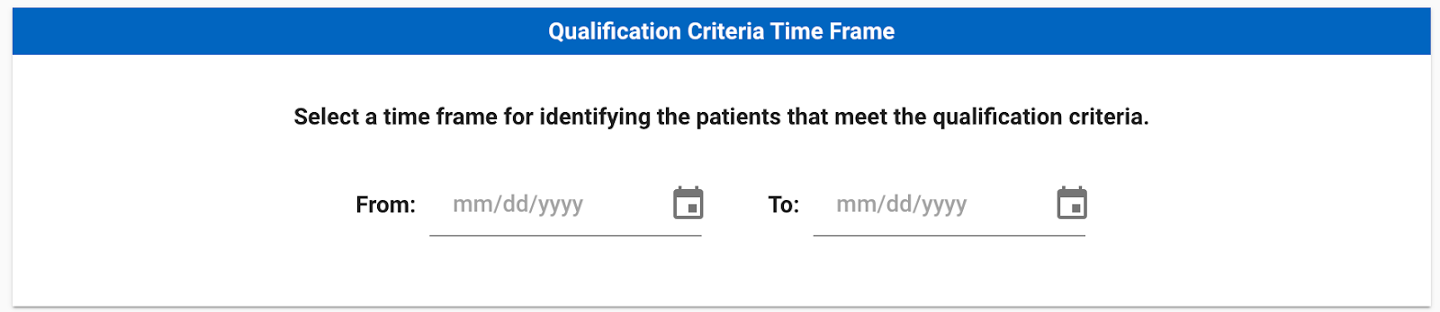
To add a starting time frame, type or click the “mm/dd/yyyy” or the calendar picker next to “From:”. After selecting the starting time frame, specify the ending time frame. To add an ending time frame, type or click the “mm/dd/yyyy” or the calendar picker “To:”.
Note that the “From” date must be prior to the “To” date.
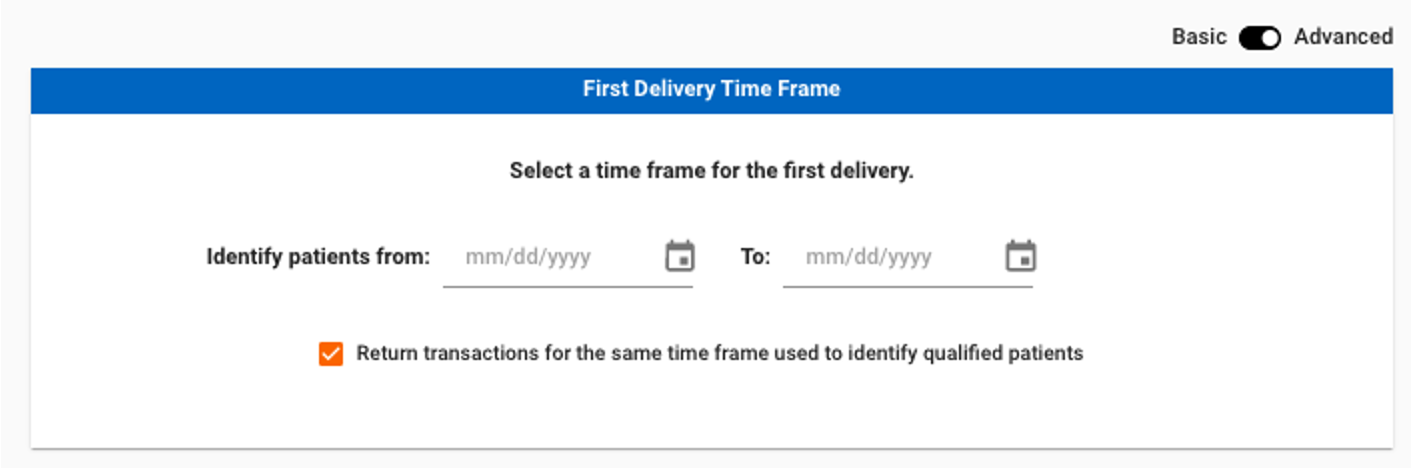
Returned Records Time Frame (One Time)
Returned Records Time Frame is used to identify the time frame when the transactions occurred. For example, you may want to identify patients from 2019-2021, but only see their health transactions from 2021. By default, the time frame for Returned Records is the same as the Qualification Criteria.

To specify a different time frame for Qualification Criteria, uncheck the box “Return transactions for the same time frame used to identify qualified patients”. Upon unchecking the box, a starting and ending calendar picker appears. Set the starting and ending dates by typing or using the calendar pickers.

Monthly
A monthly job allows you to specify a set of criteria and receive data delivered on a recurring monthly basis. Monthly jobs are run on the 20th of each month.
When scheduling a monthly job, you can use either Basic or Advanced mode depending on what time frames are needed for your job. In both modes, you also have the ability to define a separate time frame for the first monthly job.
- Basic mode allows users to use the same dates across the qualification criteria and returned records time frames. Basic mode supports use cases where the time frame used to identify patients and the time frame of the returned transactions should be the same, such as updating a monthly dashboard with a full refresh of data each month.
- Advanced mode allows you to define different dates across the qualification criteria and returned records time frames. Advanced mode supports use cases where the time frame used to identify patients is different from the time frame of the returned transactions, such as following the patient journey for a defined set of patients from 2020-2021, and receiving their last 12 months of data on a monthly basis.
To toggle between Basic and Advanced mode, use the toggle under the Delivery Schedule section.

Basic Mode (Monthly)
Basic mode allows you to use the same dates across the qualification criteria and returned records time frames. This means that each job will identify patients and return their transactions using the same time frame.
You will be prompted to select a custom time frame for your first month’s delivery by inputting dates in the “From” and “To” date fields. This will allow you to specify a larger time frame for the first job, if desired.
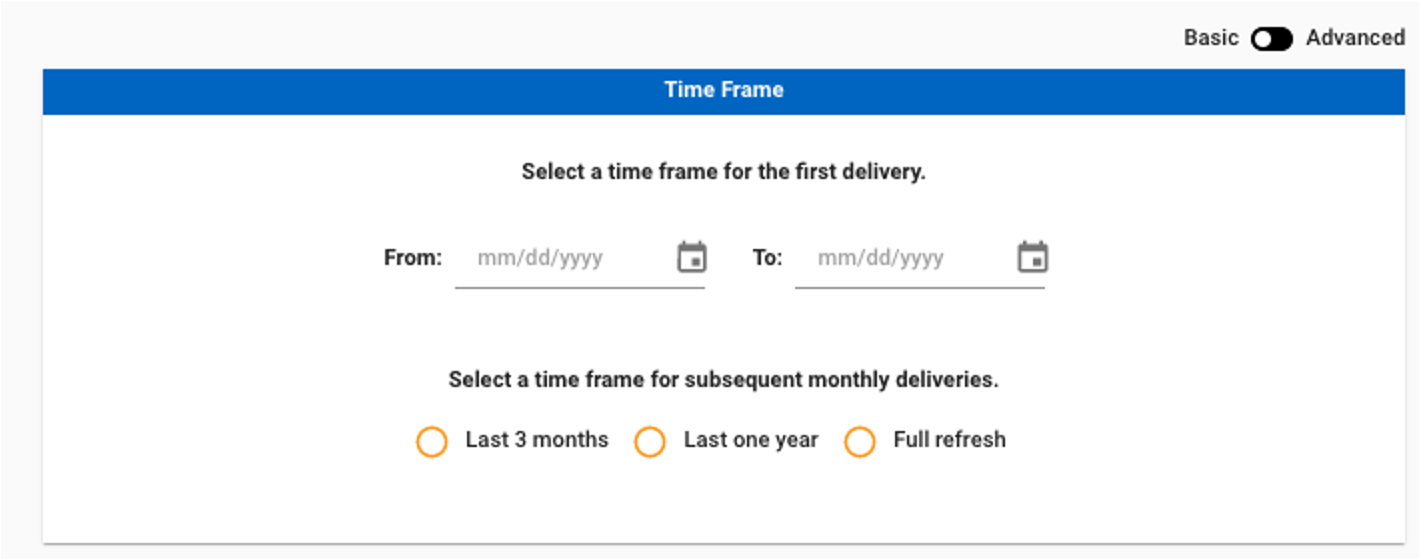
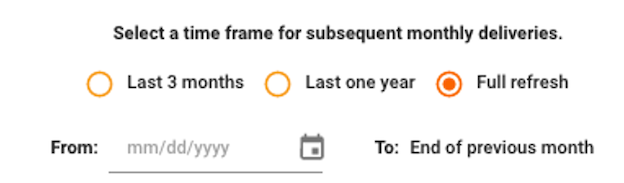
Then, you will be prompted to select a time frame for subsequent monthly deliveries. For monthly jobs, there are 3 time frame options:
- Last 3 months means that each monthly job will identify patients and return their transactions from the most recent 3 complete months. The time frames increment by one month for each job.
- For example, a September 20, 2022 job would identify patients and return transactions from June 1, 2022 - August 31, 2022. The next job on October 20th would identify patients and return transactions from July 1, 2022 - September 30, 2022.
- Last one year means that each monthly job will identify patients and return their transactions from the most recent 12 complete months. The time frames increment by one month for each job.
- For example, a September 20, 2022 job would identify patients and return transactions from September 1, 2021 - August 31, 2022. The next job on October 20th would identify patients and return transactions from October 1, 2021 - September 30, 2022.
- Full refresh means that each monthly job will identify patients and return transactions from the specified start date to the end of the previous month. The start date will be fixed, while the end date increments by one month for each job. When this option is selected, you will be prompted to select a start date.
- For example, if you select January 1, 2018 as the start date, your September 20, 2022 job would identify patients and return transactions from January 1, 2018 - August 31, 2022. The next job on October 20th would identify patients and return transactions from January 1, 2018 - September 30, 2022.
Advanced Mode (Monthly)
Advanced mode allows you to define different dates across the qualification criteria and returned records time frames. For example, if you want each monthly job to identify patients from January 1st, 2017 to the end of the previous month, but return their transactions from the last 12 months, you would use Advanced mode.
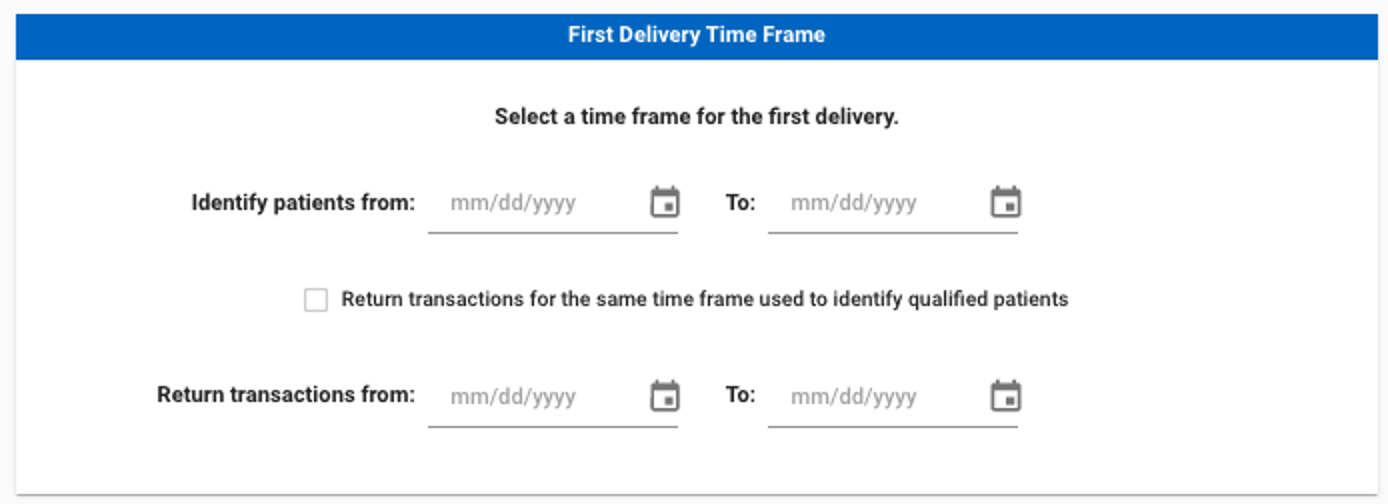
First Delivery Time Frame (Monthly)
You will be prompted to select a custom time frame for your first month’s delivery in the “First Delivery Time Frame” panel.
By default, the first job will use the same time frame for both qualification criteria and returned records. If you would like to use two different time frames, deselect the checkbox for “Return transactions for the same time frame used to identify qualified patients”. This will prompt you to select a different time frame for the returned records.
Qualification Criteria Time Frame (Monthly)
In the “Qualification Criteria Time Frame” panel, you can specify the time frame used to identify patients for your subsequent monthly deliveries.
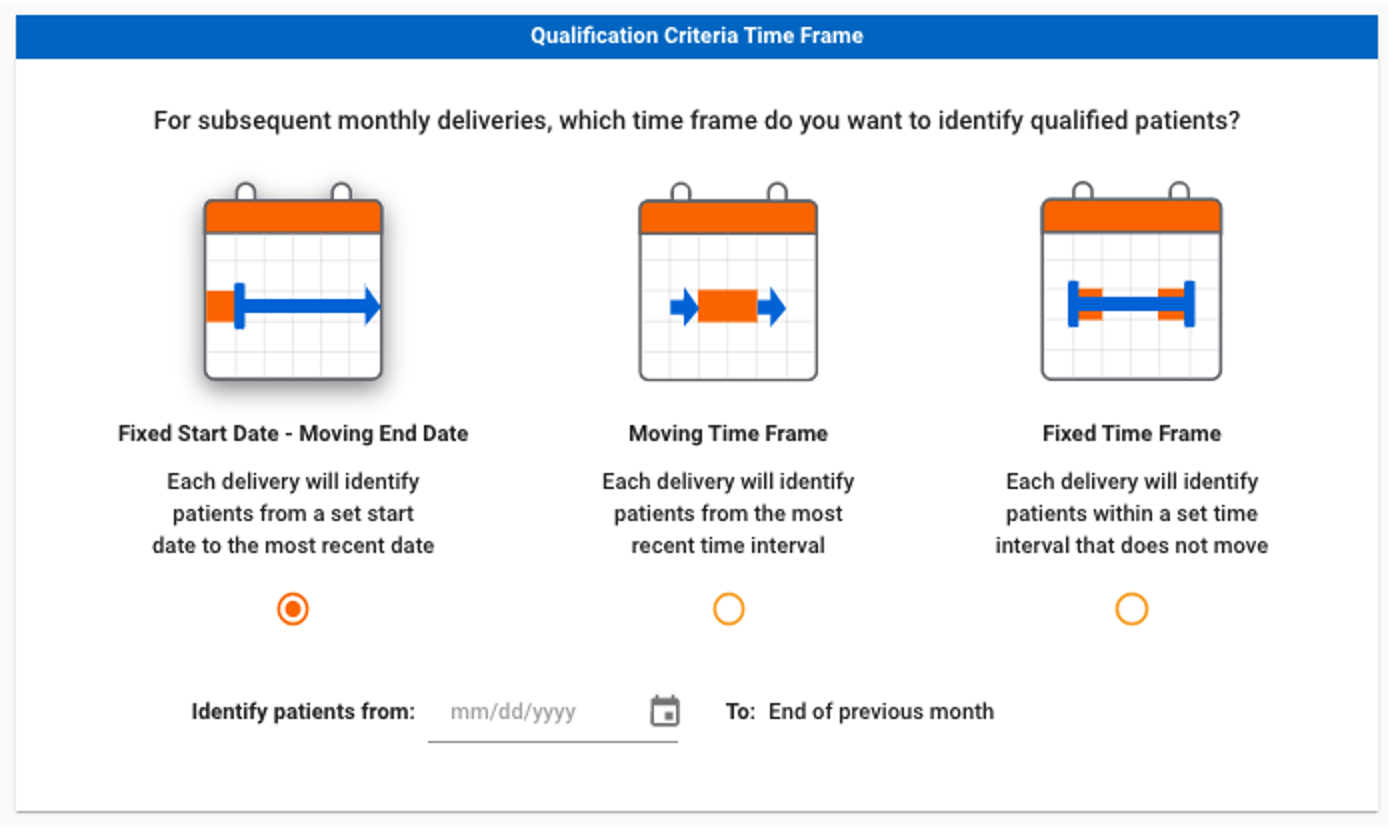
There are 3 time frame options:
- Fixed Start Date - Moving End Date means that for each monthly job, patients will be identified from the specified start date to the end of the previous month. The start date will be fixed, while the end date increments by one month for each job. When this option is selected, you will be prompted to select a start date.
- For example, if you select January 1, 2018 as the start date, your September 20, 2022 job would identify patients from January 1, 2018 - August 31, 2022. The next job on October 20th would identify patients from January 1, 2018 - September 30, 2022.
- Moving Time Frame means that for each monthly job, patients will be identified from the most recent 3 complete months. The time frame increments by one month for each job.
- For example, a September 20, 2022 job would identify patients from June 1, 2022 - August 31, 2022. The next job on October 20th would identify patients from July 1, 2022 - September 30, 2022.
- Fixed Time Frame means that for each monthly job, patients will be identified from the specified time frame. This time frame will not change for each job.
- For example, if you input January 1, 2017 to December 31, 2020 for a fixed time frame, each monthly job will identify patients from within that time frame.
Returned Records Time Frame (Monthly)
In the “Returned Records Time Frame” panel, you can specify the time frame for the returned transactions for subsequent monthly deliveries.
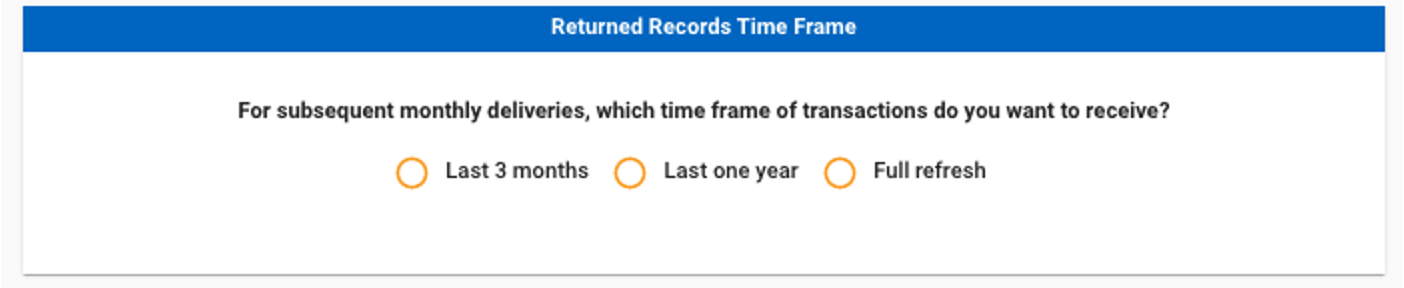
For monthly jobs, there are 3 time frame options:
- Last 3 months means that each monthly job will return transactions from the most recent 3 complete months. The time frames increment by one month for each job.
- For example, a September 20, 2022 job would return transactions from June 1, 2022 - August 31, 2022. The next job on October 20th would return transactions from July 1, 2022 - September 30, 2022.
- Last one year means that each monthly job will return transactions from the most recent 12 complete months. The time frames increment by one month for each job.
- For example, a September 20, 2022 job would return transactions from September 1, 2021 - August 31, 2022. The next job on October 20th would return transactions from October 1, 2021 - September 30, 2022.
- Full refresh means that each monthly job will return transactions from the specified start date to the end of the previous month. The start date will be fixed, while the end date increments by one month for each job. When this option is selected, you will be prompted to select a start date.
- For example, if you select January 1, 2018 as the start date, your September 20, 2022 job would return transactions from January 1, 2018 - August 31, 2022. The next job on October 20th would return transactions from January 1, 2018 - September 30, 2022.
Weekly
A weekly job allows you to specify a set of criteria and receive data delivered on a recurring weekly basis. Weekly jobs are run at 2:00PM EST each Sunday.
When scheduling a weekly job, you can use either Basic or Advanced mode depending on what time frames are needed for your job. In both modes, you also have the ability to define a separate time frame for the first weekly job.
- Basic mode allows users to use the same dates across the qualification criteria and returned records time frames. Basic mode supports use cases where the time frame used to identify patients and the time frame of the returned transactions should be the same, such as updating a weekly dashboard to support triggers and next best action with the most recent patients and data.
- Advanced mode allows users to define different dates across the qualification criteria and returned records time frames. Advanced mode supports use cases where the time frame used to identify patients is different from the time frame of the returned transactions, such as following the patient journey for a defined set of patients from 2020-2021 and receiving their last selected lookback time frames (last 13, 26, and 52 week options) of data on a weekly basis.
To toggle between Basic and Advanced mode, use the toggle under the Delivery Schedule section.
Basic Mode (Weekly)
Basic mode allows you to use the same dates across the qualification criteria and returned records time frames. This means that each job will identify patients and return their transactions using the same time frame.
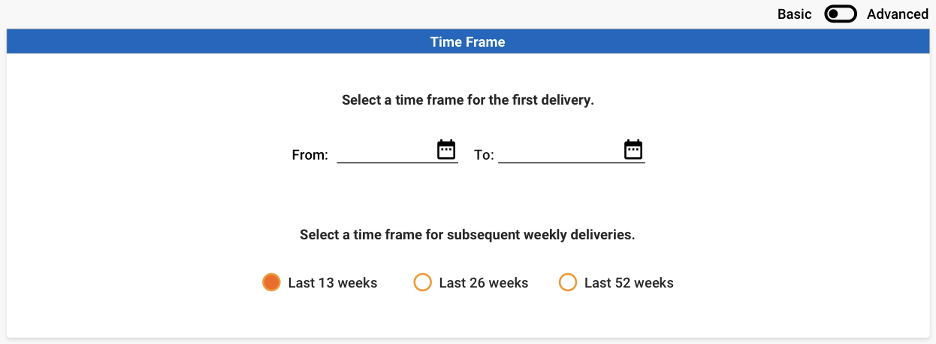
You will be prompted to select a custom time frame for your first weekly delivery by inputting dates in the “From” and “To” date fields. This will allow you to specify a larger time frame for the first job, if desired.
Then, you will be prompted to select a time frame for subsequent weekly deliveries.
- Last 13 weeks means that each weekly job will identify patients and return their transactions from the most recent 13 weeks (up until the previous day). The time frames increment by one week for each job.
- For example, a June 19, 2023 job would identify patients and return transactions from March 20, 2023 - June 18, 2023. The next job on June 26, 2023 would identify patients and return transactions from March 27, 2023 - June 25, 2023.
- Last 26 weeks means that each weekly job will identify patients and return their transactions from the most recent 26 weeks (up until the previous day). The time frames increment by one week for each job.
- For example, a June 19, 2023 job would identify patients and return transactions from December 18, 2022 - June 18, 2023. The next job on June 26, 2023 would identify patients and return transactions from December 25, 2022 - June 25, 2023.
- Last 52 weeks means that each weekly job will identify patients and return their transactions from the most recent 52 weeks (up until the previous day). The time frames increment by one week for each job.
- For example, a June 19, 2023 job would identify patients and return transactions from June 18, 2022 - June 18, 2023. The next job on June 26, 2023 would identify patients and return transactions from June 26, 2022 - June 25, 2023.
Advanced Mode (Weekly)
Advanced mode allows you to define different dates across the qualification criteria and returned records time frames. For example, if you want each weekly job to identify patients from January 1st, 2017 to the previous day, but return their transactions from the last 13, 26, or 52 weeks, you would use Advanced mode.
First Delivery Time Frame (Weekly)
You will be prompted to select a custom time frame for your first weekly delivery in the “First Delivery Time Frame” panel.
By default, the first job will use the same time frame for both qualification criteria and returned records. If you would like to use two different time frames, deselect the checkbox for “Return transactions for the same time frame used to identify qualified patients”. This will prompt you to select a different time frame for the returned records.
Qualification Criteria Time Frame (Weekly)
In the “Qualification Criteria Time Frame” panel, you can specify the time frame used to identify patients for your subsequent weekly deliveries. Select your lookback time period from the dropdown, e.g. Last 13 Weeks.
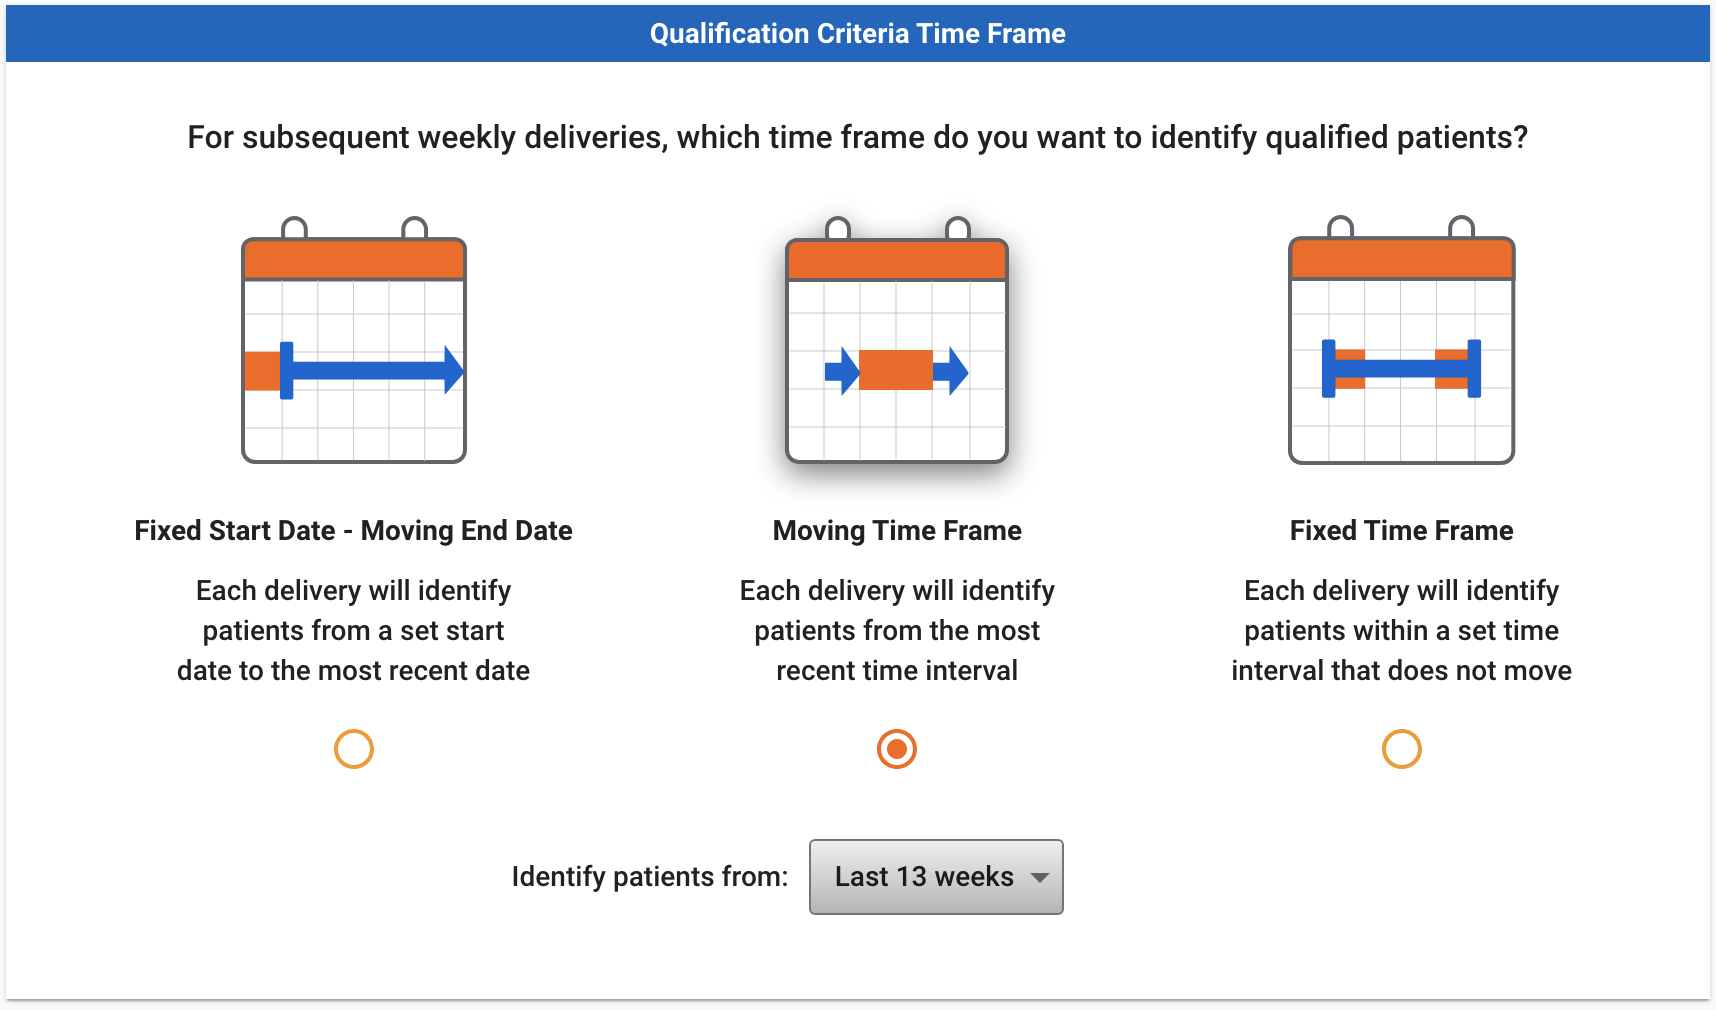
There are 3 time frame options:
- Fixed Start Date - Moving End Date means that for each weekly job, patients will be identified from the specified start date to the previous day. The start date will be fixed, while the end date increments by one week for each job. When this option is selected, you will be prompted to select a start date.
- For example, if you select January 1, 2018 as the start date, your June 19, 2023 job would identify patients from January 1, 2018 - June 18, 2023. The next job on June 27th would identify patients from January 1, 2018 - June 26, 2023.
- Moving Time Frame means that for each weekly job, patients will be identified from the most recent 13, 26, or 52 weeks. The time frame increments by one week for each job.
- For example, if Last 13 Weeks is selected, a June 19, 2023 job would identify patients from March 20, 2023 - June 18, 2023. The next job on June 27, 2023 would identify patients from March 27, 2023 - June 25, 2023.
- Fixed Time Frame means that for each weekly job, patients will be identified from the specified time frame. This time frame will not change for each job.
- For example, if you input January 1, 2017 to December 31, 2020 for a fixed time frame, each weekly job will identify patients from within that time frame.
Returned Records Time Frame (Weekly)
In the “Returned Records Time Frame” panel, three lookback time frames are available.

- Last 13 weeks means that each weekly job will return transactions from the most recent 13 weeks (up until the previous day). The time frames increment by one week for each job.
- For example, a June 19, 2023 job would return transactions from March 20, 2023 - June 18, 2023. The next job on June 26, 2023 would return transactions from March 27, 2023 - June 25, 2023.
- Last 26 weeks means that each weekly job will identify patients and return their transactions from the most recent 26 weeks (up until the previous day). The time frames increment by one week for each job.
- For example, a June 19, 2023 job would identify patients and return transactions from December 18, 2022 - June 18, 2023. The next job on June 26, 2023 would identify patients and return transactions from December 26, 2022 - June 25, 2023.
- Last 52 weeks means that each weekly job will identify patients and return their transactions from the most recent 52 weeks (up until the previous day). The time frames increment by one week for each job.
- For example, a June 19, 2023 job would identify patients and return transactions from June 19, 2022 - June 18, 2023. The next job on June 26, 2023 would identify patients and return transactions from June 27, 2022 - June 25, 2023.
Daily
A daily job allows you to specify a set of criteria and receive data delivered on a recurring daily basis. Daily jobs are run at 12:00PM EST each day.
When scheduling a daily job, you can use either Basic or Advanced mode depending on what time frames are needed for your job. In both modes, you also have the ability to define a separate time frame for the first daily job.
- Basic mode allows users to use the same dates across the qualification criteria and returned records time frames. Basic mode supports use cases where the time frame used to identify patients and the time frame of the returned transactions should be the same, such as updating a daily dashboard to support triggers and next best action with the most recent patients and data.
- Advanced mode allows users to define different dates across the qualification criteria and returned records time frames. Advanced mode supports use cases where the time frame used to identify patients is different from the time frame of the returned transactions, such as following the patient journey for a defined set of patients from 2020-2021 and receiving their last 90 days of data on a daily basis.
To toggle between Basic and Advanced mode, use the toggle under the Delivery Schedule section.
Basic Mode (Daily)
Basic mode allows you to use the same dates across the qualification criteria and returned records time frames. This means that each job will identify patients and return their transactions using the same time frame.
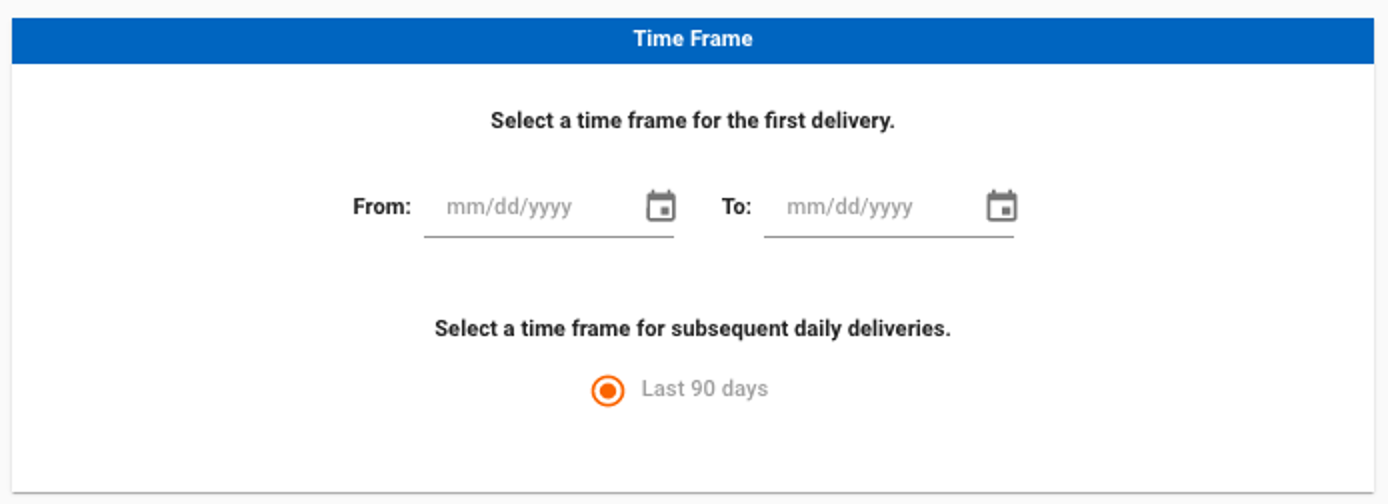
You will be prompted to select a custom time frame for your first daily delivery by inputting dates in the “From” and “To” date fields. This will allow you to specify a larger time frame for the first job, if desired.
Then, you will be prompted to select a time frame for subsequent daily deliveries. Currently, for daily jobs, only one time frame (Last 90 days) is available.
- Last 90 days means that each daily job will identify patients and return their transactions from the most recent 90 days (up until the previous day). The time frames increment by one day for each job.
- For example, a September 20, 2022 job would identify patients and return transactions from June 22, 2022 - September 19, 2022. The next job on September 21, 2022 would identify patients and return transactions from June 23, 2022 - September 20, 2022.
Advanced Mode (Daily)
Advanced mode allows you to define different dates across the qualification criteria and returned records time frames. For example, if you want each daily job to identify patients from January 1st, 2017 to the previous day, but return their transactions from the last 90 days, you would use Advanced mode.
First Delivery Time Frame (Daily)
You will be prompted to select a custom time frame for your first daily delivery in the “First Delivery Time Frame” panel.
By default, the first job will use the same time frame for both qualification criteria and returned records. If you would like to use two different time frames, deselect the checkbox for “Return transactions for the same time frame used to identify qualified patients”. This will prompt you to select a different time frame for the returned records.
Qualification Criteria Time Frame (Daily)
In the “Qualification Criteria Time Frame” panel, you can specify the time frame used to identify patients for your subsequent daily deliveries.

There are 3 time frame options:
- Fixed Start Date - Moving End Date means that for each daily job, patients will be identified from the specified start date to the previous day. The start date will be fixed, while the end date increments by one day for each job. When this option is selected, you will be prompted to select a start date.
- For example, if you select January 1, 2018 as the start date, your September 20, 2022 job would identify patients from January 1, 2018 - September 19, 2022. The next job on September 21st would identify patients from January 1, 2018 - September 20, 2022.
- Moving Time Frame means that for each daily job, patients will be identified from the most recent 90 days. The time frame increments by one day for each job.
- For example, a September 20, 2022 job would identify patients from June 22, 2022 - September 19, 2022. The next job on September 21, 2022 would identify patients from June 23, 2022 - September 20, 2022.
- Fixed Time Frame means that for each daily job, patients will be identified from the specified time frame. This time frame will not change for each job.
- For example, if you input January 1, 2017 to December 31, 2020 for a fixed time frame, each daily job will identify patients from within that time frame.
Returned Records Time Frame (Daily)
In the “Returned Records Time Frame” panel, only one time frame (Last 90 days) is currently available.
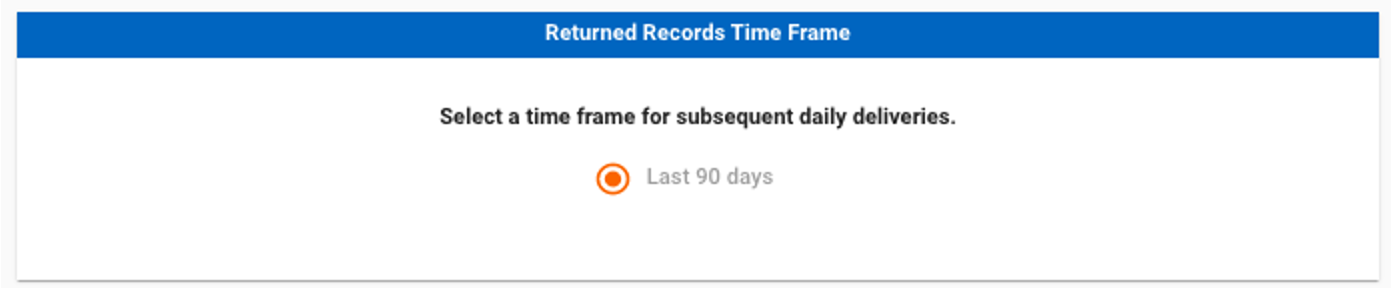
- Last 90 days means that each daily job will return transactions from the most recent 90 days (up until the previous day). The time frames increment by one day for each job.
- For example, a September 20, 2022 job would return transactions from June 22, 2022 - September 19, 2022. The next job on September 21, 2022 would return transactions from June 23, 2022 - September 20, 2022.
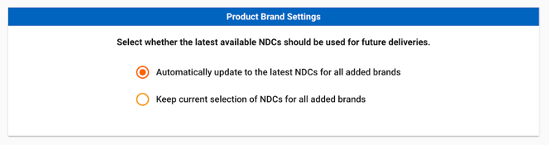
Product Brand Settings
For recurring jobs, you have the ability to select if any new NDCs should be automatically added to monthly jobs. On the Schedule step for Recurring jobs, select either to automatically update to the latest NDCs, or to maintain the fixed current selection of NDCs under Product Brand Settings. Note that this section will only appear if at least one entire brand has been added to your qualification criteria or returned records.
The following options are available:
- Automatically update to the latest NDCs for all added brands: This means that for each recurring delivery, any brands that have been added to the query will always include the latest set of available NDCs for that brand. For example, a monthly recurring job is set-up for Cholecap. The February delivery included all current NDCs in market for Cholecap, and then a new NDC is launched at the end of the month. If this option is selected, March’s delivery will automatically include the complete basket of NDCs for Cholecap, including this new NDC, as well as for all monthly deliveries going forward.
- Keep current selection of NDCs for all added brands: This means that for each recurring delivery delivery, any brands that have been added to your query will include only the current selection of NDCs for that brand. For example, a monthly recurring job is set-up for Cholecap. The February delivery included all current NDCs in market for Cholecap, and then a new NDC is launched at the end of the month. If this option is selected, March’s delivery will only keep the current selection of NDCs for Cholecap, as well as all monthly deliveries going forward; any new NDCs will not be included.
Delivery Options
Delivery Options allows you to select your desired data delivery locations and file formats for your data. Select the delivery location(s) you would like your data to be delivered to via the checkboxes. You may select more than one delivery location for your data, depending on what is available in your Compass Portal.
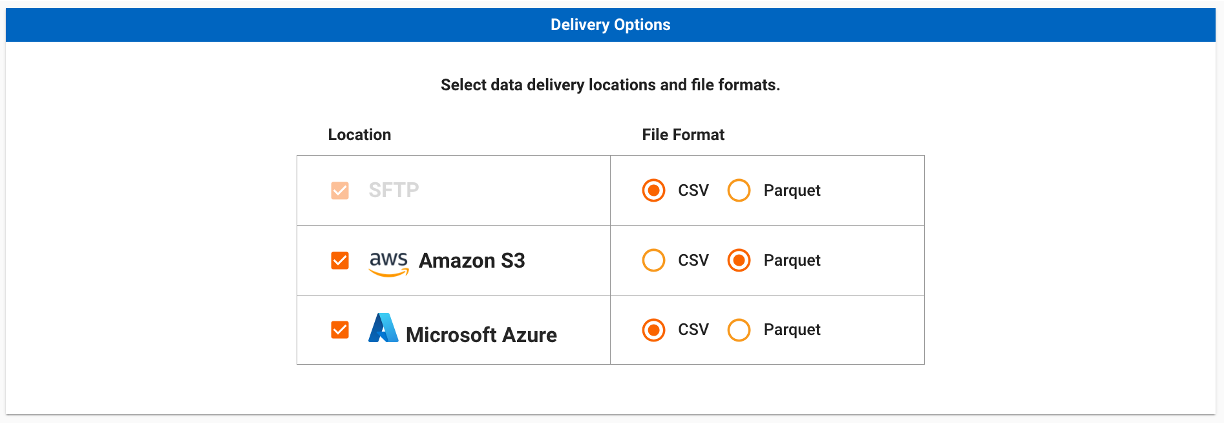
The following delivery locations are currently available:
- SFTP is a Veeva-hosted secure file location which allows users to use an SFTP client (such as FileZilla or CyberDuck) to connect, navigate and download their data files. The SFTP option will be default selected for all Compass Pathway queries.
- Amazon S3 allows you to deliver your data files to Amazon S3. The Amazon S3 option is only available for users with a pre-configured Amazon S3 bucket. Refer to Setting up an Amazon S3 Bucket for more information on S3 bucket setup.
- Microsoft Azure allows you to deliver your data files to Microsoft Azure. The Azure option is only available for users with a pre-configured Azure container. Refer to Setting up a Microsoft Azure container for more information on Azure container setup.
Once you have selected your delivery locations, you may be prompted to select a file format for your delivery. You can select one file format per location for your delivery. The available file formats for each location are managed by System Administrators via the Delivery Configuration page. Currently, Veeva Compass offers data in CSV and Parquet format. For more information on the data delivery files for Parquet and CSV, refer to Understanding the Files & Format
Refer to the Accessing the Data section for instructions on how to access your data.
Note The Veeva Compass Portal and other delivery destinations are tools for data delivery and data access to Veeva Compass data for use during a customer’s subscription to Veeva Compass. They are not intended for use as long-term data storage and are subject to Veeva’s retention policy for data delivery tools.
Review & Submit
Review & Submit is the final step before the query is submitted for processing. This step allows you to confirm the details of your data pull prior to submission. To make changes to the Qualification Criteria or Returned Records timeframes, click “Edit” at the bottom right of Schedule.
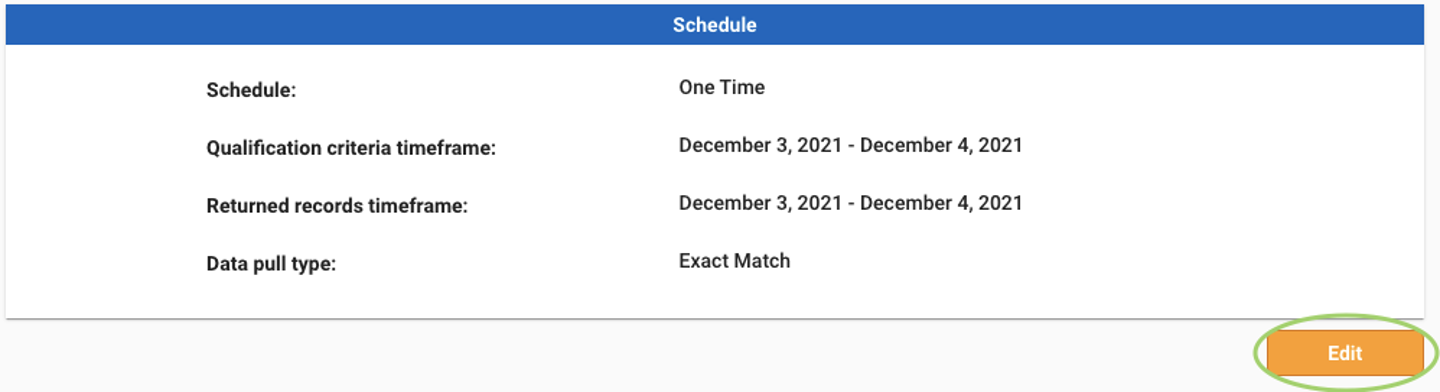
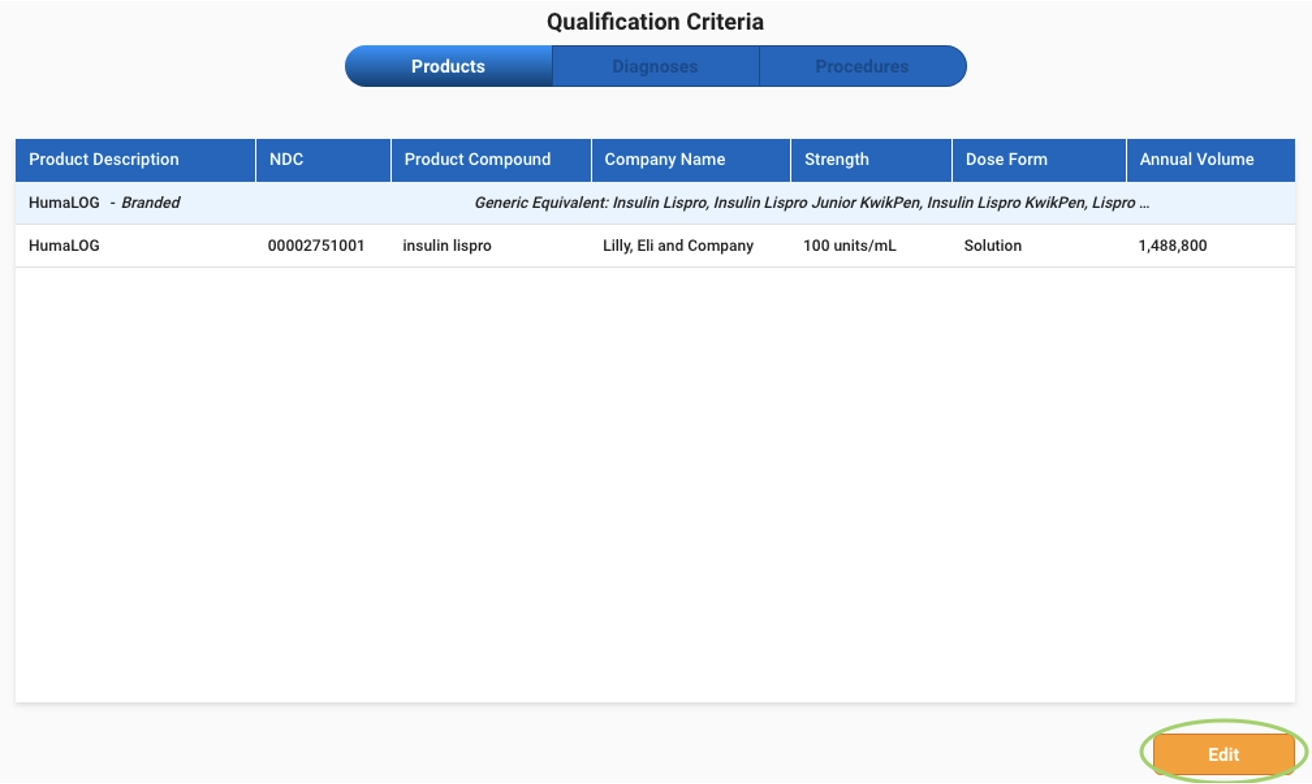
Similarly, to make changes to the Qualification Criteria or Returned Records codes (if applicable), click “Edit” at the bottom right corner of the Qualification Criteria and Returned Records review boxes.
When you are ready to submit your query, scroll to the top of the screen and click “Submit”. Upon clicking “Submit”, a modal will appear for you to provide a name and select a license (if applicable) for your query, as well as manage sharing settings.
Note Query names can only consist of letters, numbers, underscores and spaces.
Sharing Settings
Sharing settings allow users to manage roles and access to jobs. These roles determine the user’s permissions (allowed actions) on the job. Roles can be assigned to individual users or groups. Users can also subscribe to job email notifications (e.g. job completion emails) via sharing settings.
By default, upon selecting a license, the user submitting the job is assigned as the Owner role, and any groups associated with the selected license are added to the Viewer role.
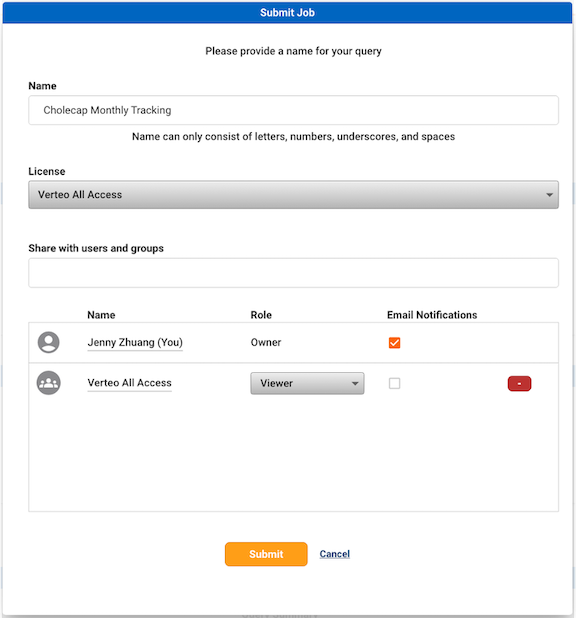
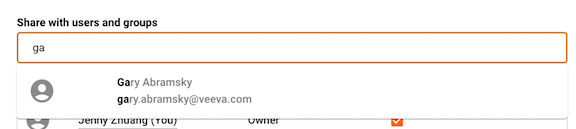
You can add additional users and groups to the sharing settings by searching in the “Share with users and groups” search bar, then clicking to select the user or group. The list of available users and groups will be filtered to those associated with the selected license.
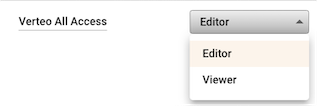
By default, the newly added user/group will be assigned the Viewer role. To update the role for a user or group, click on the drop-down menu in the Role column. Note that to reassign another user as the Owner, you must submit the job first, then update the sharing settings in Job Manager.
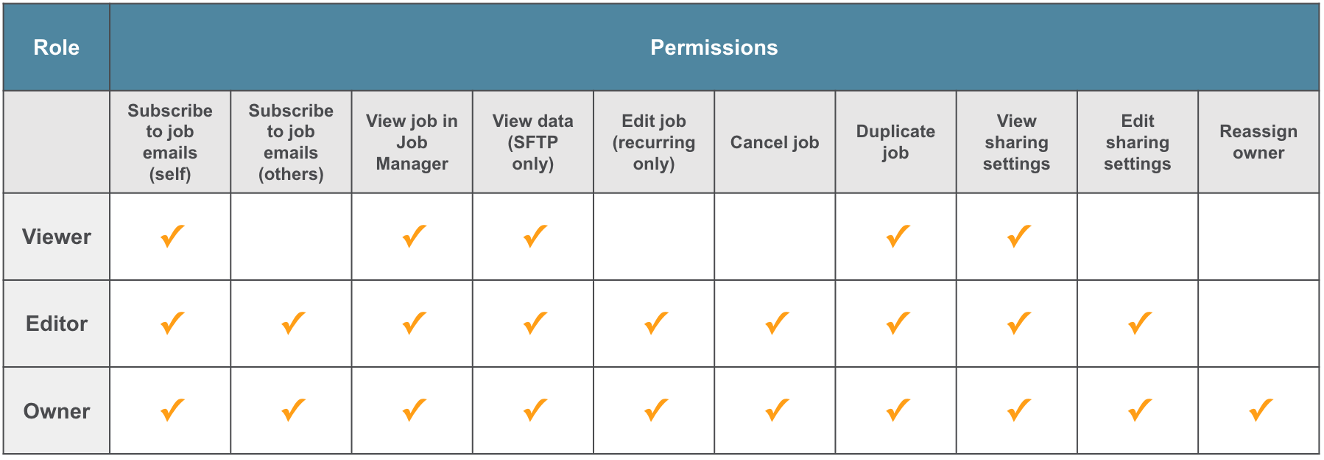
The table below provides details of permissions that are available for each role.
You can also subscribe users or groups to receive email notifications related to the job, such as when the job completes or is cancelled. To subscribe a user or group to email notifications, select the “Email notifications” checkbox.

Note that for one time jobs, email notification settings can only be updated when the job is submitted or during processing. For recurring (monthly or daily) jobs, email notification settings can be changed at any time, and will apply to any future jobs.
You may preview the list of users in a group by hovering over the group name. To remove a user or group from sharing settings, click on the “-” button.
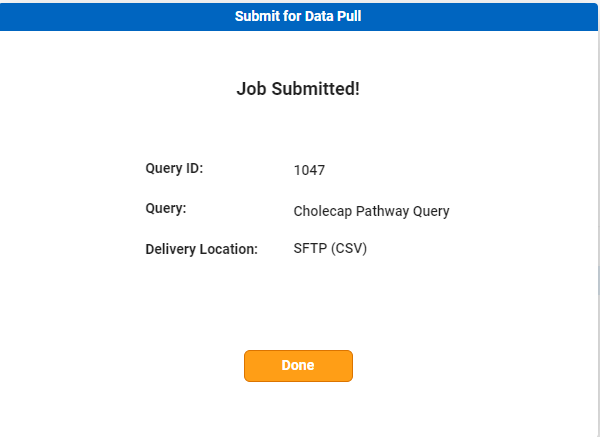
Submit Job
Once you have made any desired updates to sharing settings for the job, click on “Submit”. You can check the status of your job in the Job Manager as well as manage the sharing settings. Confirmation of the Query ID, Query Name & Delivery location will pop up once the data pull is successfully submitted. You can check the status of your data pull in the Job Manager.